
In this article, I show you how to make a seashell resin table. Learn how to embed shells in resin and many more resin and woodworking tips to create a beach inspired table.
Even if you don’t need a seashell resin table, the epoxy resin tips and woodworking techniques I used can be applied to any resin and wood project.
So, let’s get started with a list of tools and material.
Tools and Material
Epoxy ResinNeutral Aqua Glow Powder
Mixing Containers
Rubio Monocoat Finish
Rotex Sander
40 Grit
60 Grit
80 Grit
100 Grit
120 Grit
150 Grit
180 Grit
220 Grit
320 Grit
Grinder (Updated Item)
50 Grit Sanding Disc
MFT3 Table
TS75 Track Saw
Orbital Buffer
All the Tools I Use
Often times, I experiment with many different epoxy products and wood finishes in my shop.
For your convenience, I’ve compiled a complete list of my favorite epoxy resin material and tools.
Video Tutorial
There are several things which are difficult to fully explain with words and images, so be sure to check out the video tutorial above/below!
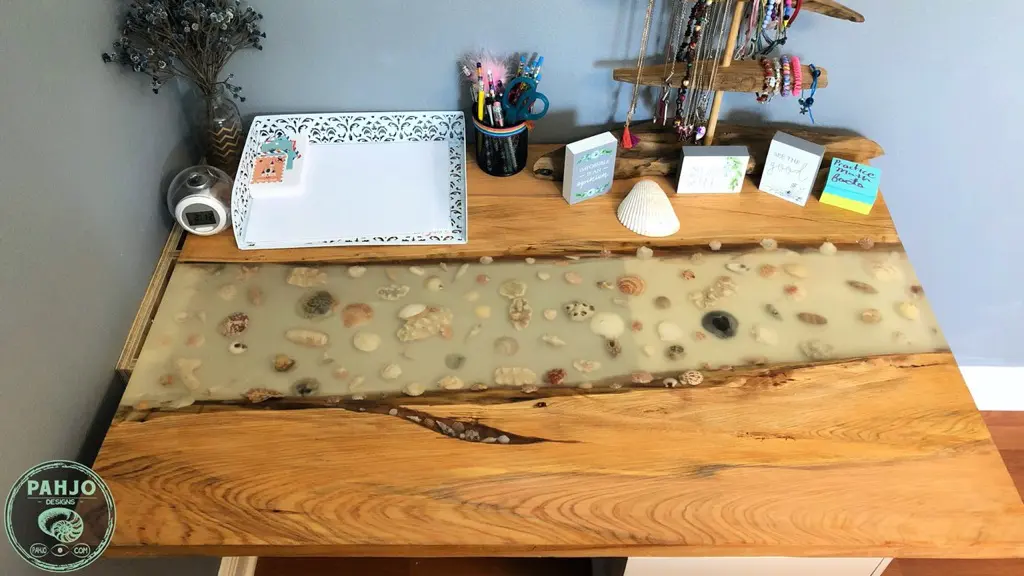
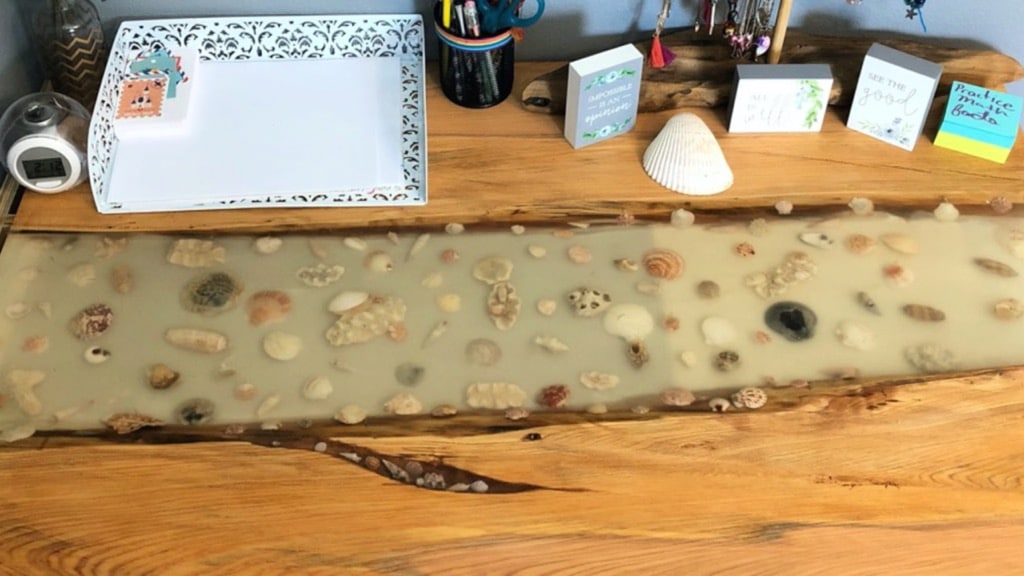
How to Make a Seashell Resin Table Top
Gather Materials
The basic materials needed for a seashell resin table are 2 pieces of reclaimed wood of equal lengths, epoxy resin, and seashells.
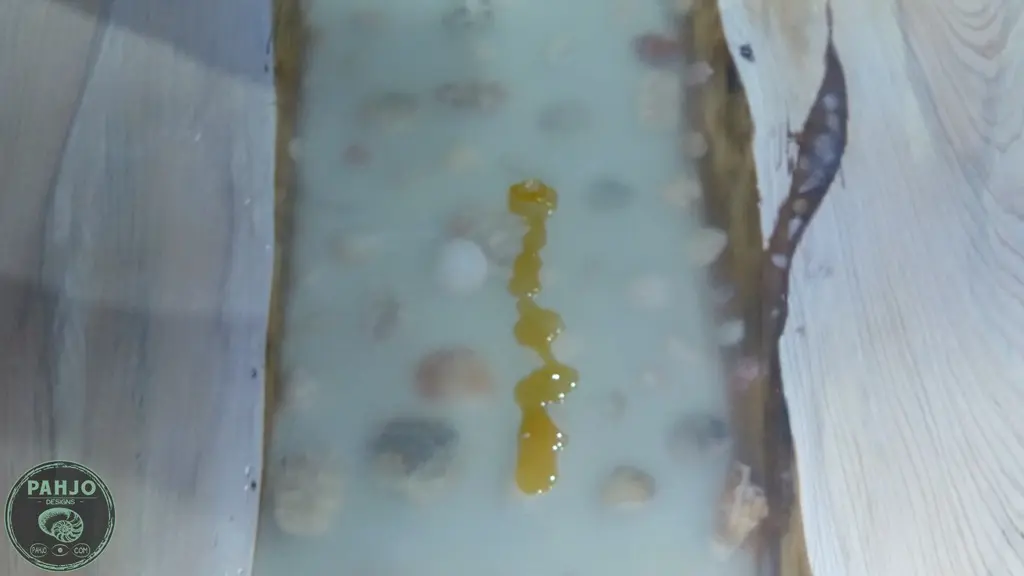
Epoxy resin pigment powder or glow powder can also be mixed with resin to add color and glowing effects.


Create Resin Mold
To create a resin mold, use plywood (or any flat wood) to build a box larger than the width, length, and height of the seashell resin table and cover it with packing tape or sheathing tape.
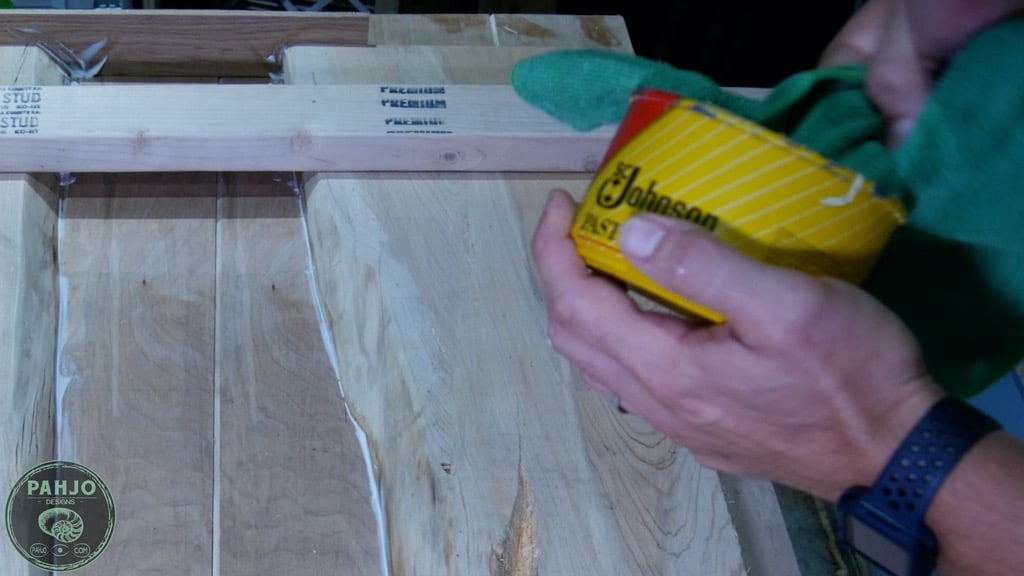
Apply furniture wax to serve as a epoxy resin release agent.

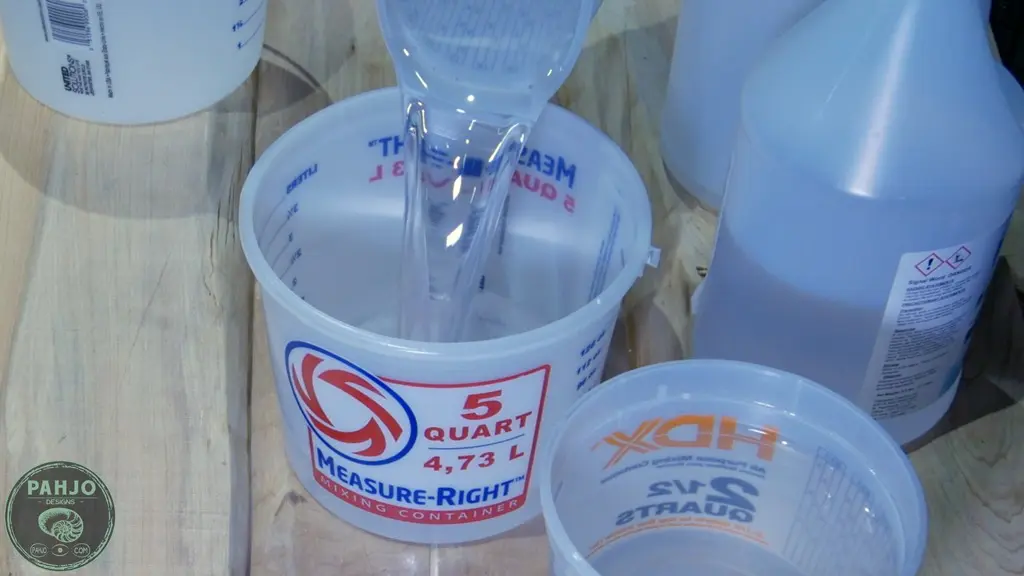
Mix Epoxy Resin
Determine the amount of epoxy resin needed to fill half the thickness of the epoxy seashell table and mix the epoxy resin.

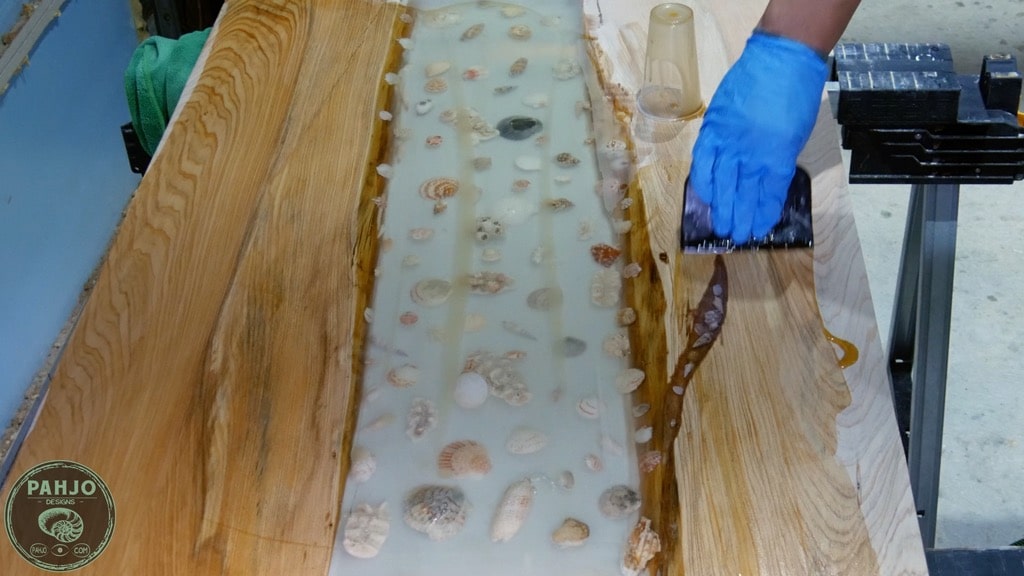
Pour Epoxy Resin
Next, pour the epoxy in the seashell resin table. After pouring, inspect the table for leaks.


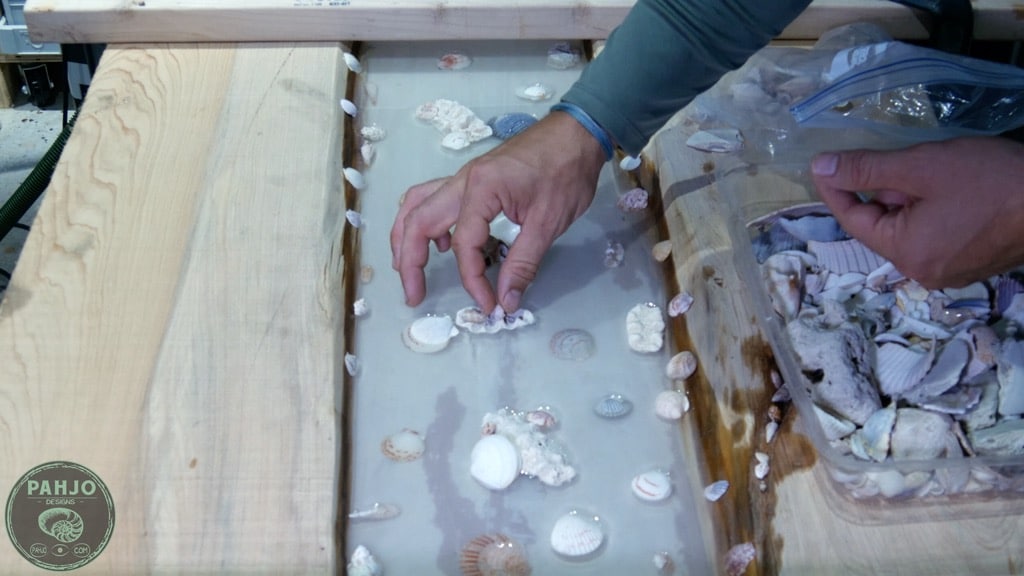
Set Shells in Resin
To set shells in epoxy resin, wait until the epoxy is partially cured but still tacky and place the seashells in the resin.

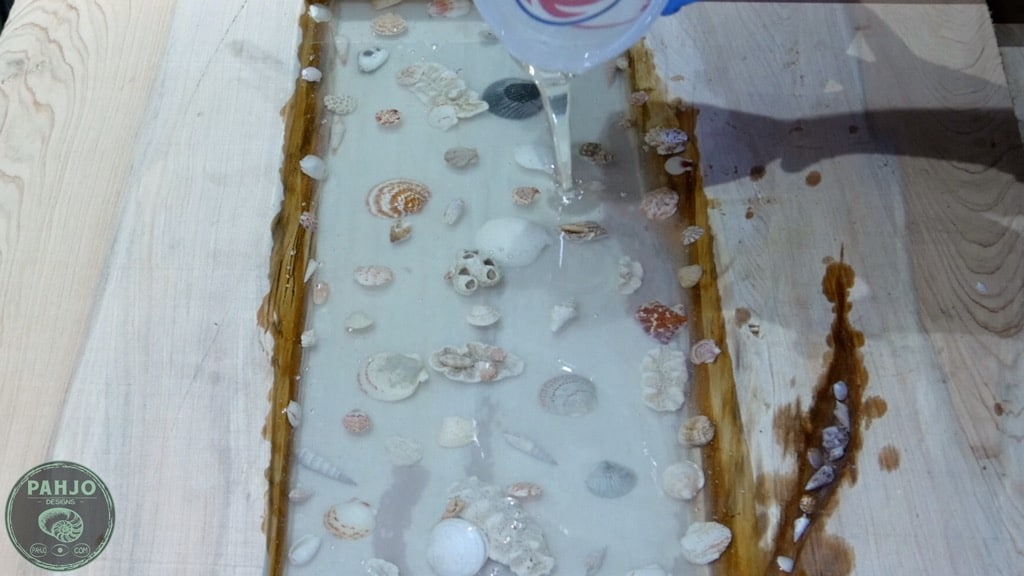
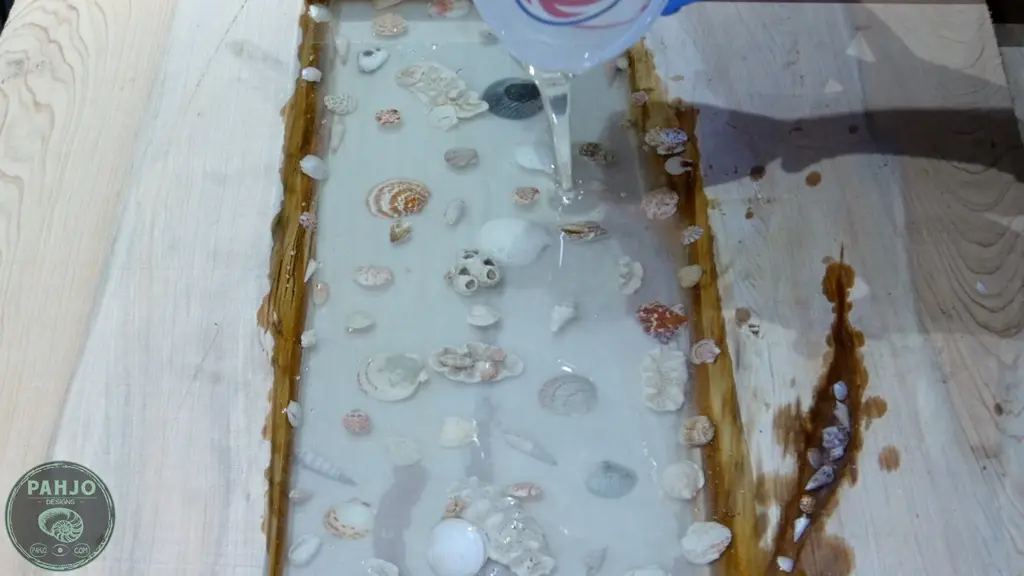
Embed Seashells in Resin
After the first layer of resin completely cures (normally 24 hours), mix and pour clear epoxy resin over the seashells.
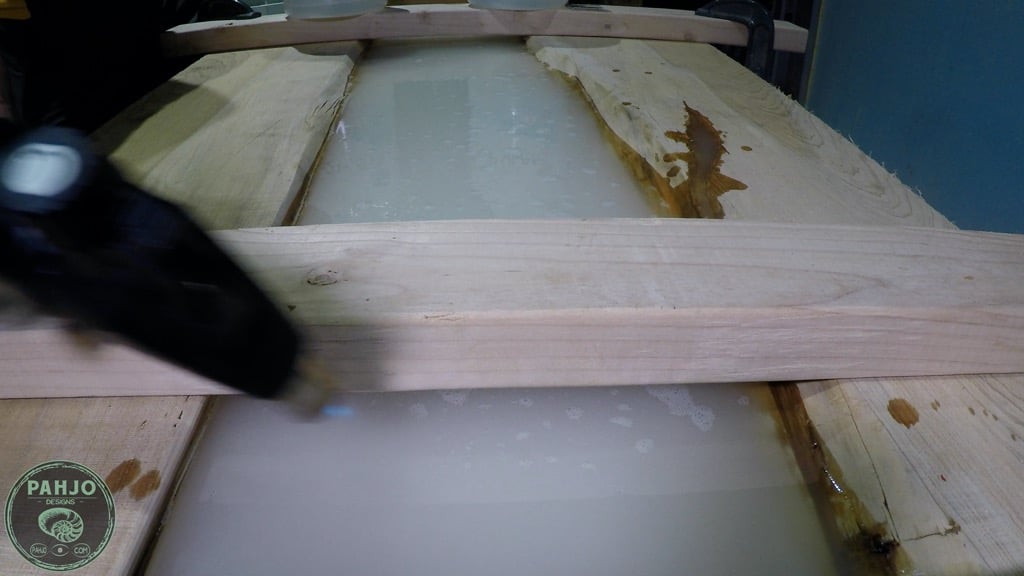
Remove Epoxy Bubbles
Often times, air pockets form for 30 to 45 minutes after the initial layer of epoxy is poured.
Simply use a heat gun or mini torch to remove the air pockets as they rise to the surface.

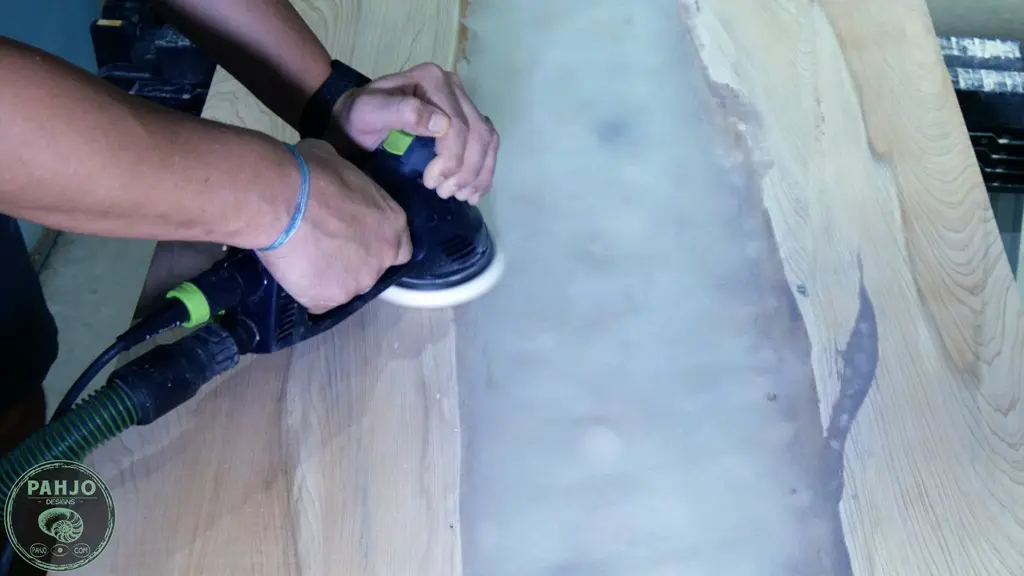
Sand Epoxy Resin
To properly sand epoxy resin, use an orbital sander and with the following sanding grits in order: 40, 60, 80, 120, 150, 180, 220, 320.

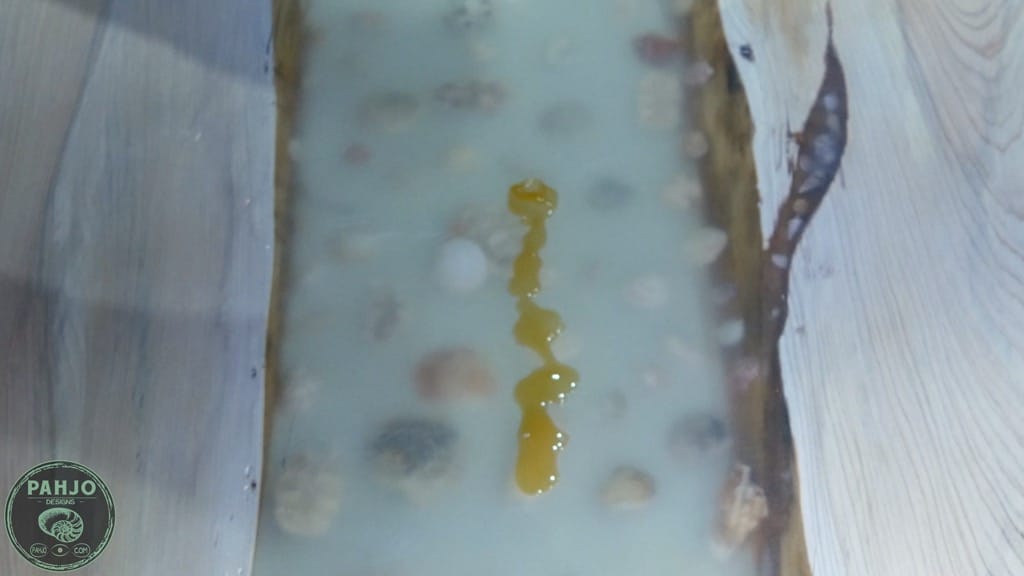
Apply Epoxy Wood Finish
The best epoxy wood finish is Rubio Monocoat Oil Plus 2c.
Apply Rubio Monocoat according to the manufacturers instructions.

DIY Project Background
My daughter asked me to build her a new desk for her room about a year ago.
Obviously, I wanted this desk to be special for her – one that would bring a smile to her face.
A few went by and I noticed the huge amount seashells my family and I collected over the last 10 summers.
So, I decided to use these seashells to make a seashell resin table or desk for my daughter.
As a side note, I recently opened a beach inspired blog and online store where I sell handcrafted beach decor.

Beach and Family
My family and I love the beach, ocean, and everything else it has to offer.
The beach plays such a huge role in my life – always has and always will.
It nourishes my soul, clears my thoughts, and inspires me.
More importantly, the ocean reminds me of the most important things in my life.


My family and I spend as much time as possible enjoying the warm sun, clear blue waters, and soft white sand at our home in Destin, Florida.


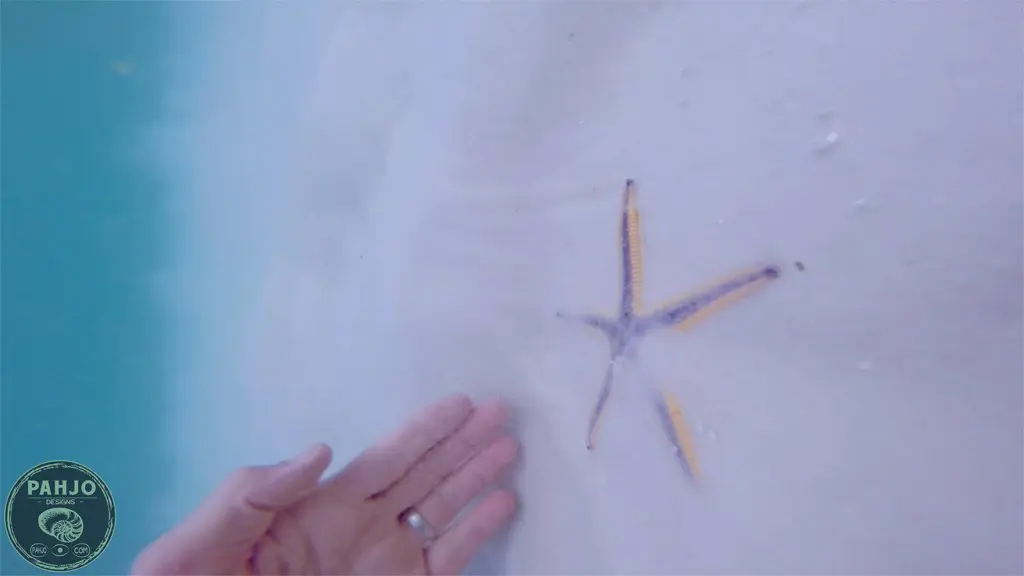
Different Ways to Collect Seashells
My family and I collect seashells organically.
In other words, we collect them while doing other beach activities.
Ocean Wildlife
We enjoy chasing dolphins on our paddle boards.


Furthermore, we love taking underwater pictures of sea turtles and different types of fish.


Often times, Manatees or sea cows cruise along the beaches and scare the daylights out of tourists.

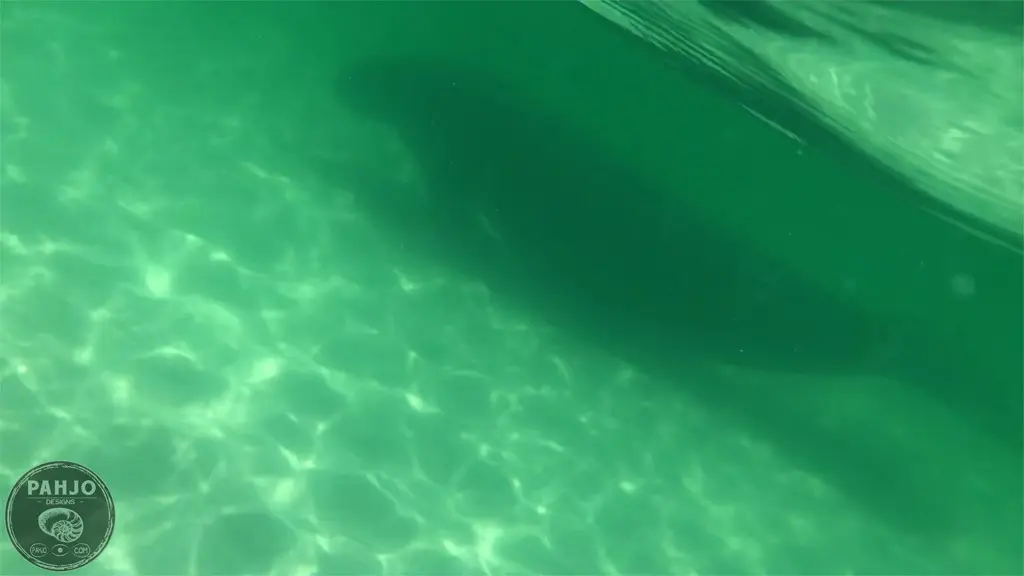
Beach Snorkeling
Obviously, we collect seashells mostly by snorkeling.


Seashell Epoxy Desk Installation
In order to install the seashell resin table in the corner of my daughter’s room, I built a 2″x24″ rectangle box using plywood.
Essentially, the box allows me to secure the desk away from the wall and provides a space to drop down cables or power cords.

Then, I rested the desk on the far right side with the drawers facing out.
Also, I used the DIY plans I created for my epoxy beach table to make the desk bottom.
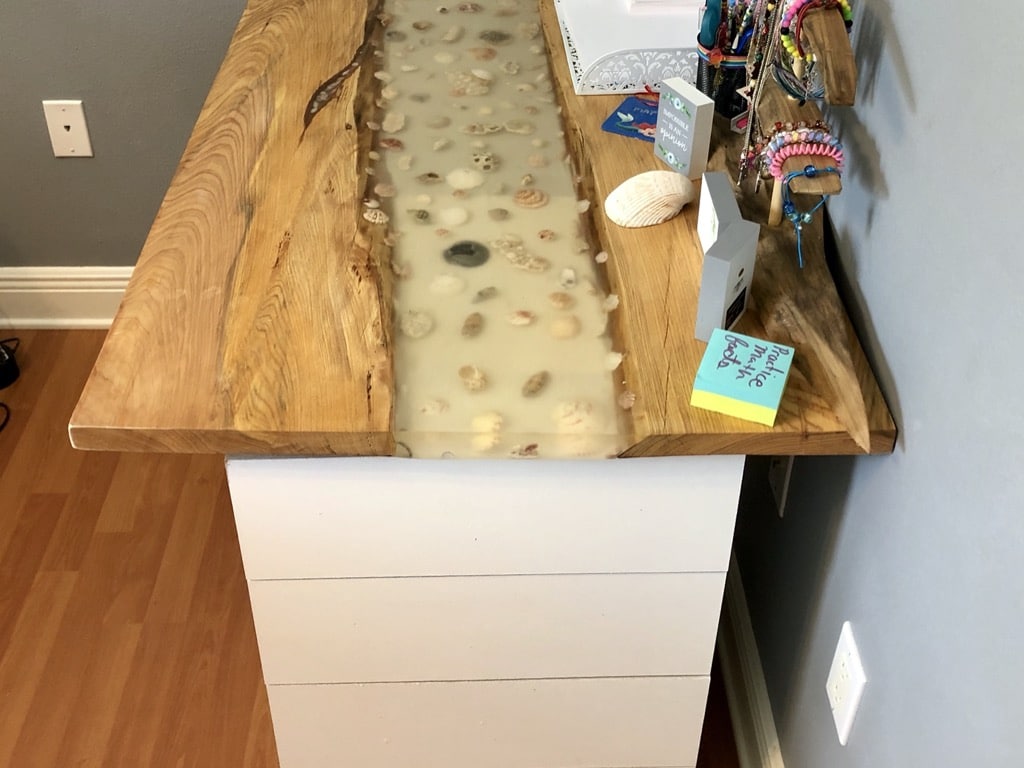
Also, be sure to download the desk base cabinet with drawer storage DIY plans.
Next, I drilled pilot holes on the underside of the table and used 3 screws to secure the desk to the wall bracket.
Seashell Resin Table
Obviously, my daughter loves her beach inspired desk.
More importantly, it reminds her of all the great memories we made and continue to make during long summer days at the beach.
In conclusion, I hope this tutorial showed you how to make a seashell resin table and inspired you to make your own.

Finishes for Wood and Epoxy Resin
Learn about the different finishes for wood and epoxy resin and the best one for your project.
Related Posts:
- Beach Inspired Epoxy Table with Real Sand
- Resin Ocean Wave Art
- Surfboard Wall Art
- Epoxy Resin River Table
Frequently Asked Questions
to make a beach scene with resin, mix various blue and green pigments with resin to create water. Use white alcohol ink mmixed with white resin to create ocean waves.
To pour epoxy over sand, the sand must first be mixed with a small amount of epoxy resin to make it tacky. This helps the sand remain in place when epoxy is poured over the sand.
The typical price of 1 gallon of epoxy resin costs $65.00 dollars.
To make resin ocean art, use a canvas, epoxy resin, and various dyes and pigments to create ocean colors.
ronnie hudacik
Monday 9th of March 2020
loved it, just was beginner need