In this article, learn how to make a high quality epoxy resin table mold for your next large epoxy table.
Even if you don’t need to make an epoxy table, these DIY tips can be applied to other resin projects.
From choosing the right materials to designing and assembling your own mold, this tutorial covers every step of the process in detail.
Here are some jump links to the main sections of this post to help you find the information you need quickly.
Tools and Material Needed
Choosing the Best Epoxy Mold Material
Epoxy Mold Design
How To Make an Epoxy Resin Table Mold – Step-by-Step
Reuse Epoxy Mold for Future Projects
Epoxy Project Ideas

Tools and Materials
Epoxy resin kitWood (or other inclusions)
Large mold box
Mold release agent (e.g., silicone spray or paste wax)
Tuck Tape or Sheathing Tape
Gloves
Mask
Level and shims
Epoxy Resin Table DIY Plans
Choosing the Right Materials for Epoxy Resin Mold
While silicone and acrylic sheets work well for smaller projects, they are not stable enough for large epoxy resin tables.
With this in mind, 3/4″ melamine or MDF boards work best for a large epoxy resin table mold.
Ultimately, it is a great product sold at your local store the best material to use with epoxy.
The rigidity of 3/4″ thick material ensures your epoxy resin stays level and doesn’t warp or droop during the curing process.
Melamine is a type of plastic-coated particleboard that’s commonly used for making epoxy molds.
It’s smooth, waterproof surface make it an ideal material for creating the base and walls of your mold.
If you are using MDF boards or any other piece of wood used to create the resin form must be covered with sheathing tape.
In addition, you need to install a mold release agent on top of this tape.
The only reason to use anything other than melamine to build an large epoxy resin mold is to save money.
Yes, melamine is expensive, but so is sheathing tape.
Compare the cost of sheathing tape and cheap wood to melamine.
The option you believe to be cheaper may be more expensive.
When creating a large epoxy resin mold, the materials you use are critical to the success of your project.

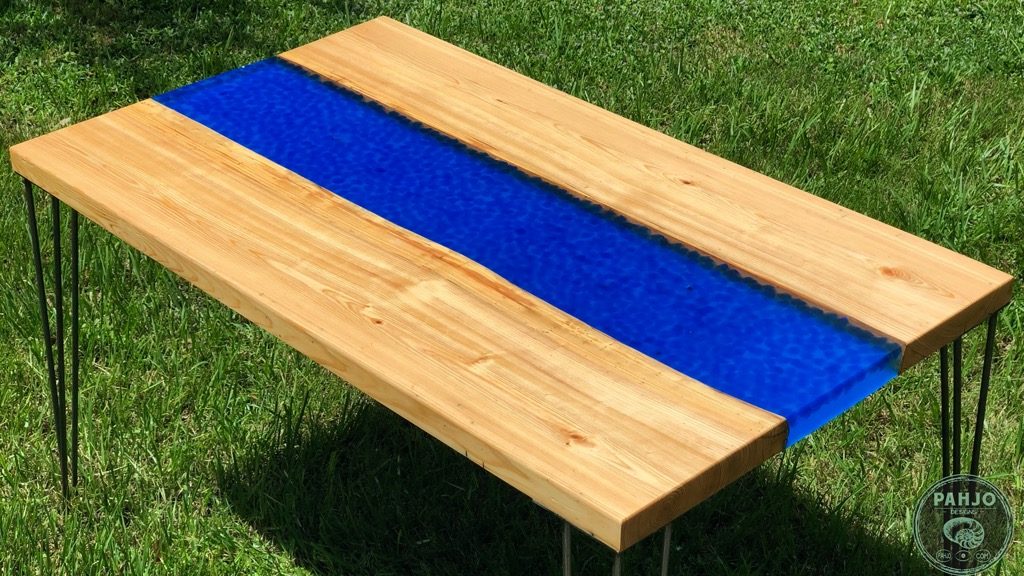
Best Epoxy Resin Table Mold Design

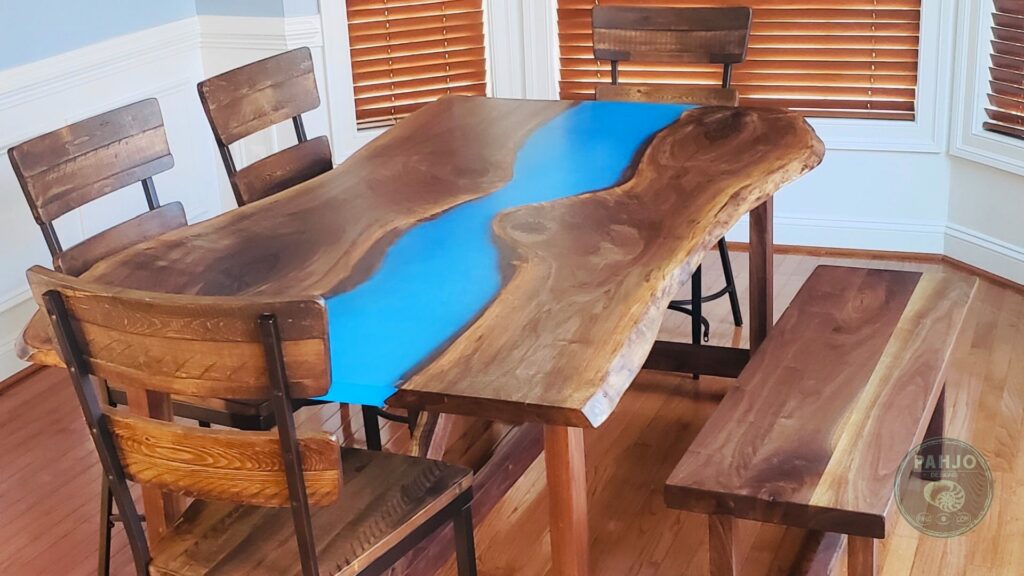
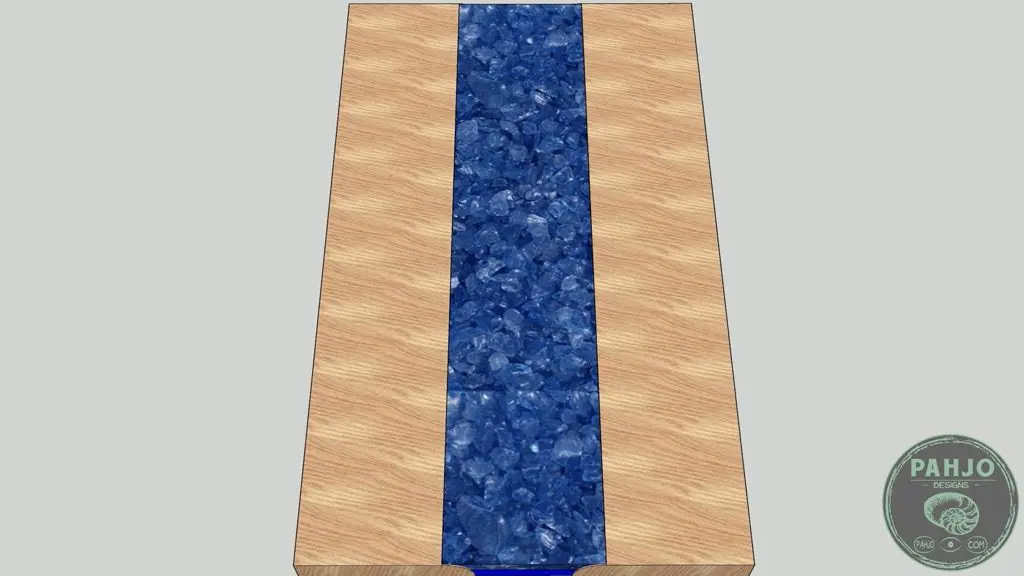
The key to creating a stunning epoxy resin river table lies in a well-designed mold built with the right material.
A well-designed and properly constructed mold provides the following benefits:
- Prevents costly epoxy leaks
- Non-stick surface makes demolding
- Maintains the perfect size and shape of your river table project with live edges.
- Creates a smooth surface free from imperfections.
- Reusable for a variety of projects
In this guide, we’ll be focusing on the materials and techniques needed to create a DIY epoxy mold specifically designed for large table projects.
Steps to Make an Epoxy Resin Table Mold
Now that you have a better understanding of epoxy resin, have chosen the right materials for your mold, and prepared your workspace, it’s time to dive into the epoxy mold-making process.
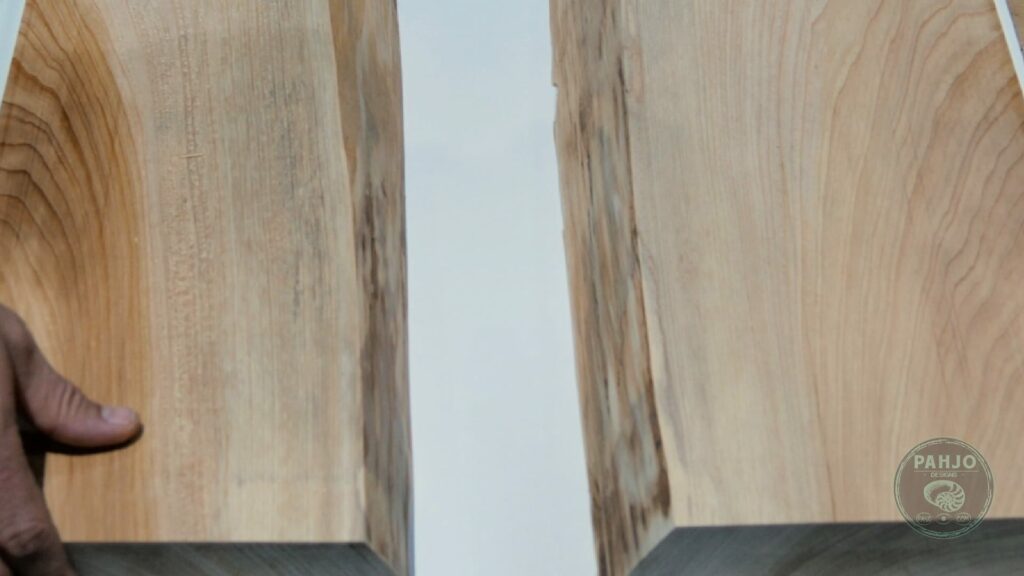
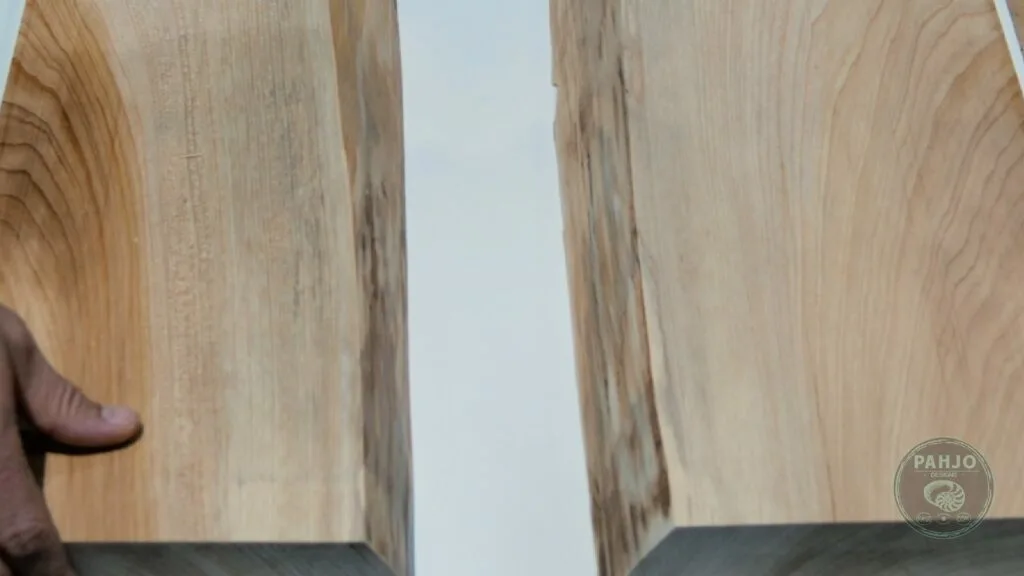
1 – Design Your Epoxy Wood Table

As a first step, plan and measure the shape and size of the table. Obviously, this is a very important step before creating your DIY mold,
The desired shape of the epoxy resin table depends on various factors, such as the available space in your home, the size of the wooden slab, and other personal preferences.
As a quick tip, sketch out your design on paper or in a 3D modeling program.
Remember, take accurate measurements and plan out your design carefully as this will form the basis of your entire project.
2 – Determine Size of Epoxy Table Form
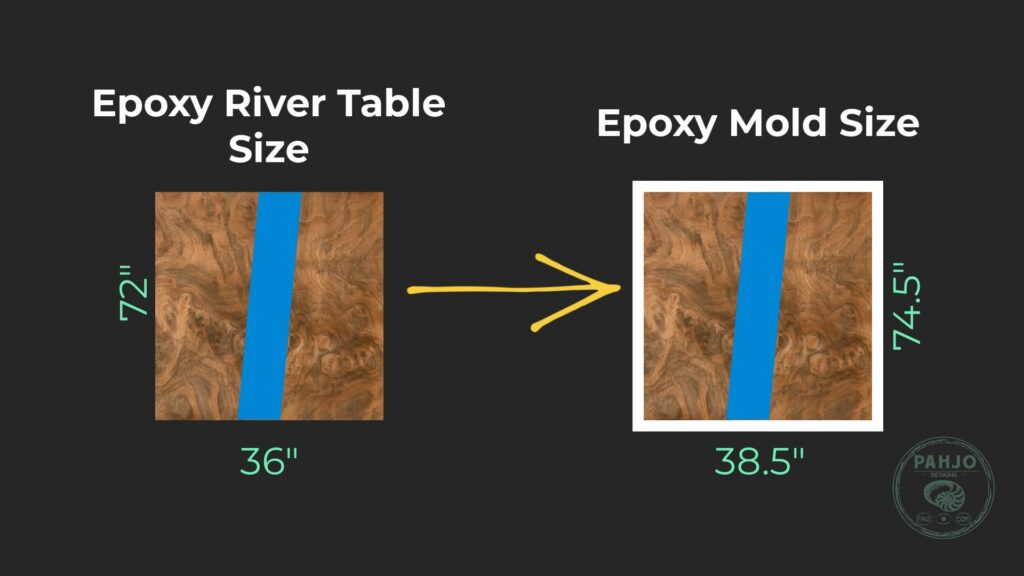

Once you have your measurements in hand, it’s time to determine the size of the epoxy table mold.
Don’t worry, a formula helps you determine the mold size.
The key step to determine the size of your mold is to add additional space for width of the wood and area between mold and table.
Essentially, the ideal width for wood used to construct an epoxy mold frame is .75″.
The best space to leave between the table and the mold is 1″.
Using the aforementioned measurements, the formula to determine the size of an epoxy resin table mold is:
- Length of Table + 1″ + .75″ + .75″ = Mold Length
- Width of Table + 1″ + .75″ + .75″ = Mold Width
- Thickness of Table + 1″ = Mold Height
- For example, your table measurement are 72″ (Length) x 36″ (Width) x 2″ (Thickness)
- Length of Mold = 74.5″
- 72 + 1 + .75 + .75
- Width of Mold = 38.5″
- 36 + 1 + .75 + .75
- Height of Mold = 3″
- Final Measurements: 74.5″ x 38.5″ x 3″
- Length of Mold = 74.5″
As a final step, use the final epoxy resin table mold measurements to determine the size of the base, sides, and ends. This will be your cut list.
- Base = Final Length x Final Width
- 74.5″ x 38.5″
- Quantity 1
- Sides = Final Length x Final Height
- 74.5″ x 3″
- Quantity 2
- Ends = (Final width – .75″ – .75″) x Final Height .
- 37″ x 3″
- Quantity 2
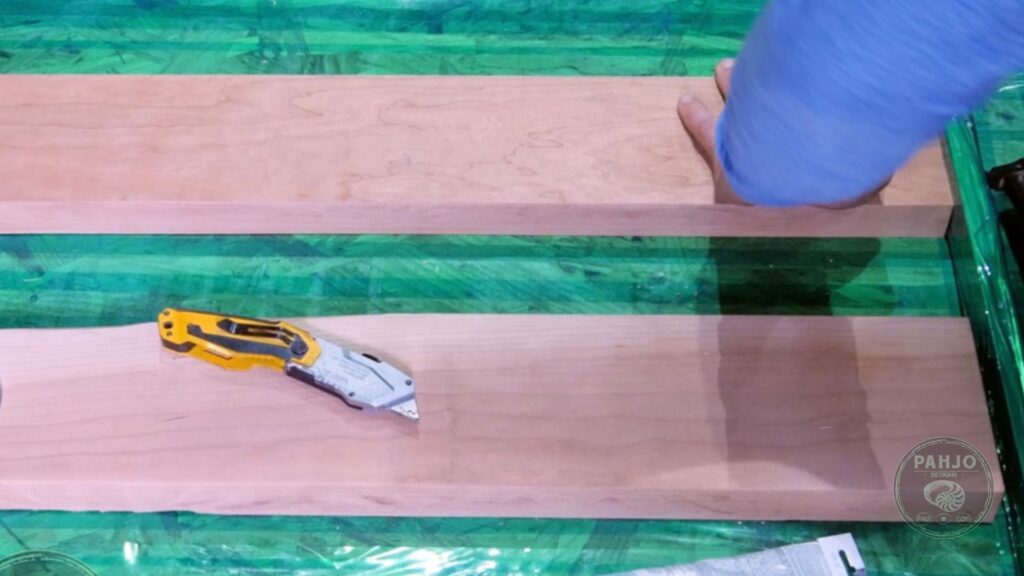
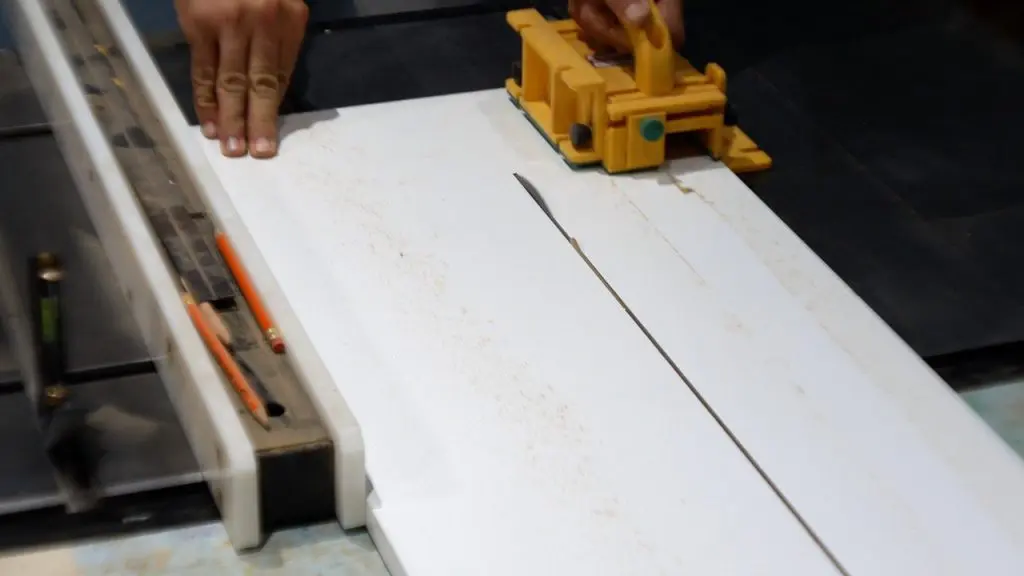
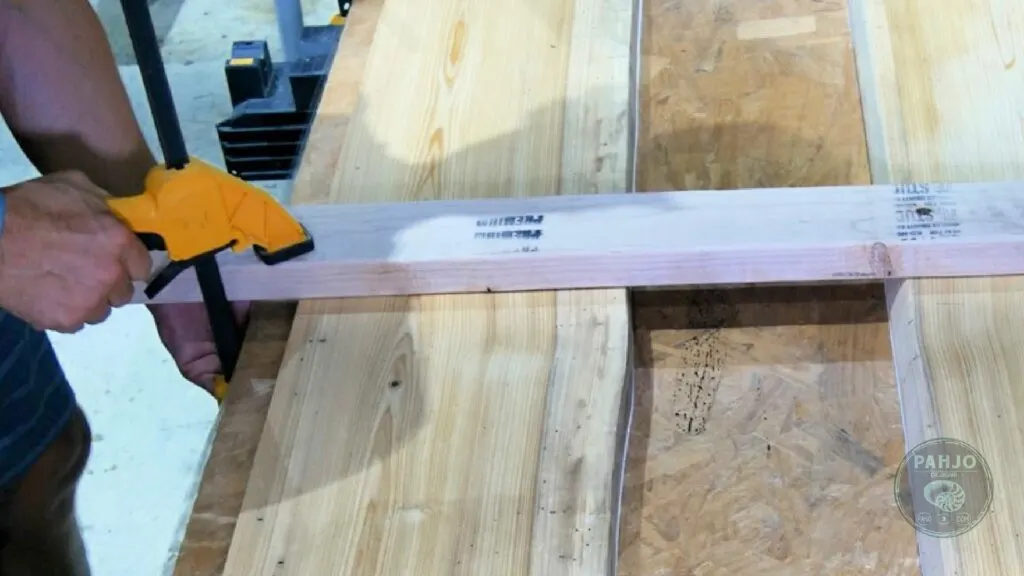
3 – Cut Wooden Planks or Melamine for Epoxy Resin Table Mold

5 pieces of wood form the base and 4 walls of your epoxy mold.
For best results, choose a 3/4″ melamine 4’x8′ sheet.
Melamine has a non-stick surface, sufficient wall thickness, readily available, and relatively affordable..
Keep in mind, any combination of wood such as Plywood, MDF (medium-density fiberboard), scrap wood, and melamine works.
They are both excellent options, as they’re readily available and relatively affordable.
One of the most important things to do is sand the base of the epoxy mold to a smooth finish.
First, use a circular saw or track saw to cut the wood for the base piece to the final width and length measurements listed above.
If you don’t own a track saw or circular saw, ask your local home center to cut the base for you.
Their panel saw cuts straight lines, but be sure to monitor the epoxy resin table mold measurements before they cut.
Then, sand the entire surface of each piece to remove any rough spots or imperfections.
Next, cut the sides and ends.

4 – Choose a Flat Surface


To ensure that your epoxy table turns out perfectly level, it’s crucial to choose a flat surface on which to construct your mold.
A great place to build your epoxy resin table mold is a sturdy workbench, a large sheet of plywood, or even a section of your garage floor.
Use a level (bubble levels) to check that the surface is completely flat, and make any necessary adjustments before proceeding.
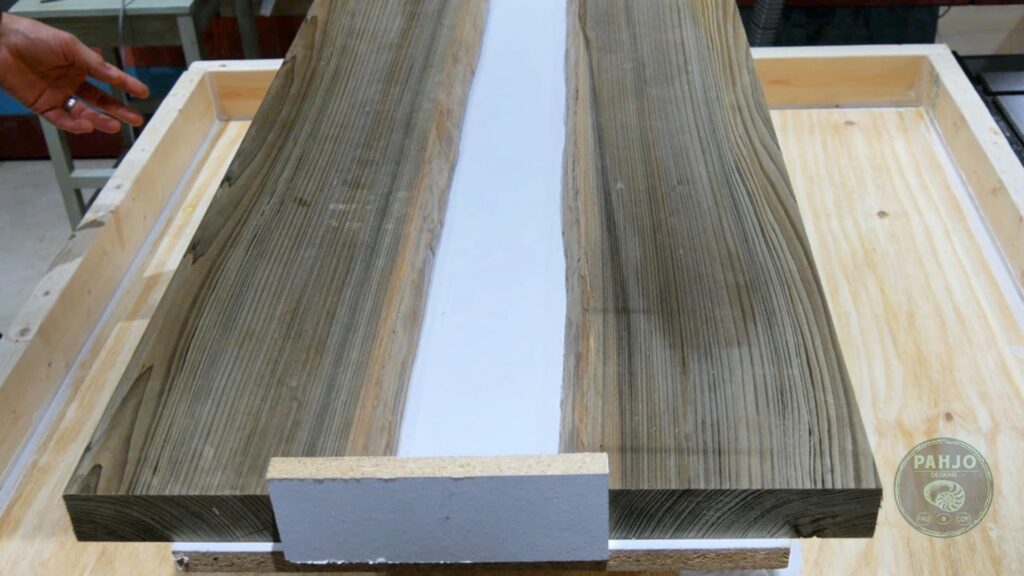
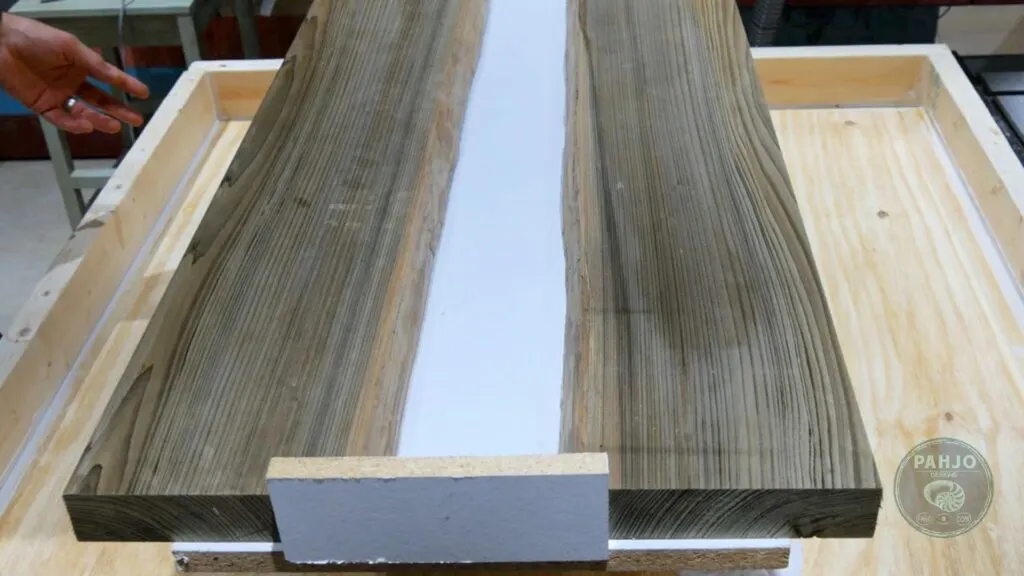
5 – Build Your Mold Frame

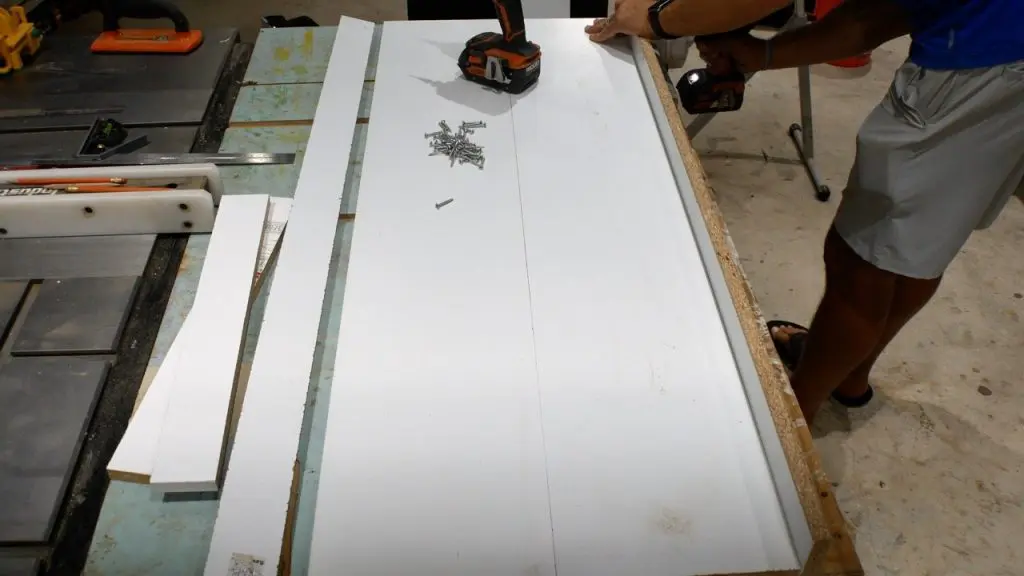
The easiest way to build the epoxy resin form is to attach the sides to the base.
In fact, the formulas in the previous step take this into account.
First, drill 4 pilot holes on each side and on each end.
Make sure the holes are spaced apart appropriately.
Next, run a bead of caulk along the epoxy mold sides.
Also, fast dry caulk is a great option to use.
It seals well, but isn’t hard to remove.
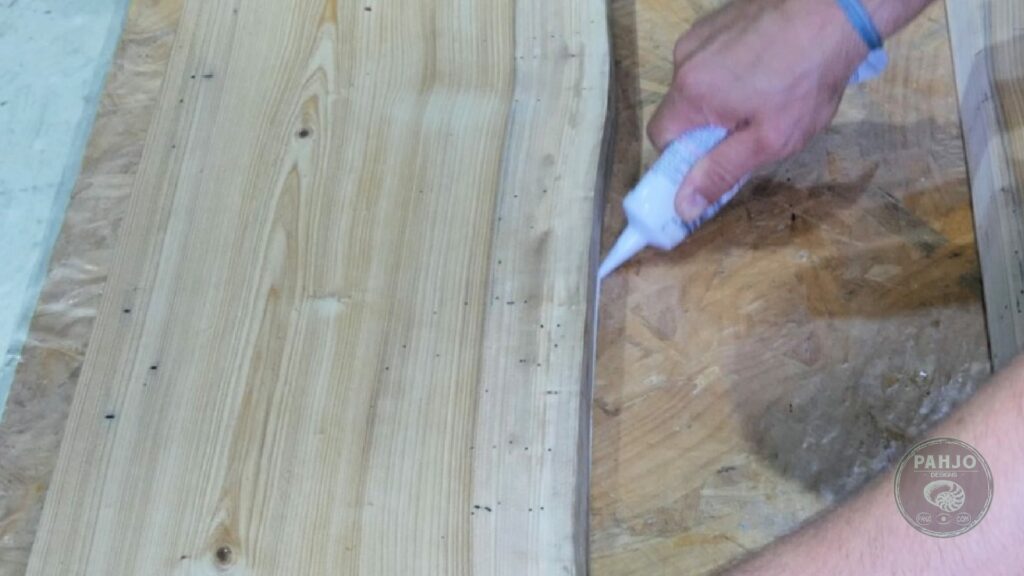
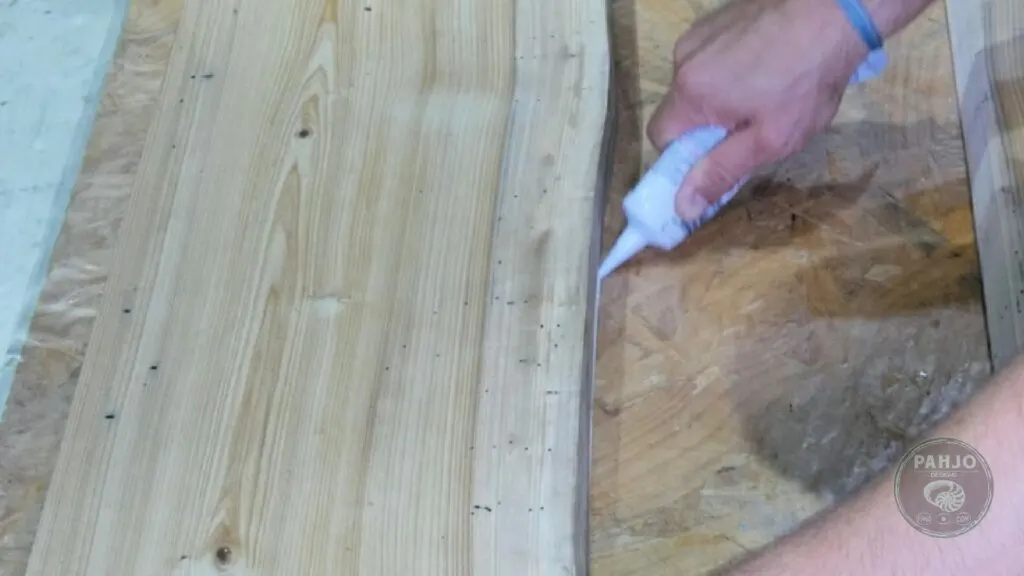

Silicone or construction adhesive may be a lot of work to remove.
The damage you cause to the mold during the removal process may prevent it from being used on a future project.
Next, place the sides on the base and use clamps to hold in place.
Drive screws through the pilot holes from the underside of the epoxy resin table form.
Ultimately, pilot holes prevent the screws from protruding causing the epoxy mold to be uneven.
Then, drive 2 screws through the sides into the ends.
Keep in mind, pilot holes aren’t needed since the screws are not on the bottom.
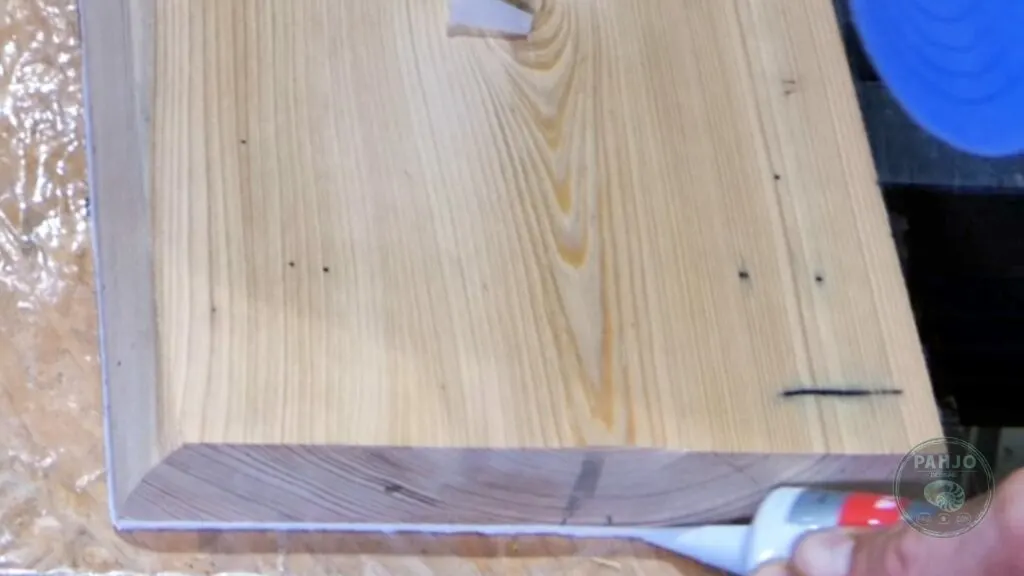
6 – Seal Your Mold Frame

Seal your mold frame using fast dry caulk on every inside and outside seam.
Next, smooth the caulk with your finger.
As a quick tip, wet your finger when smoothing caulk to prevent it from sticking.
As a quick tip, wet your finger when smoothing caulk to prevent it from sticking.

This will prevent any leaks during the pouring process.
Allow the epoxy mold to rest for 24 to 48 hours before attempting a pour of epoxy.
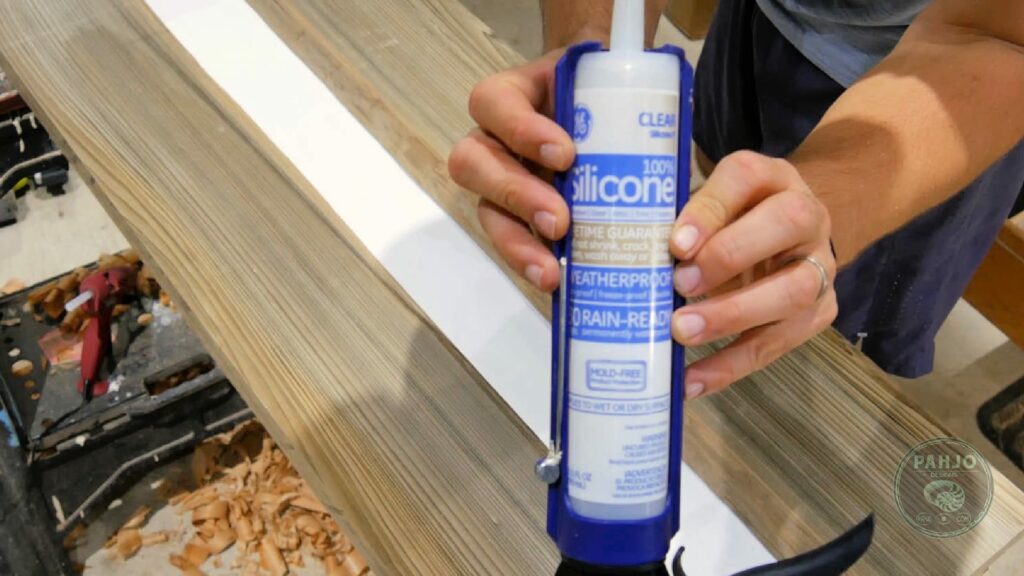
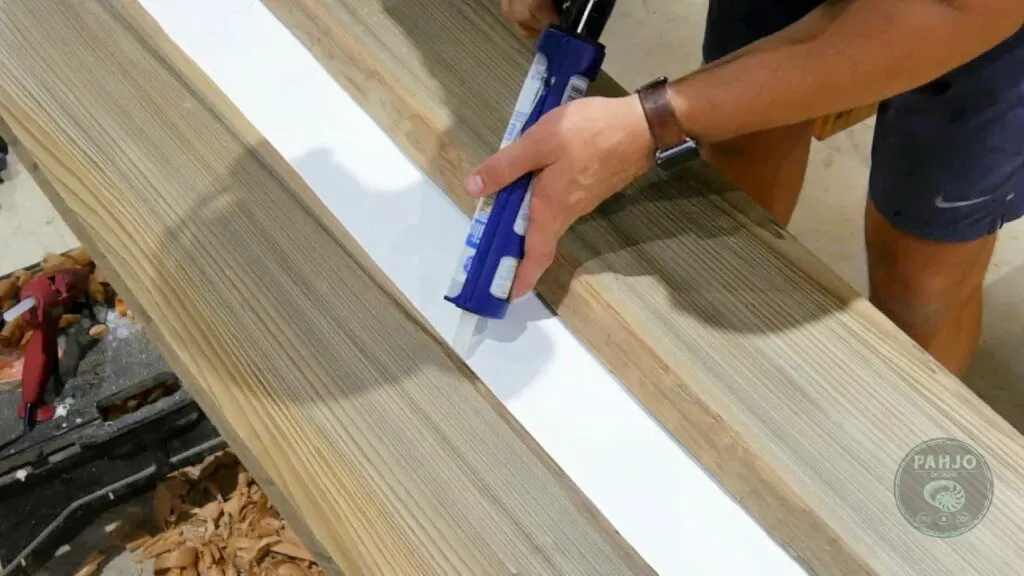
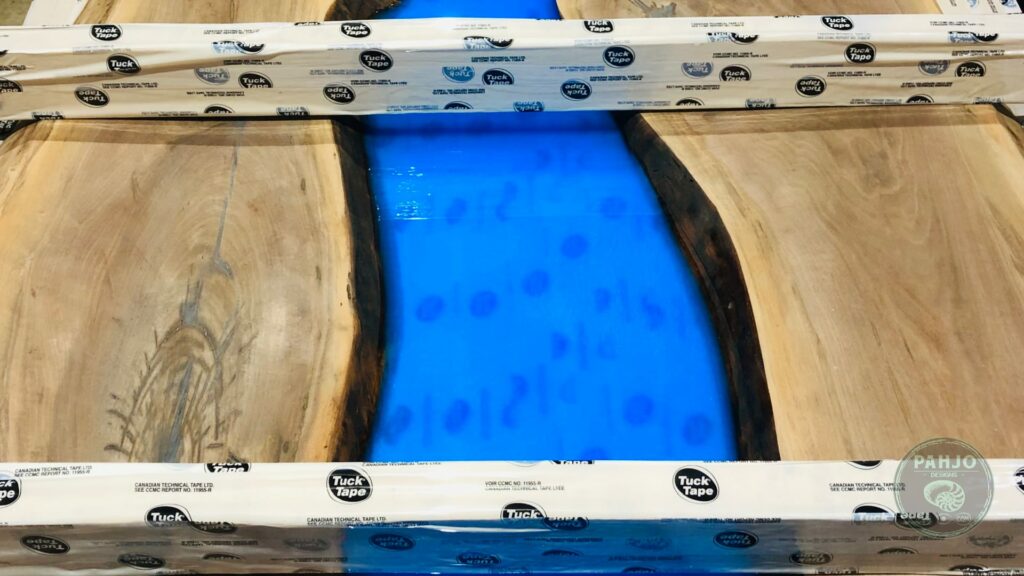
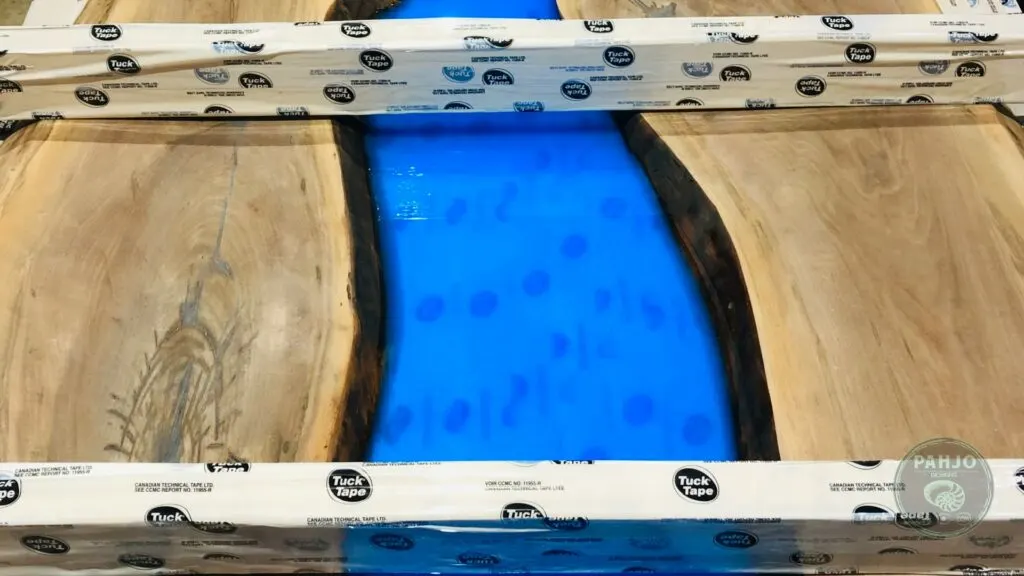
Sheathing Tape

If you used MDF or plywood for your epoxy resin table mold, use tuck tape and sheathing tape to seal the joints and edges of your epoxy mold.
This ensures the resin doesn’t leak during the casting process.
Both types of tape are waterproof and highly adhesive, making them ideal for use with epoxy resin.
7 – Apply a Mold Release Agent
Reusing your epoxy resin mold is a great way to save money on future projects.
So, a mold release agent is one of the most vital parts of the epoxy mold making process.
Otherwise, the epoxy sticks to the surface and ruins the mold during the demolding process.

To make the demolding process easier, apply a mold release agent to the inside of your mold frame.
A mold release spray, furniture wax, or a thin layer of petroleum jelly work well.
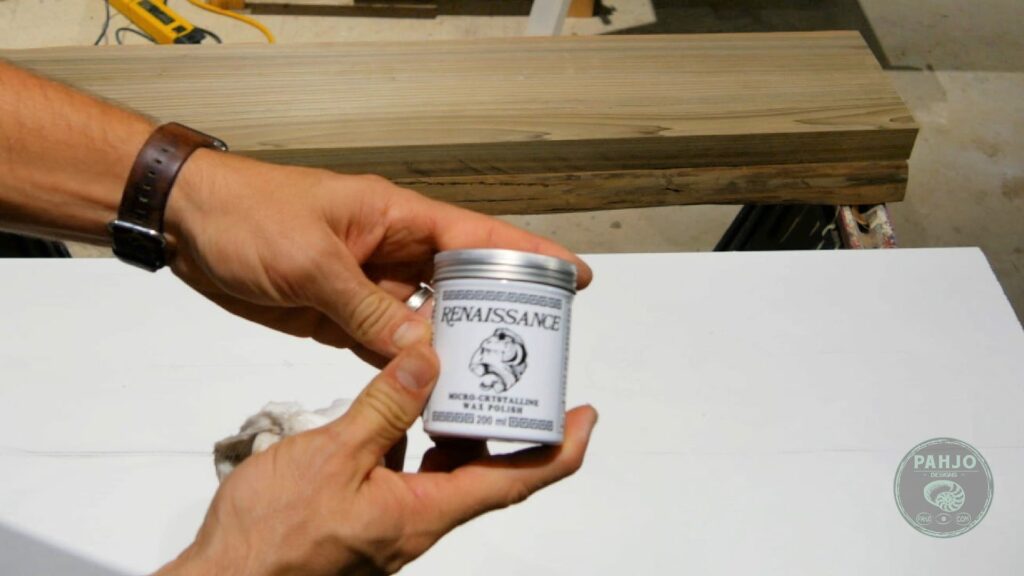

Allow it to dry for a few minutes then wipe with a paper towel.
As a quick tip, cover all wood before using mold release spray on your epoxy resin table form.
As a quick tip, cover all wood before using mold release spray on your epoxy resin table form.
Mold release spray is a bad substance to get on wood.
8 – Level the Epoxy Mold

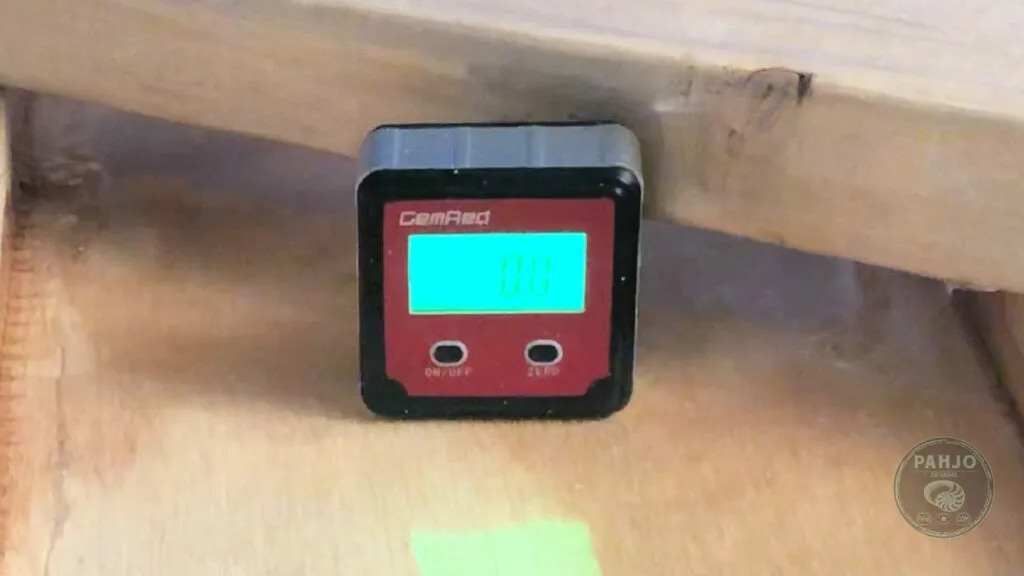
Use a level and shims to ensure the mold is perfectly level, as this will affect the final appearance of your table.
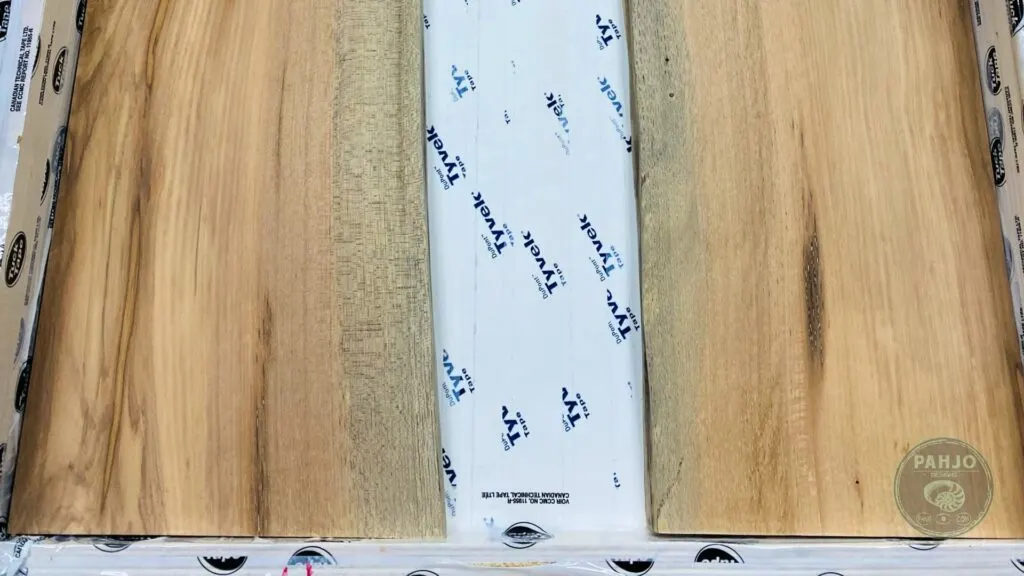
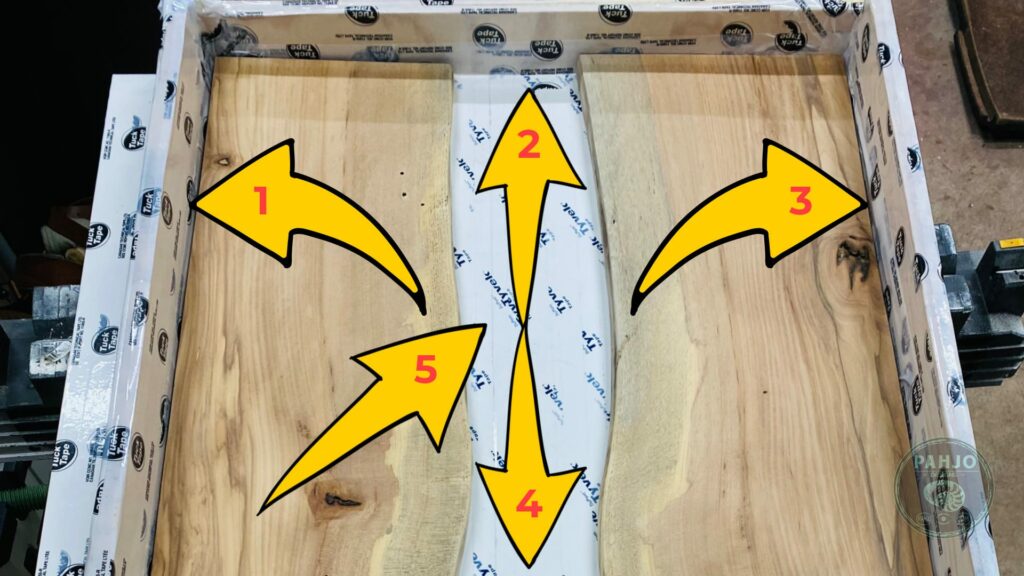
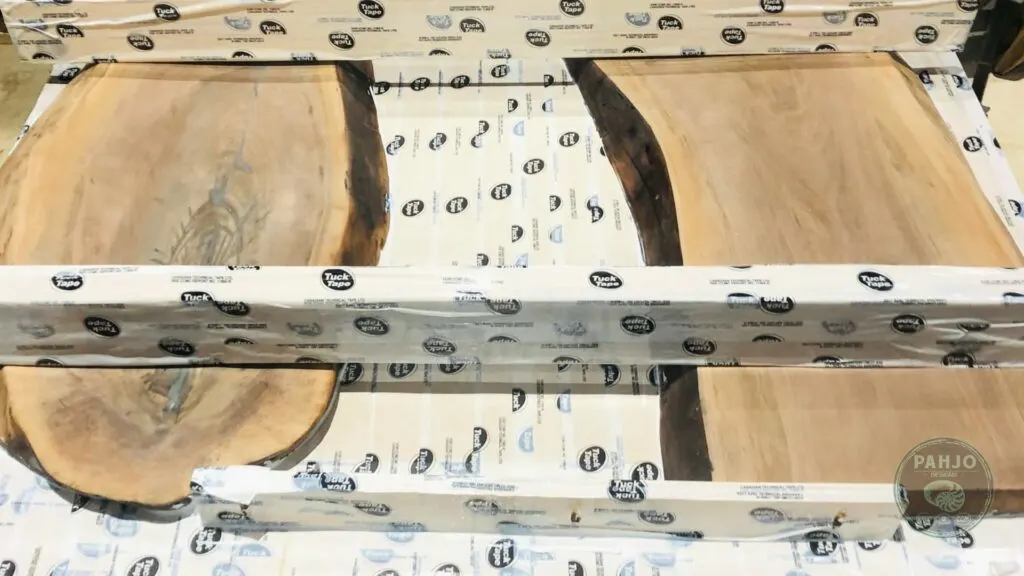
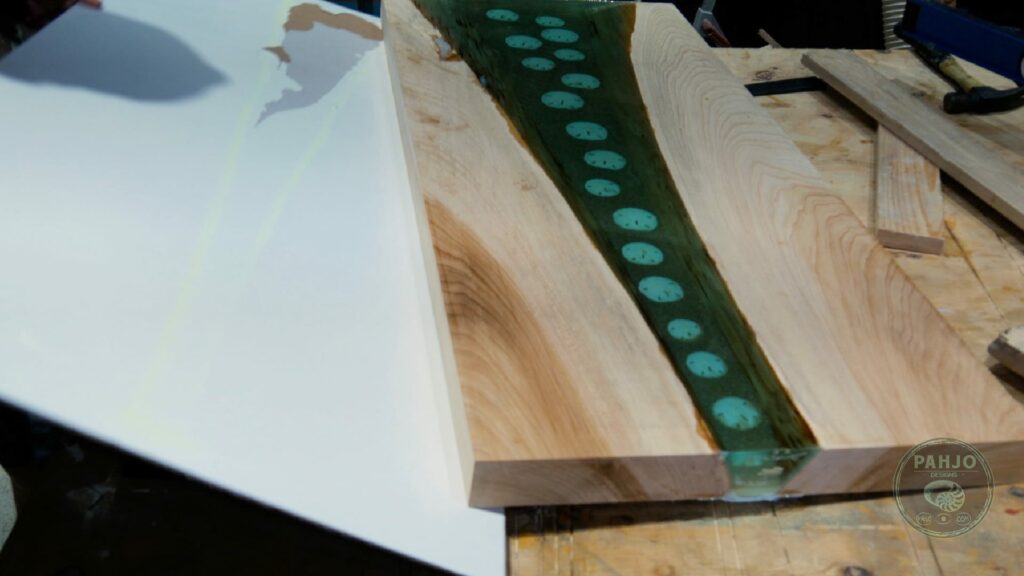
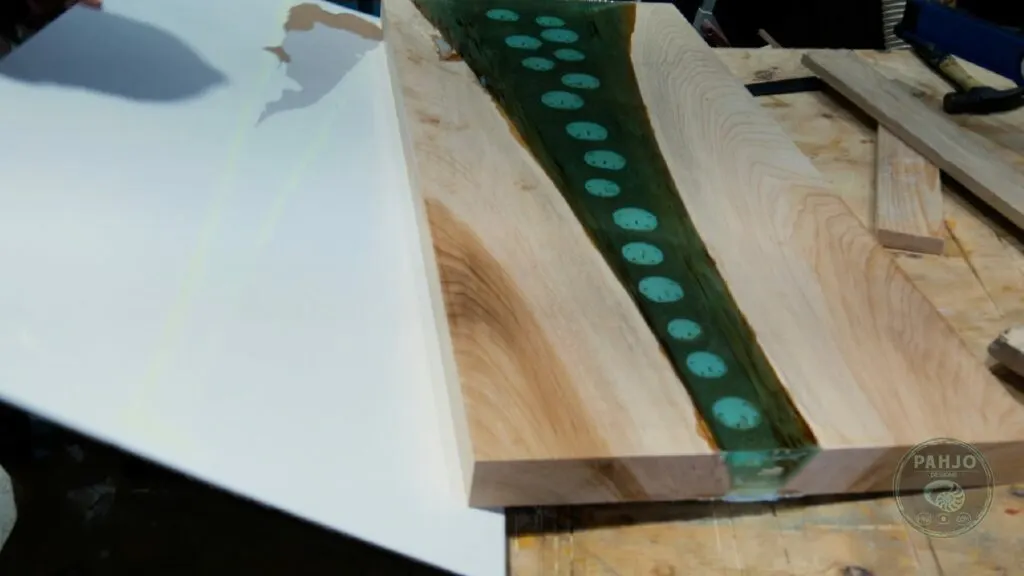
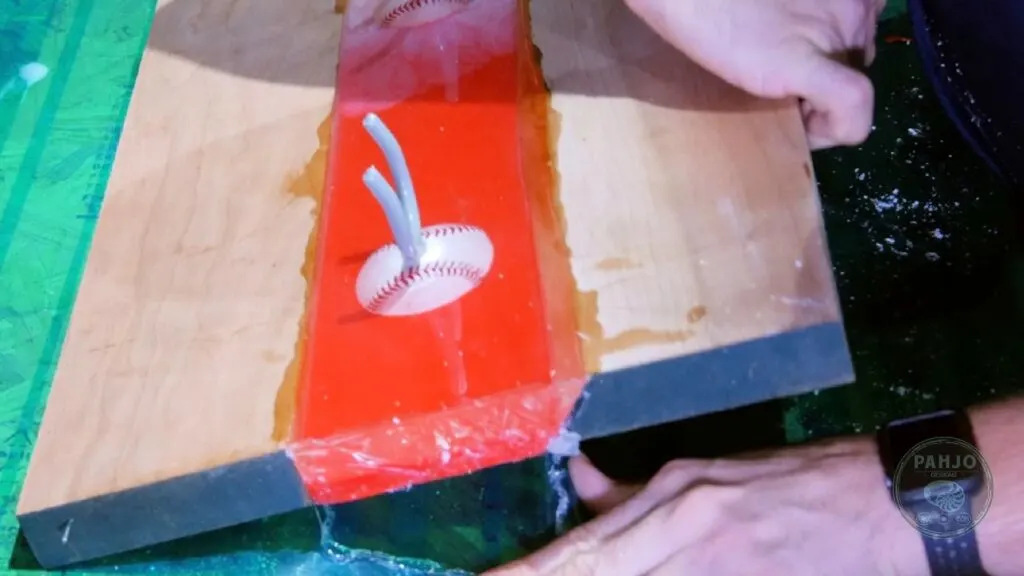
9 – Position the Wood & Inclusions
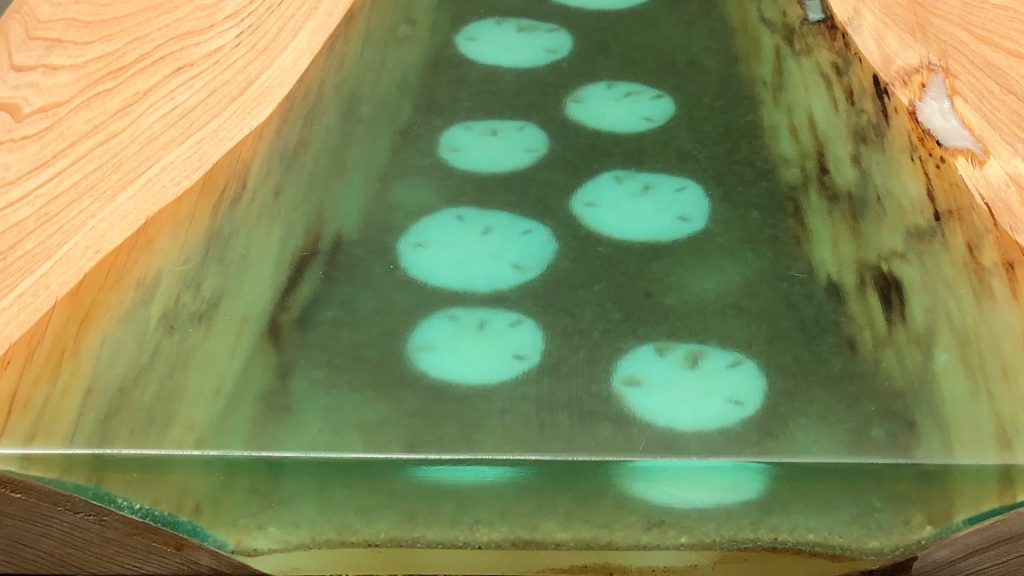
Place your prepared wood and any additional elements of different shapes in the mold.
Next, secure them with CA glue or hot glue if necessary.

10 – Measure and Mix Epoxy Resin

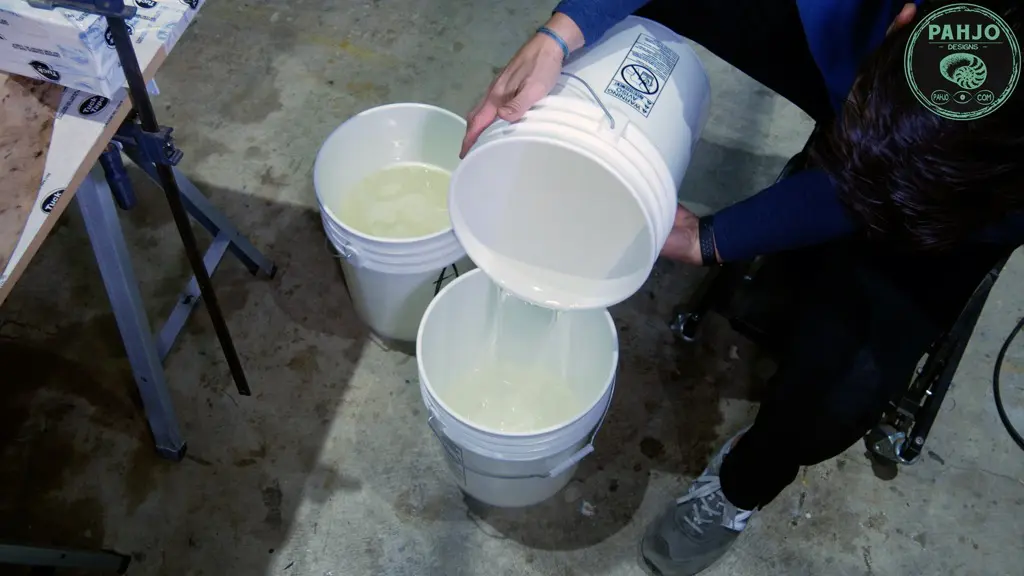
With your mold prepared, it’s time to mix and pour the epoxy resin.
Follow these steps for a successful epoxy pour:
- Measure the Epoxy
- Using a resin calculator, determine the amount of epoxy you need.
Next, measure the appropriate amounts of resin and hardener, following the manufacturer’s recommendations for the correct ratio.
- Using a resin calculator, determine the amount of epoxy you need.
- Mix the Epoxy
- Combine the resin and hardener in a mixing container and stir thoroughly.
Ensure the mixture is fully blended and free of cloudiness. Mix your epoxy resin and hardener according to the manufacturer’s instructions.
- Combine the resin and hardener in a mixing container and stir thoroughly.
- Add Different Colors or Effects
- If desired, add pigments, glow powders, or other additives to the epoxy mixture.
Then, thoroughly mix until they fully dissolve in the epoxy resin.
- If desired, add pigments, glow powders, or other additives to the epoxy mixture.
11 – Pouring the Deep Pour Epoxy

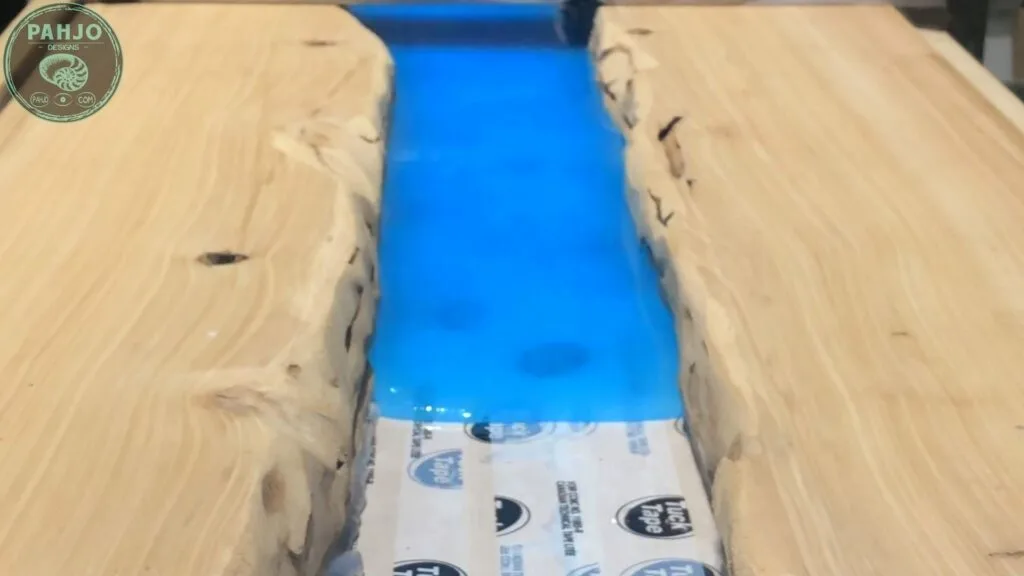
It is now time to pour or cast resin.
Slowly pour your mixed epoxy resin into the mold frame, filling the void between the wooden slab and the walls of the mold.
Pouring slowly will help minimize air bubbles and ensure an even, level surface.

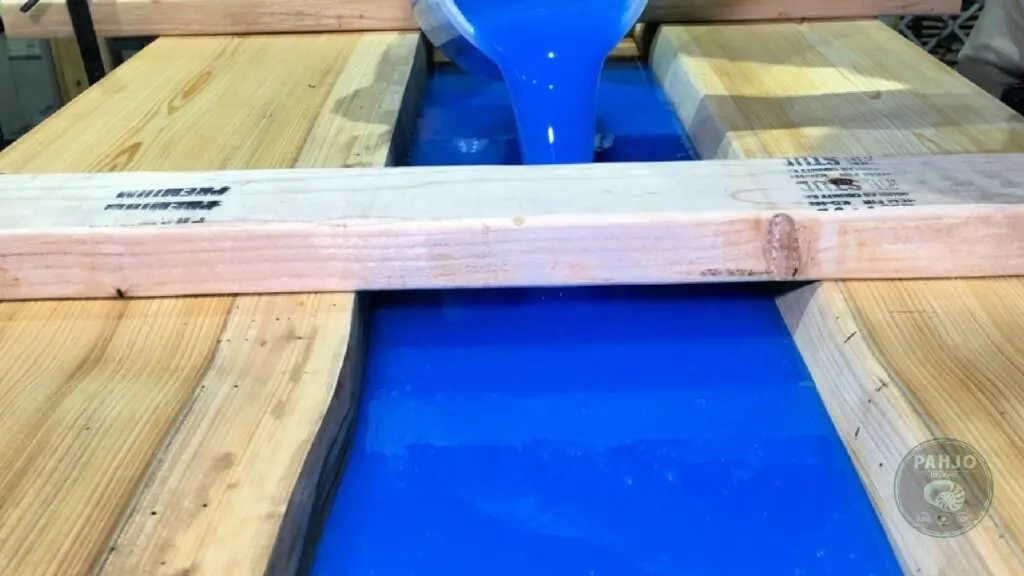
Use a spatula or a scraper to spread the epoxy evenly.
If necessary, use a heat gun or torch to pop any surface bubbles.
Use deep pour clear casting resin to reduce air bubbles and increase wood absorption for a stronger bond.
Deep pour epoxy is the best epoxy to use for many reasons.
12 – Monitor for Epoxy Leaks
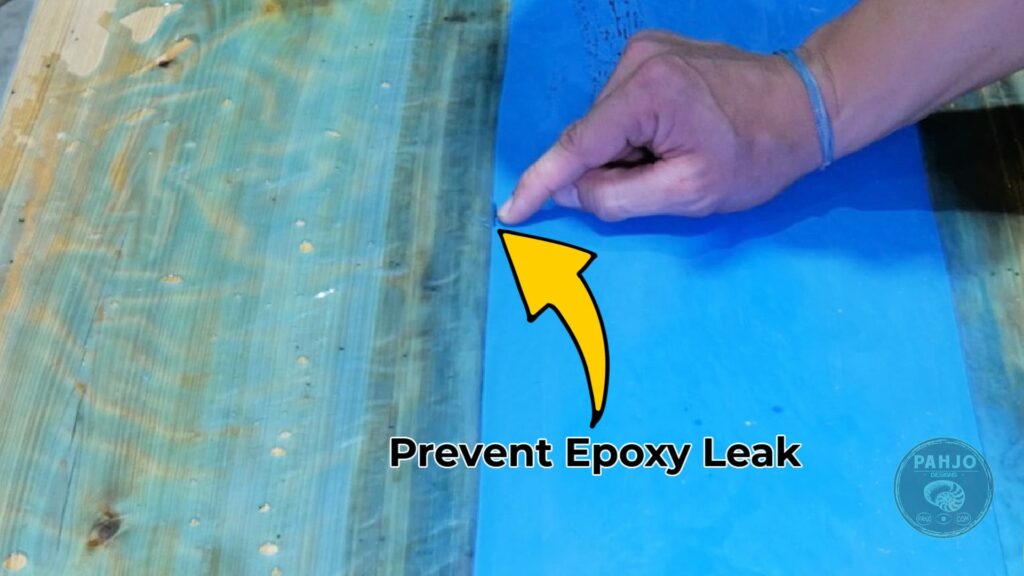
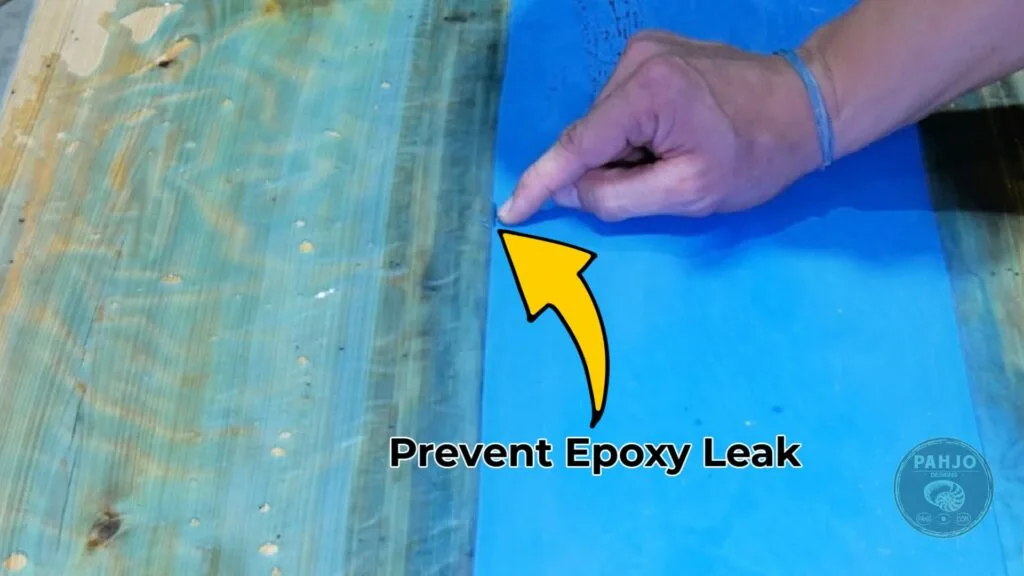
As the epoxy resin cures, it will undergo a chemical reaction that generates heat.
Consequently, epoxy leaks may occur due to heat from the chemical reaction or from an improperly sealed epoxy resin mold.
By monitoring for leaks, you can potentially save your project without losing too much resin.
Keep in mind, you can easily fix epoxy leaks with a hot glue gun, tuck tape, or fast curing caulk.
In addition, too much heat can cause the resin to crack or become discolored.
13 – Curing and De-Molding
Lastly, press the surface gently with your fingernail to ensure the epoxy has reached its full hardness before attempting to remove the table from the mold,
Disassemble the mold box by hitting the top of the sides away from the table using a deadblow mallet every 12 inches.
If it doesn’t break free, repeat the process.
Remove one end by using the same process.
Next, use a number of shims to raise the table about 1/8″ at each end.

Once the perimeter is free, the epoxy resin table mold base should easily release.
Reuse Epoxy Mold

If you’re planning to create multiple epoxy resin river tables or tackle a large table project, it may be worth investing in a reusable mold.
These molds are typically made from silicone or other flexible materials, making them easy to clean and reuse multiple times.
While they can be more expensive than DIY molds, reusable molds offer a convenient and cost-effective solution for those who plan to create multiple epoxy projects.
Epoxy Resin Project Ideas
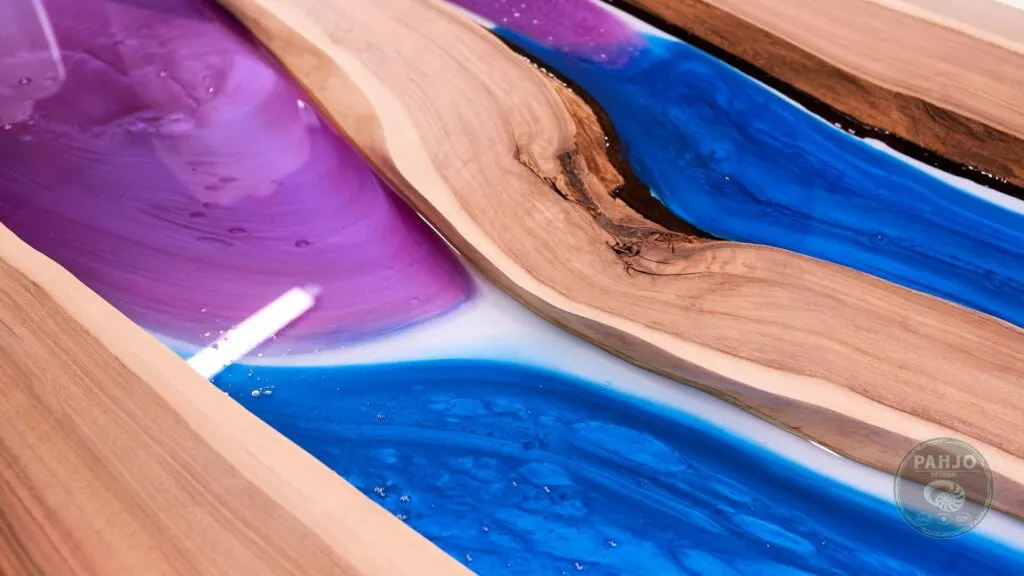
From unique wall art and river rock tables to countertops and glow in the dark projects.
Here are 3 inspirational epoxy resin casting projects:
1 – Resin Art

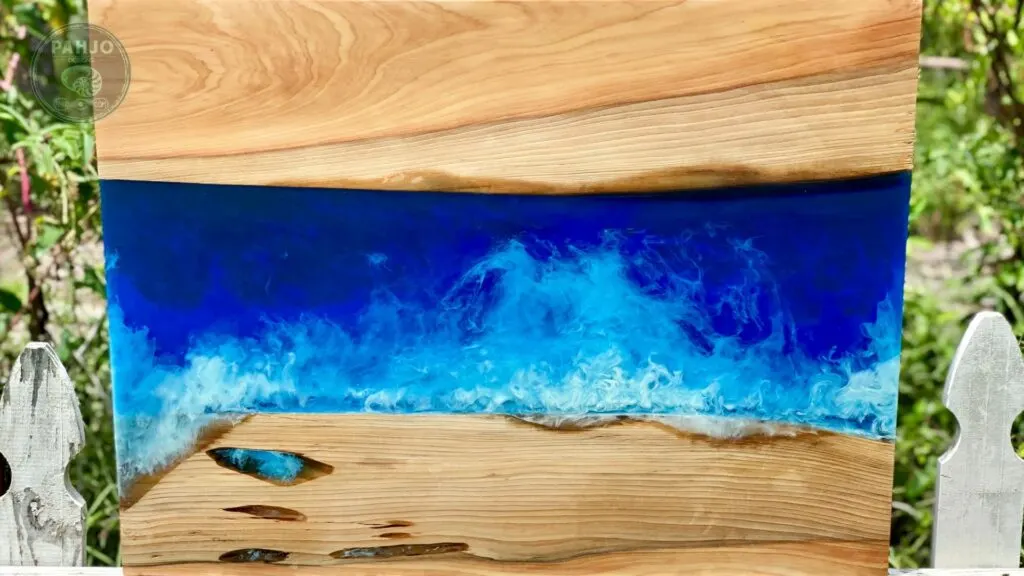
Resin ocean art on wood is a type of artwork that combines the beauty of ocean waves with the natural elegance of wood.
The art is created by pouring resin onto a wooden canvas or between 2 pieces of wood.
Then, using a variety of techniques to create a lifelike representation of ocean waves.
Resin artists and DIY’ers often use vibrant colors, intricate designs, and various resin techniques to make the waves look realistic and captivating.
The result is a unique and visually striking work of art that adds a touch of the ocean’s beauty to any room.
Resin ocean art is highly durable and easy to maintain.
This makes it a popular choice for those seeking a long-lasting and low-maintenance piece of art.
2 – Epoxy River Rock Table

An epoxy rock table is a type of furniture that combines natural rocks and epoxy resin to create a unique and visually striking piece.
The rocks are embedded in multiple layers of colored and clear epoxy resin.
The result is a durable and functional work of art that showcases the natural beauty of river or acrylic rocks.
It provides a practical surface for use in any room.
Various wood species, colors, and styles make epoxy rock tables a great option for those seeking a one-of-a-kind piece of furniture.
3 Epoxy Resin Glow in the Dark Table


A wood and epoxy resin glow in the dark table combines the natural beauty of wood with the modern functionality of epoxy resin.
The table is crafted by adding glowing pigment powder in epoxy resin and pouring it between two pieces of wood.
When exposed to light, the pigment powder absorbs energy and emits a stunning glow that can last for many hours.
An epoxy glow table adds a touch of sophistication to any room.
Wood and epoxy resin glow tables are highly durable and easy to maintain.
This makes them a popular choice for those seeking an eye-catching piece of furniture that doubles as a conversation starter.
Conclusion
In conclusion, crafting the perfect resin mold for your epoxy table masterpiece requires patience, attention to detail, and a willingness to learn.
By following the steps outlined in this guide and using the best materials and techniques available, you can create a functional piece of art that’s sure to impress.
Whether you’re a seasoned DIY enthusiast or a weekend warrior with little experience, there’s never been a better time to try your hand at creating an epoxy resin river table.
So, grab your tools, choose your materials, and let your creativity flow. Your next masterpiece is waiting to be crafted.
Related Posts:
- 11 Most Helpful Epoxy Tips
- Deep Casting Resin: A Complete Guide
- How to Choose the Right Epoxy Resin
- Casting Resin vs Coating Resin