
In this article, I show you how I built a DIY rustic dining table with resin inlays.
Even if you don’t need a rustic dining table, the DIY tips covered can be used on other woodworking projects.
Here are some jump links to the main sections of this post to help you find the information you need quickly.
Video Tutorial
DIY Plans
Table Design
Tools and Material
Step-By-Step Instructions
Video Tutorial
There are several things which are difficult to fully explain with words and images, so be sure to check out the video tutorial below!
Rustic Dining Table DIY Plans
I have DIY plans available for download for this project.
Furthermore, you can get a 25% discount on these plans at the bottom of this article.
In these DIY plans, you will receive:
- 86 page pdf with photo illustrations for each step.
- Cut List
- Material List
- Recommended Tool List
- Woodworking Tips and Techniques
Remember, don’t forget about the discount code at the end of this article.
Rustic Dining Table Design Features
I offered to build a table for my sister in November while brainstorming project ideas during Thanksgiving.
My sister is older than me, which typically means she does more favors for me than I do for her.
We traded many Pinterest screenshots via text over a two-week period to get an idea of the style table she wanted me to build.
Ultimately, the final decision was a rustic dining table with resin inlays and glow in the dark features.
First, I decided to incorporate a few unique elements to this rustic dining table such as glow in the dark resin inlays.
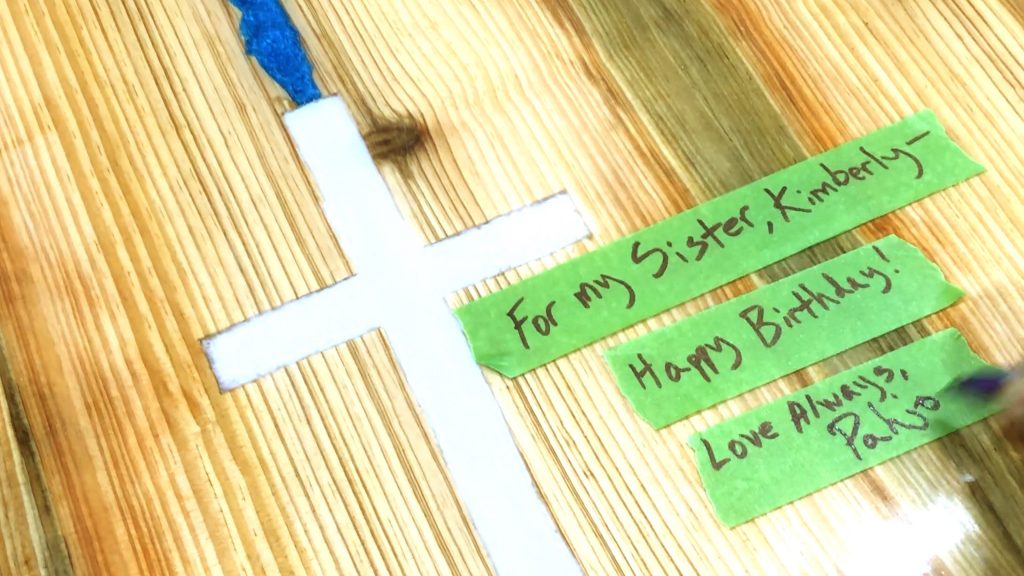
These epoxy resin inlays compliment my sister’s personality and her faith.
Additionally, I completed the table the same week as her birthday, which made it more special.

Tools and Materials
Epoxy ResinGlow Powder
Blue, Black, White Pigment Powder
Burn In Stick
Butane Torch
Measuring Containers
Rubber Squeegee
Epoxy Took Kit
Mixing Paddle
Nitrile Gloves
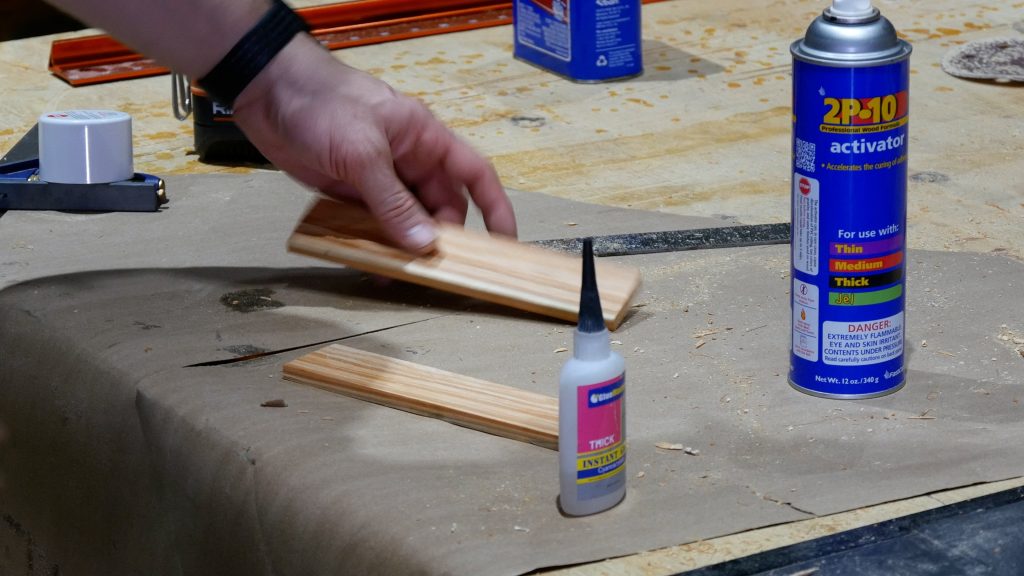
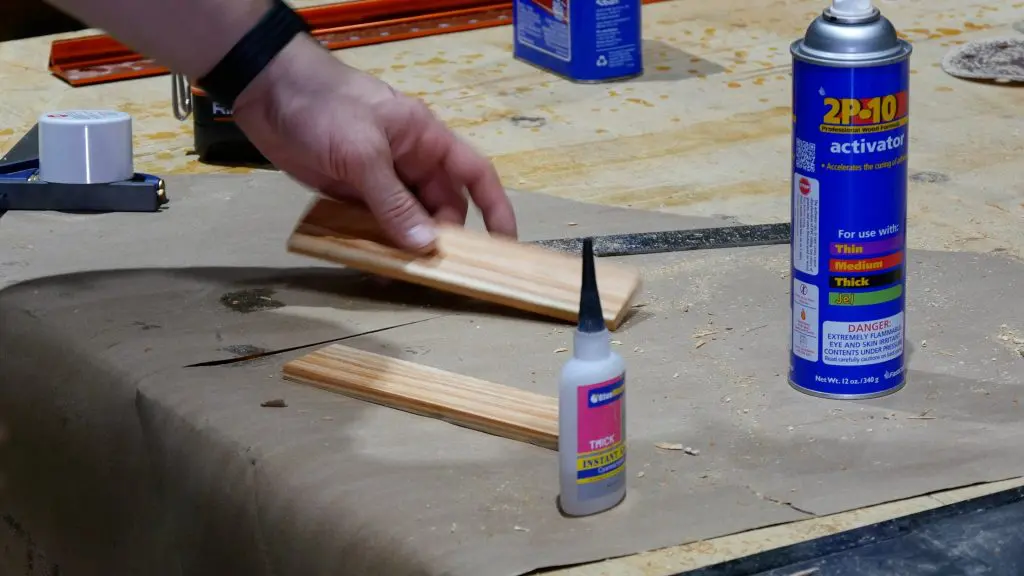
Tuck Tape
CA Glue
Foam Brush
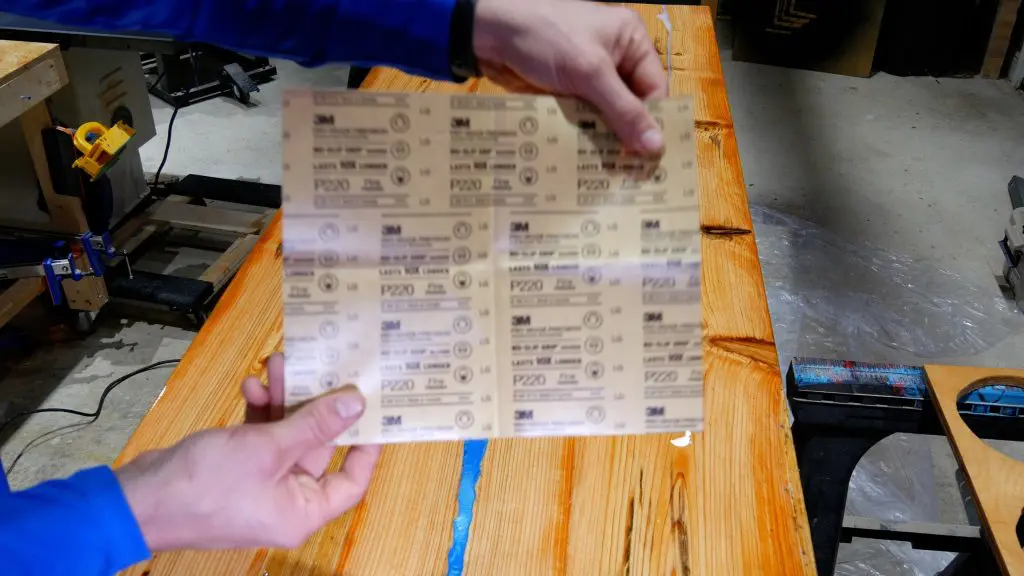
1000 Grit Sandpaper
220 Grit Sandpaper
3/8″ Dowel jig
Circular Saw
Miter Saw
Planer
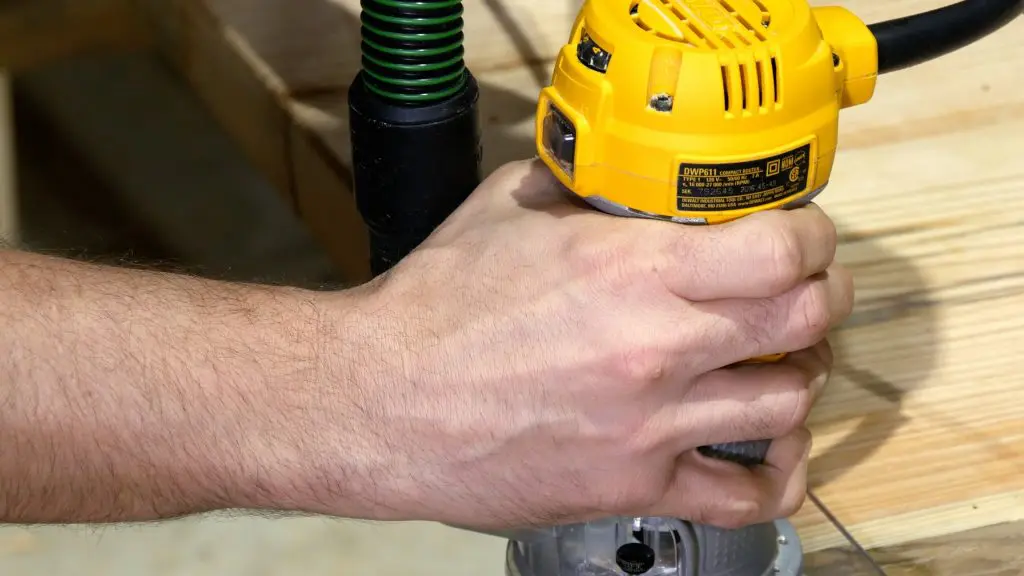
Trim Router
Roundover Bit
Spiral Bit
Clamps
Tape Measure
Wood Glue
Glue Scraper
Chisel
Low Angle Jack Plane
Often times, I experiment with many different products and tools while working with epoxy resin. Therefore, the products I recommend may change over time.
For your convenience, I’ve compiled a complete list of my favorite Epoxy Resin material and tools.
The first step to all of my projects is to gather the materials.
I get frustrated when I start a project and realize I don’t have the materials I need to proceed with the build.
Additionally, I used products such as epoxy resin which cannot be purchased at a local big box store.
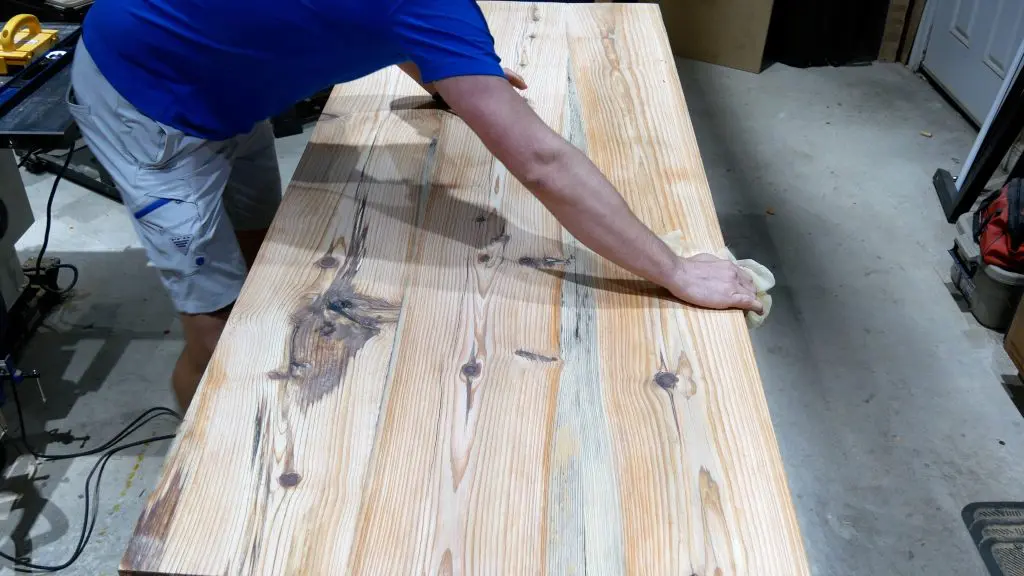
Mill Wood
Once I obtained the materials, I started milling the wood for this rustic dining table.
Essentially, I used 3 pieces of reclaimed heart pine for this project.
The Heart Pine was salvaged from an old building in New Orleans and it was in great shape.
However, it was not flat nor was it straight.
Each piece of heart pine was 90” long, 13.5” wide, and 2.5” thick.
The size of the table I needed to make was 84” long, 36” wide, and 2” thick.
Straight Sides
Quick Tip: When you build a table that consists of 3 or more boards joined together, always mill the middle board(s) to the exact width.
The outer boards should be ½” wider so that you can trim down to the final length after joining.
For example, I milled the middle board to exactly 12” wide and the outer boards to 12.5” wide.
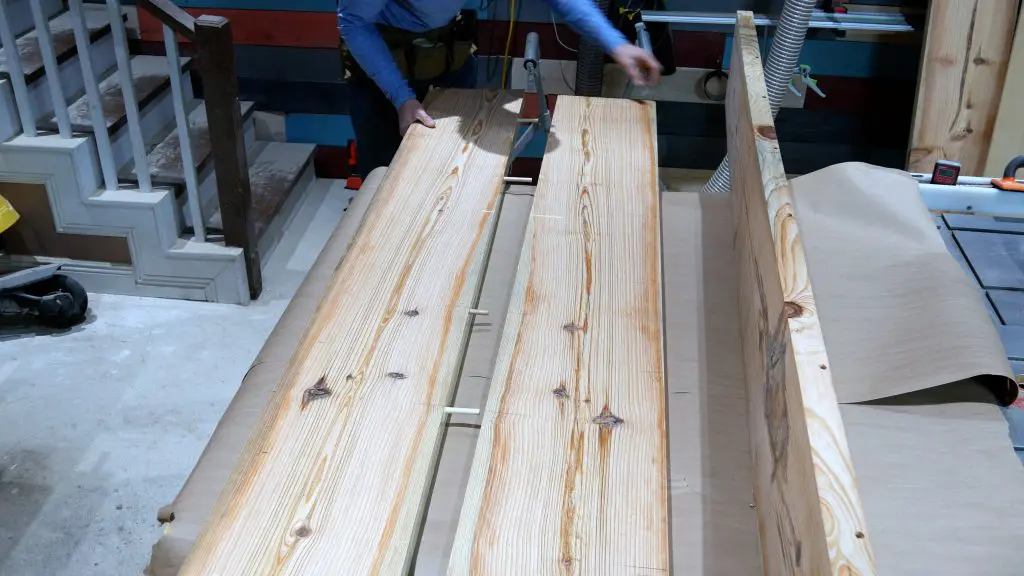
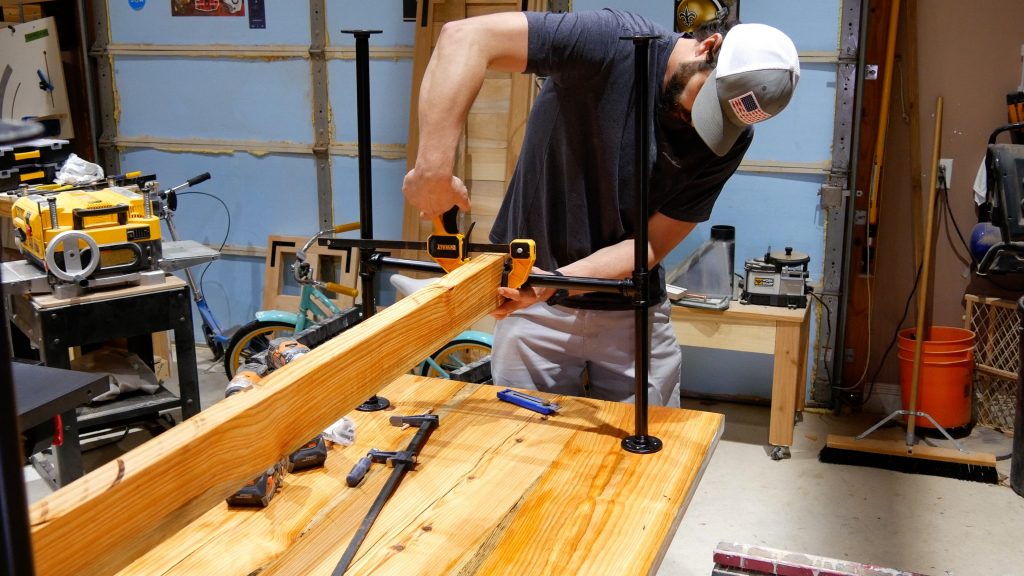
Join Wood using Dowels
I decided to use 3/8″ oak dowels to join each piece of wood for this resin inlay table.
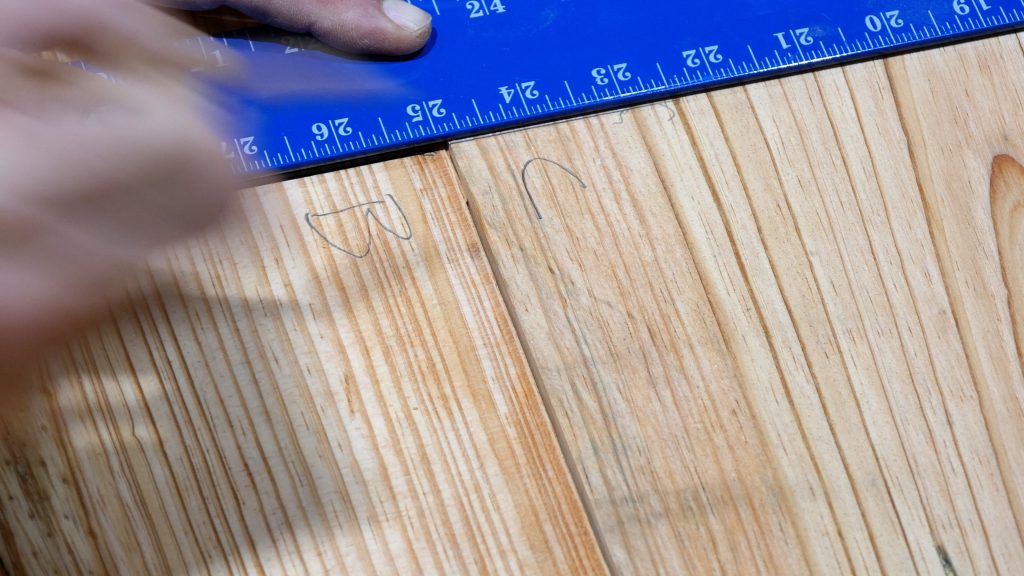
First, I lined up the 3 pieces of heart pine and marked where I would use dowels.
Each dowel was spaced 12″ apart.
Additionally, I marked each join as ‘A/B’ and ‘B/C’ to avoid confusion.
The first board is ‘A’, the second is ‘B’, and the third is ‘C’.
Therefore, the first join was between ‘A’ & ‘B’ and the second was between ‘B’ & ‘C’.


My dowel jig came in very handy during this step; however, the dowel jig is setup to be used on 3/4″ stock.
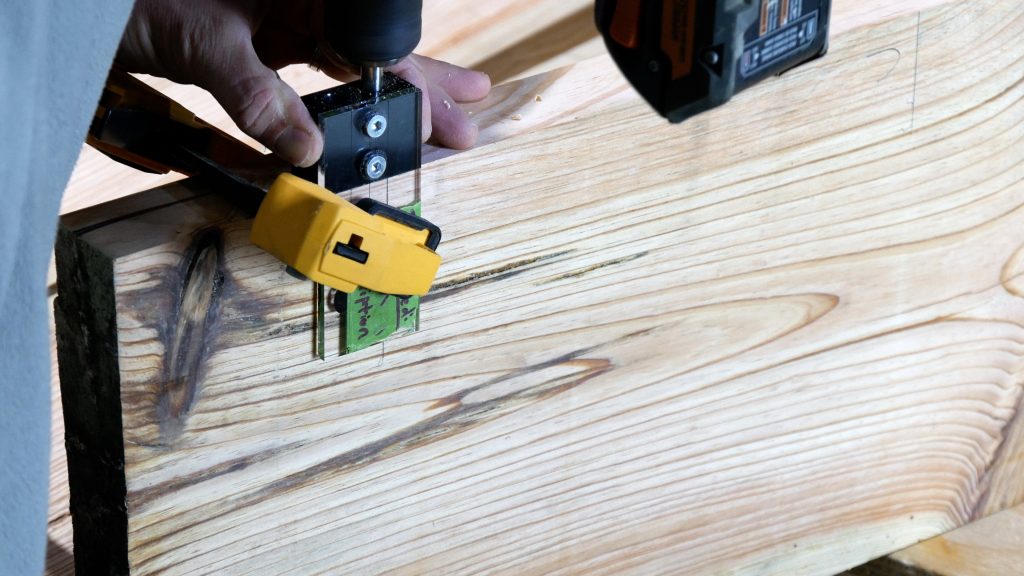

Next, I cut the dowels on my miter saw to 4 ½” each.
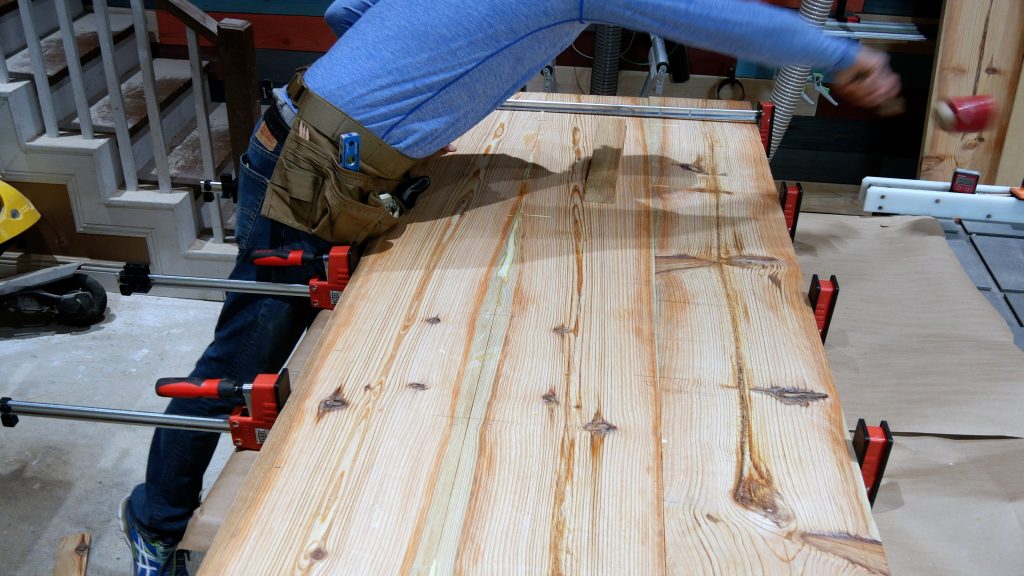
Then, I inserted the dowels and tightened the boards together with clamps.
The dowels provide a very tight fit, so I had to use my rubber mallet to gently tap the boards into place.

As you can see from the picture below, my mallet broke during this step.

Dowel Placement
These reclaimed heart pine wood pieces were 2 ⅛” thick after I planed them.
I decided to place the dowels on the upper side and lower side of each piece of wood.
In other words, I placed the first dowel with the jig laying on top of the wood.
Then, I placed the next dowel 12″ away with the dowel jig laying on the bottom of the wood.
Essentially, this provided enough spacing horizontally and vertically for a strong join.
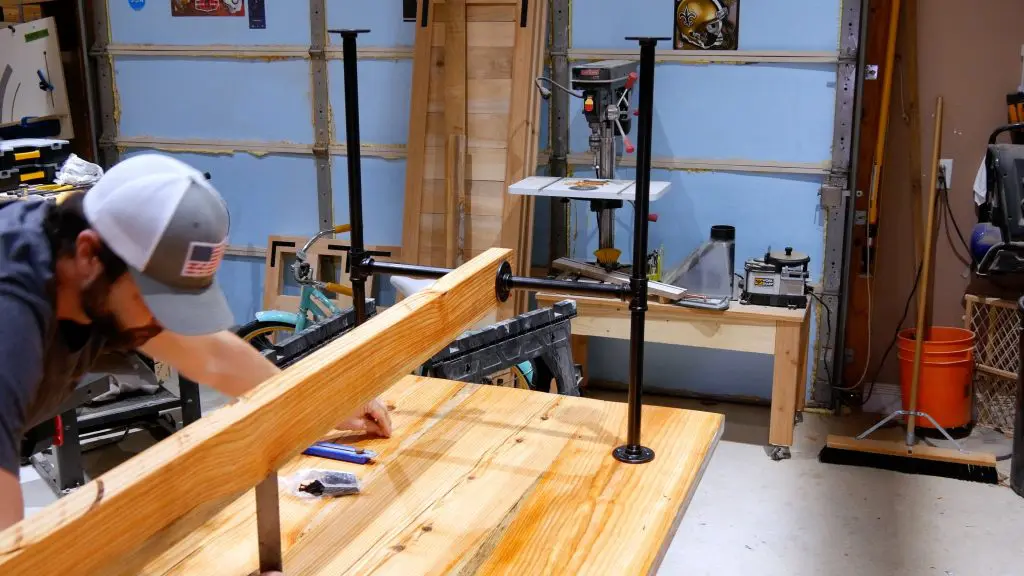
Next, I removed the clamps after the glue dried.
I used my glue scraper to remove excess glue while it was still slightly moist.
Choosing a Joinery Method
Depending on the application, I either use hand cut joinery, a biscuit joiner, pocket holes, or dowels.
I often get asked which joinery method is best and I always respond with the same answer – it depends. It depends on the application.
Of the aforementioned methods, dowels are strongest, biscuits are mid strength, and pocket holes are the weakest.
All joinery methods should be reinforced with wood glue.
Below is the criteria I use for the 3 joinery methods:
- Biscuit Joinery
- Cabinet Faces
- Flat joins of less than ¾” (paneling, etc.)
- Pocket Holes
- Cabinet Carcass
- 90 degree angle joins
- Shop Furniture
- Dowels
- Flat Joins with ¾” or greater thickness
This criteria may not be correct to some woodworkers, but this has served me well over the years.
Remove High Spots
Do you remember the tip I gave you in Step 2 regarding planing and leaving ⅛” in thickness?
This is the point in the project when this tip comes in handy.
There are many different ways to help with warping when clamping during the glue-up, but I always get a tiny bit no matter what precautions I take.
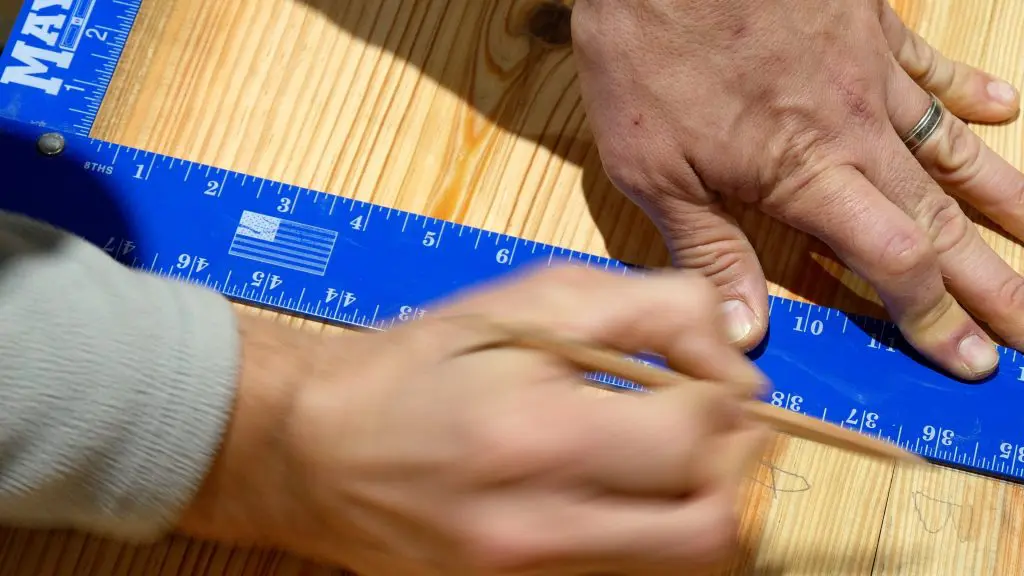
First, I used my straight edge to locate high spots and mark them with a pencil.
Then, I used my low angle jack plane with a toothed blade to remove the high spots.
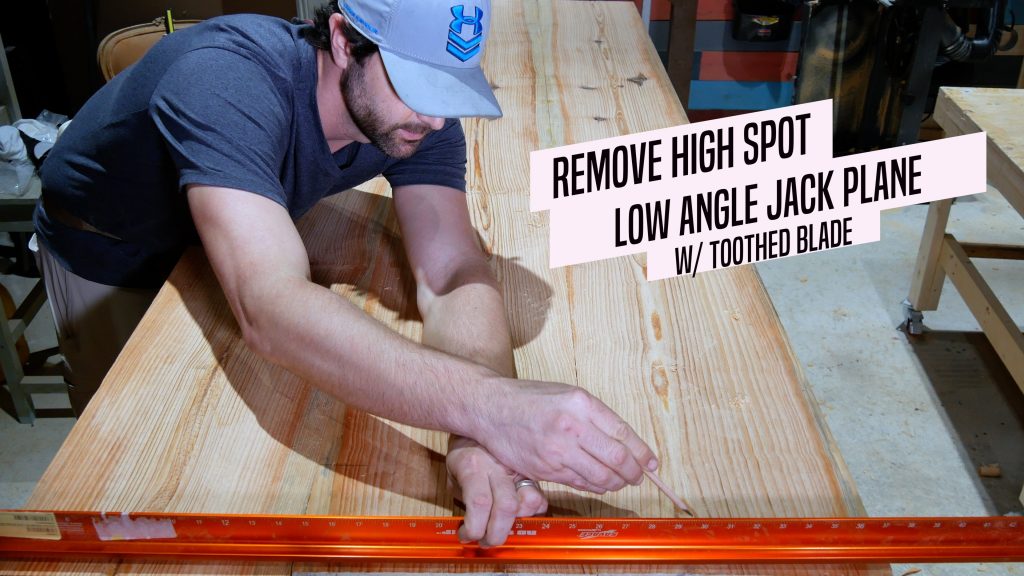


I believe every hobby woodworker needs a nice hand plane and a low angle jack plane is the most versatile hand plane a woodworker can buy.
Each manufacturer normally have options for different blades for different applications.
I used a lie nielsen low angle jack plane with a toothed blade, but a woodriver jack plane works just as well and is much cheaper.
It is crucial to get a flat surface when using epoxy resin, which is why I’m discussing this step in great detail.
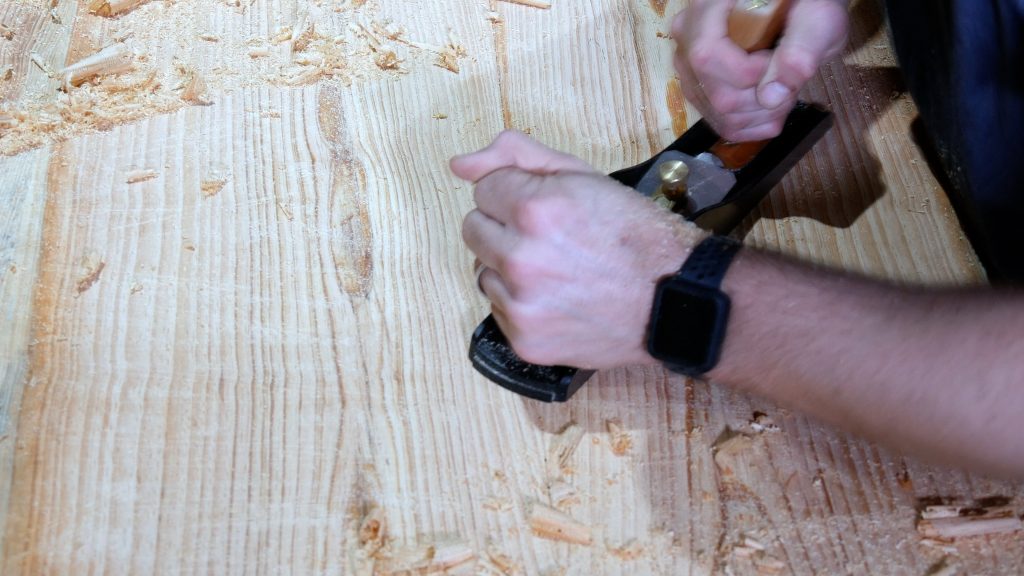
Remove Planer Marks
So, I decided to not use my normal blade for my low angle jack plane to remove the tooth marks caused by the toothed blade.
Instead, I used my Festool FO125 sander to make quick work of removing the teeth marks.
This sander is expensive, but it’s worth EVERY PENNY in my honest opinion.
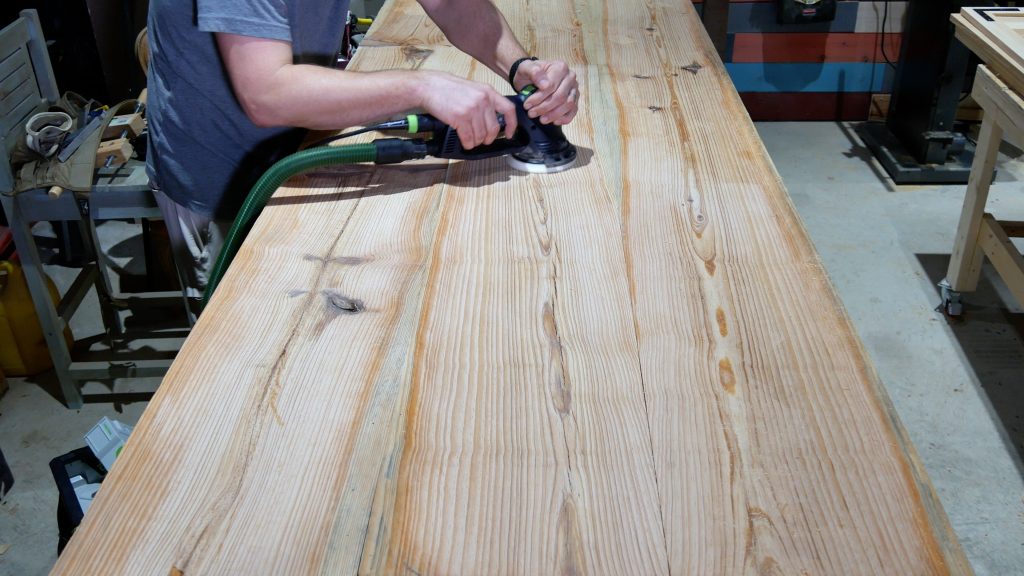

A normal random orbital sander works just as well for this step.
It just may take a bit more time than the Festool takes to get a smooth surface.
I used 80 grit, 120 grit, and 150 grit sandpaper on this step.
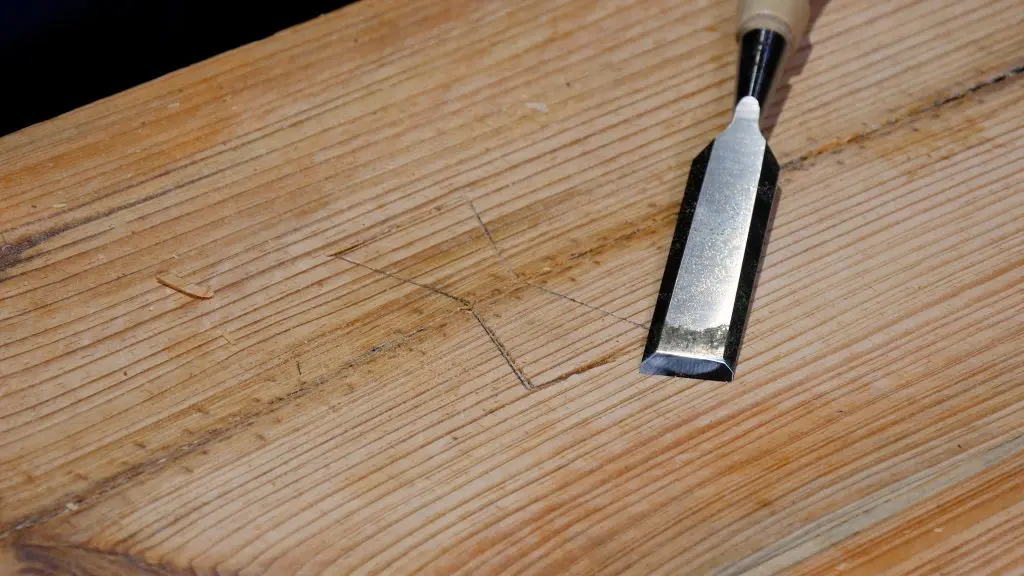
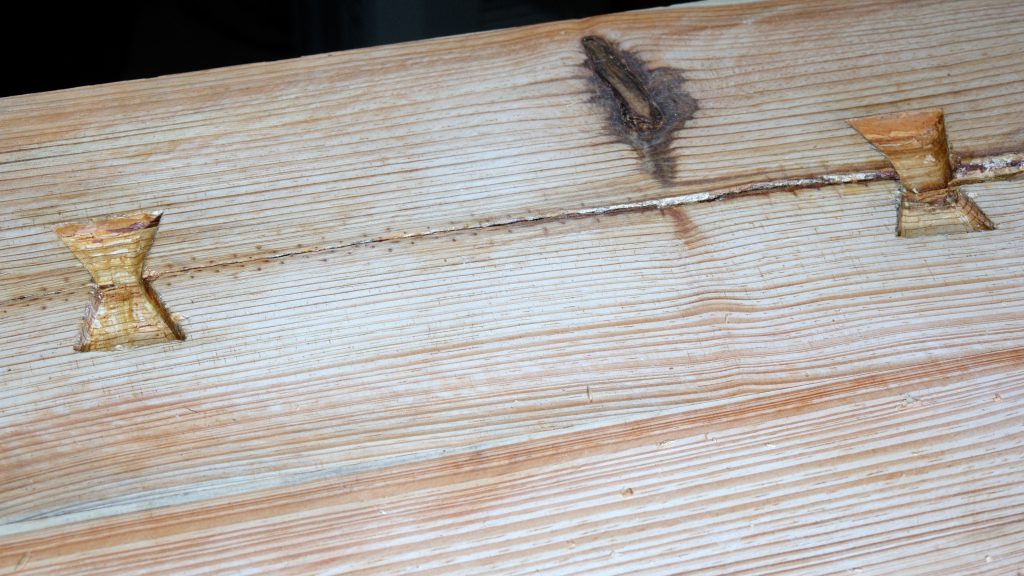
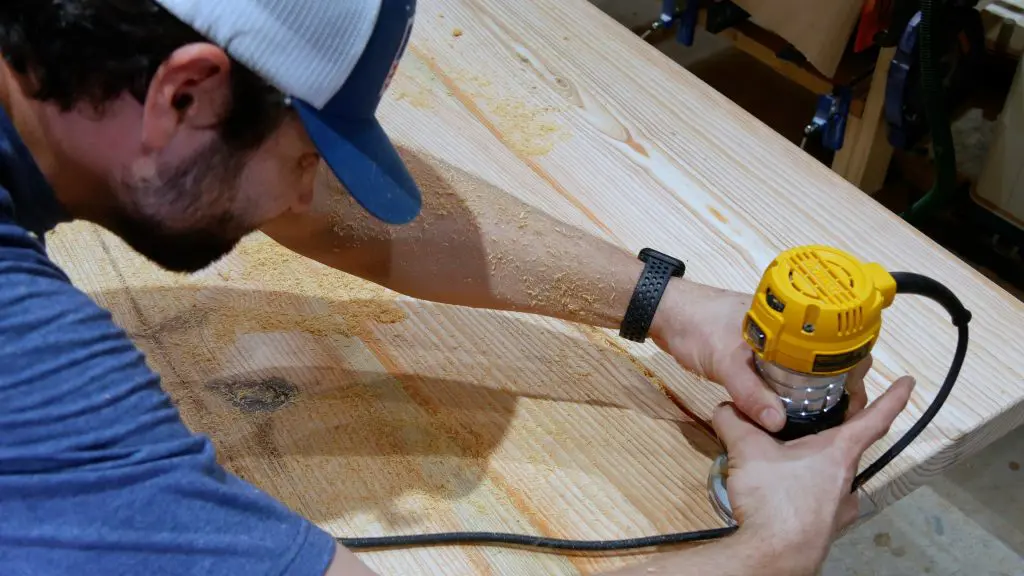
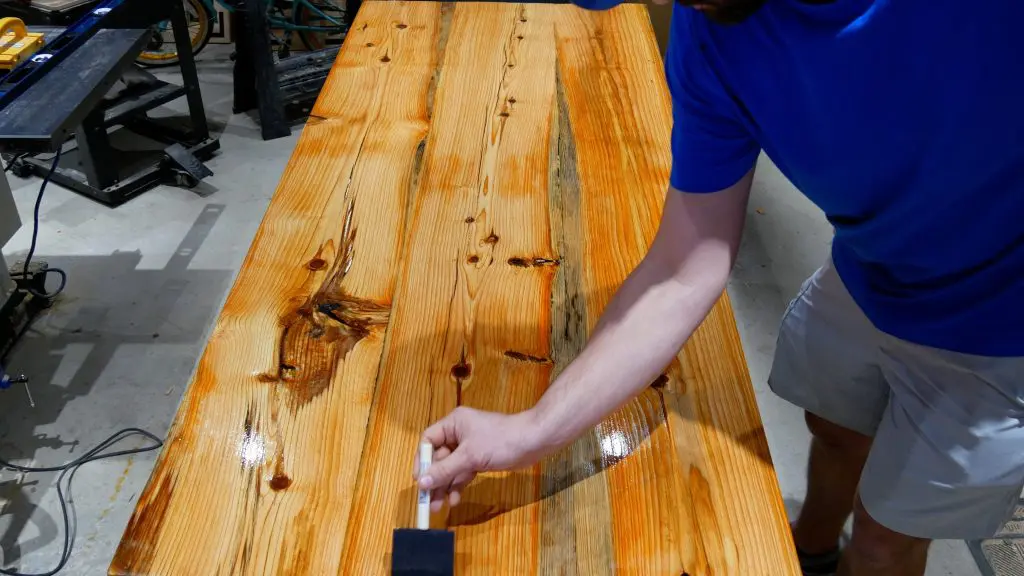
Resin Inlays
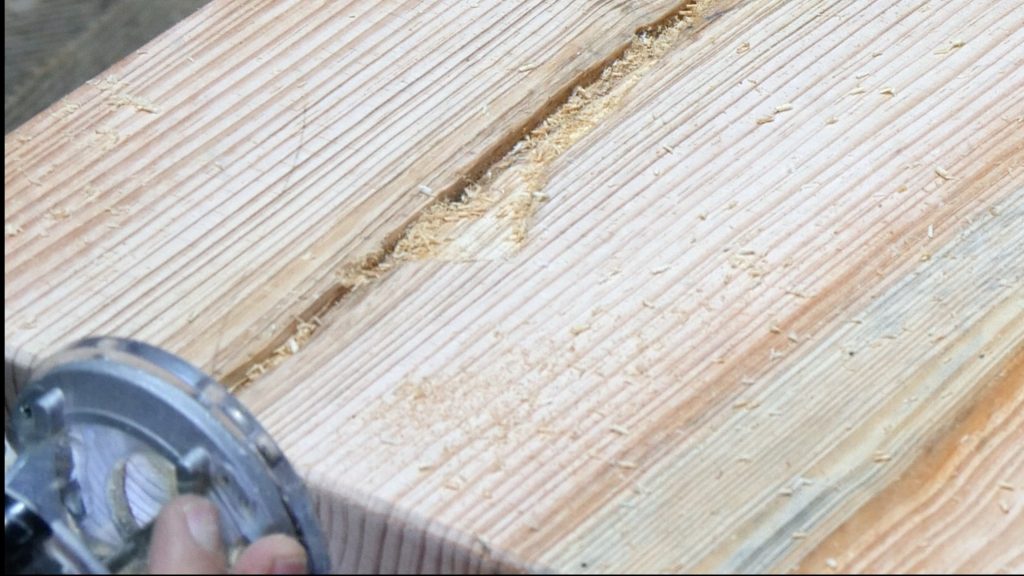
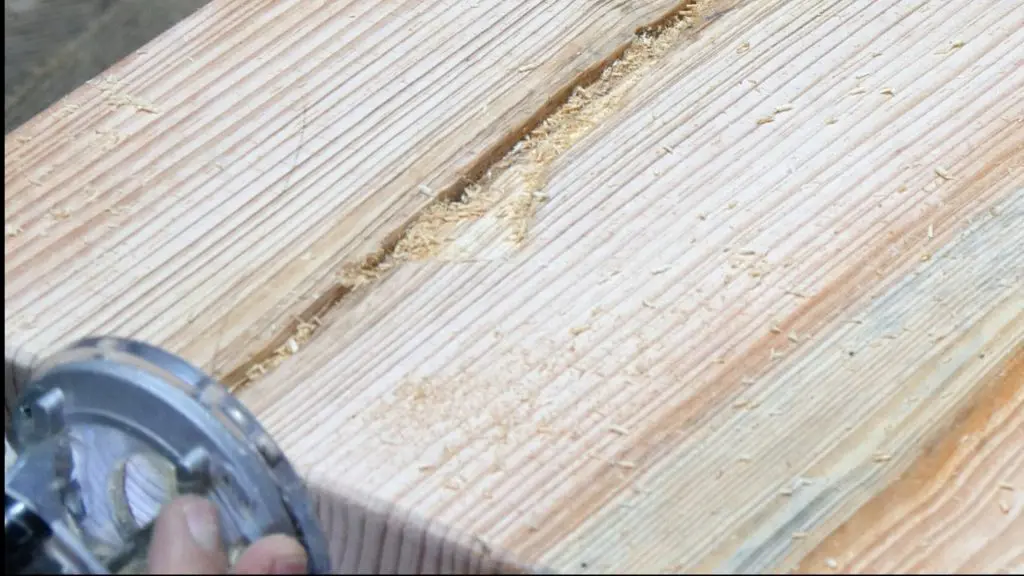
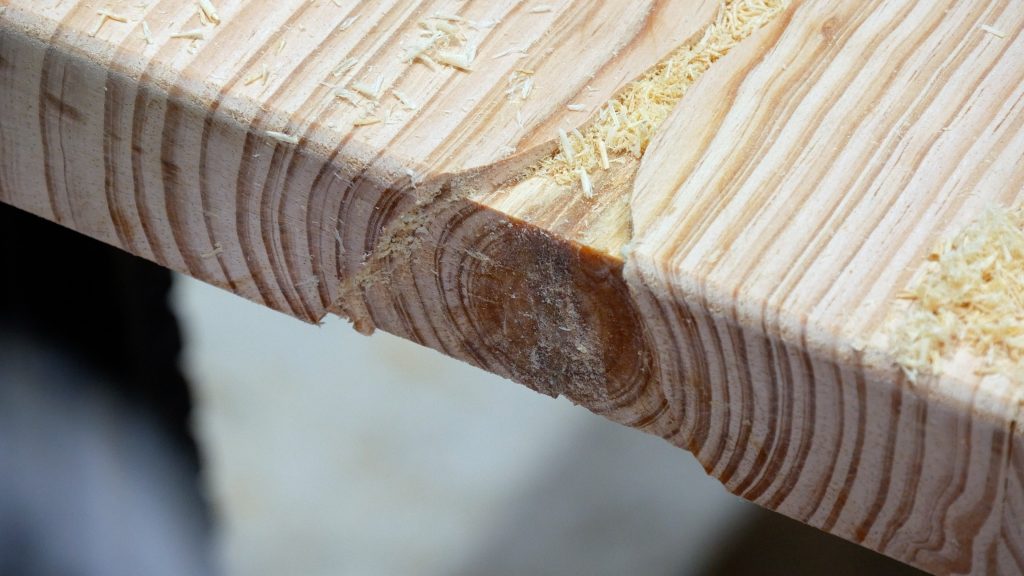
There were many fractures and cracks in the heart pine wood that needed to be secured with resin inlays.
This step can also be done with a plunge router and spiral bit.
I like using spiral bits for the outer edge and a straight bit for the middle.
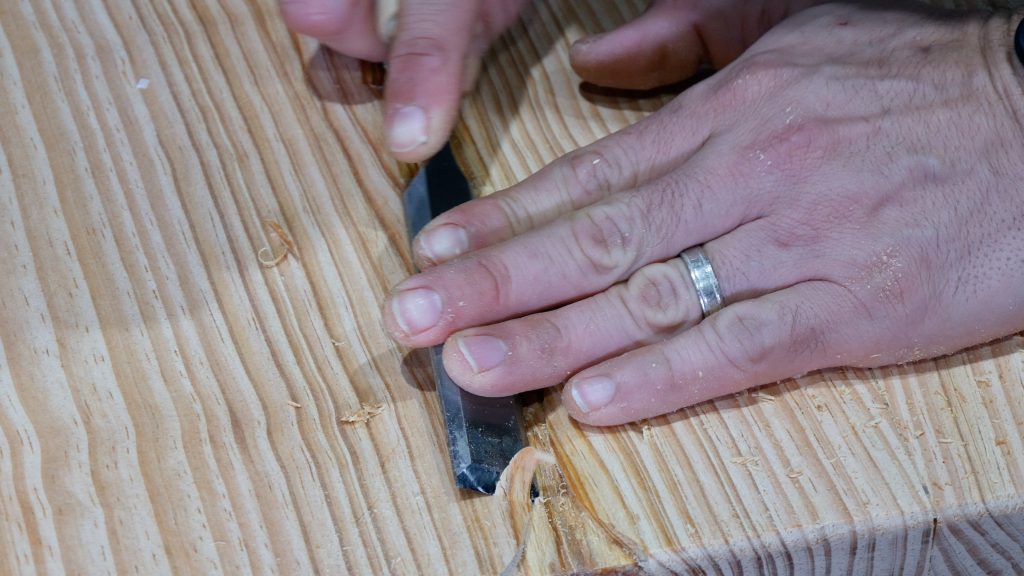
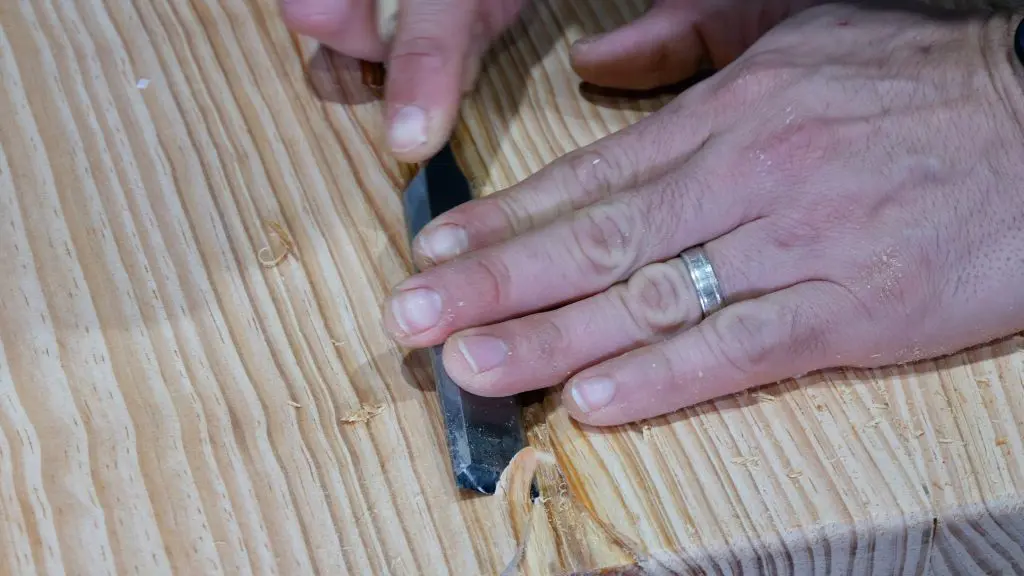
First, I used a pencil to sketch 2 bowties horizontally across the crack.
Next, I used my chisels to carve 2 bowties ¾” deep to secure the crack.
I initially planned to use a wood bowtie, but decided to be a bit more creative.
Pine is relatively soft which made chiseling the bowties easy.
However, pine does splinter so I made sure my chisels were sharp and I took my time.


Resin Inlays in Wood
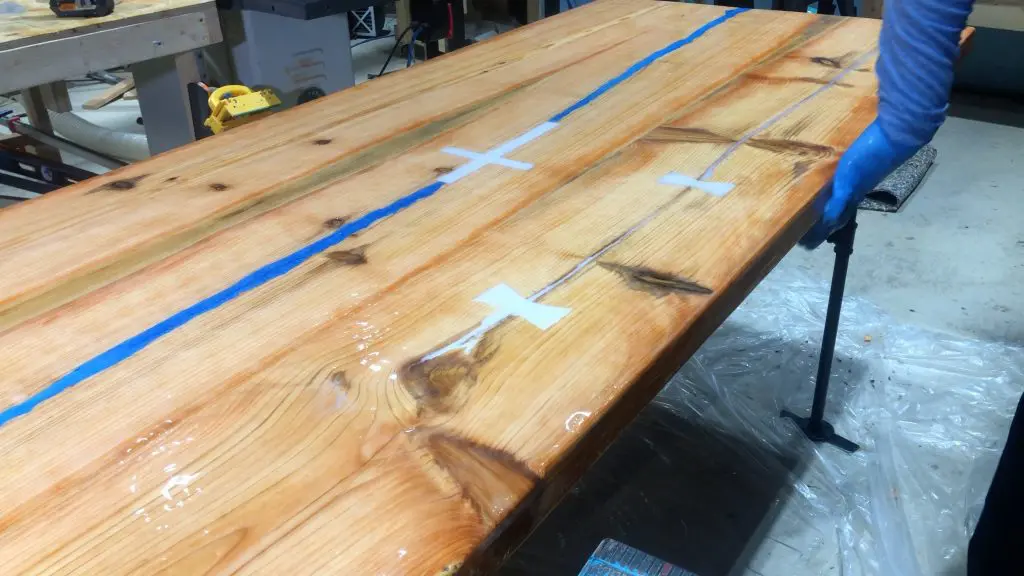
My sister loves her christian church, so I thought it would be nice to include a cross somewhere on the table.
First, I printed a cross and scaled it to 12” long by 8” wide by 1” thick.
Next, I taped it on the middle of the table over a crack that extended the length of the middle board.
Secure Wood Cracks with Resin Inlays
This crack was minor compared to the other one, but it needed to be secured with resin inlays.
I traced the cross on the paper with a pencil using moderate pressure.
This left an outline of the cross on the wood.
So, I removed the paper and used my pencil to darken the outline.
I decided to use my dewalt trim router with the plunge base and a ¾” straight bit to remove the material inside the cross.
Next, I was careful not to get too close to the line.
I removed ⅛” of material with 4 passes which equals ½”.
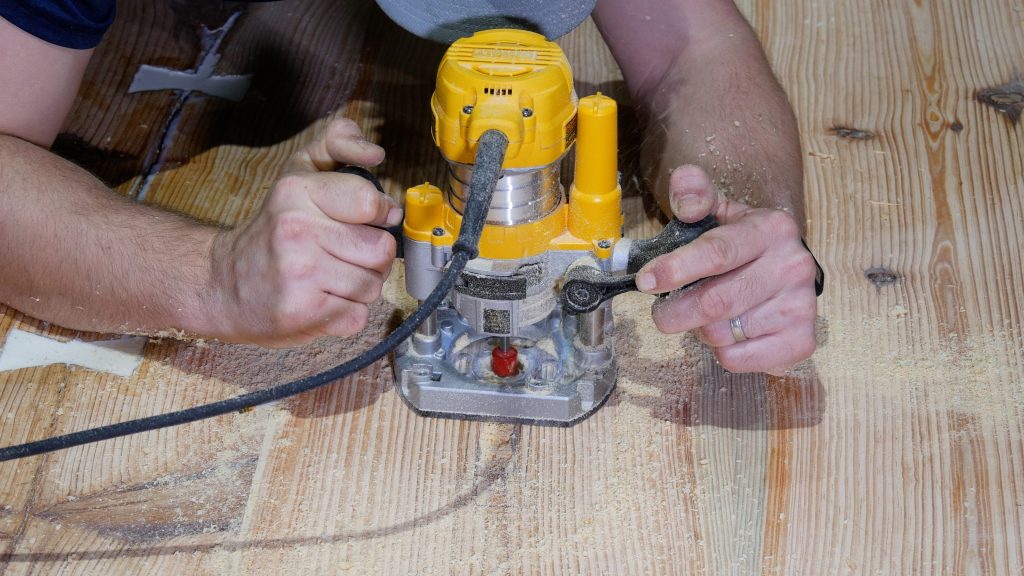

Then, I used my chisels and removed the outer edge.


Resin Inlay Pour
I used ProMarine table top epoxy resin for the resin inlays in this rustic dining table.
You can use whatever type of epoxy resin you wish. However, you MUST follow the manufacturer’s instructions precisely.
Each manufacturer uses a different formula, which causes mixing, drying times, etc. to be different.
I cannot express this enough – 99.9% of the emails I receive from people with problems originate from not following the instructions.
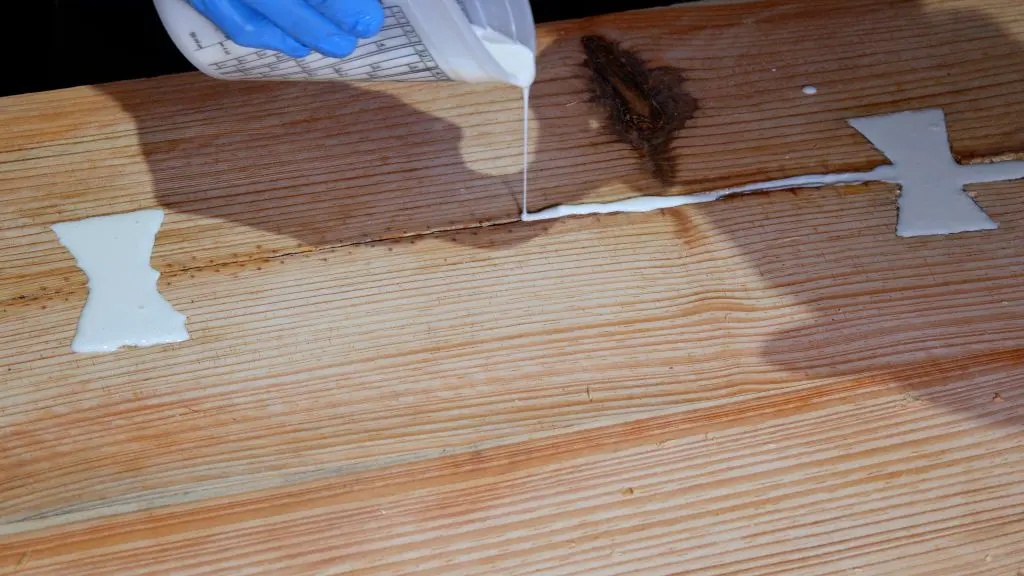
Bowtie Resin Inlays
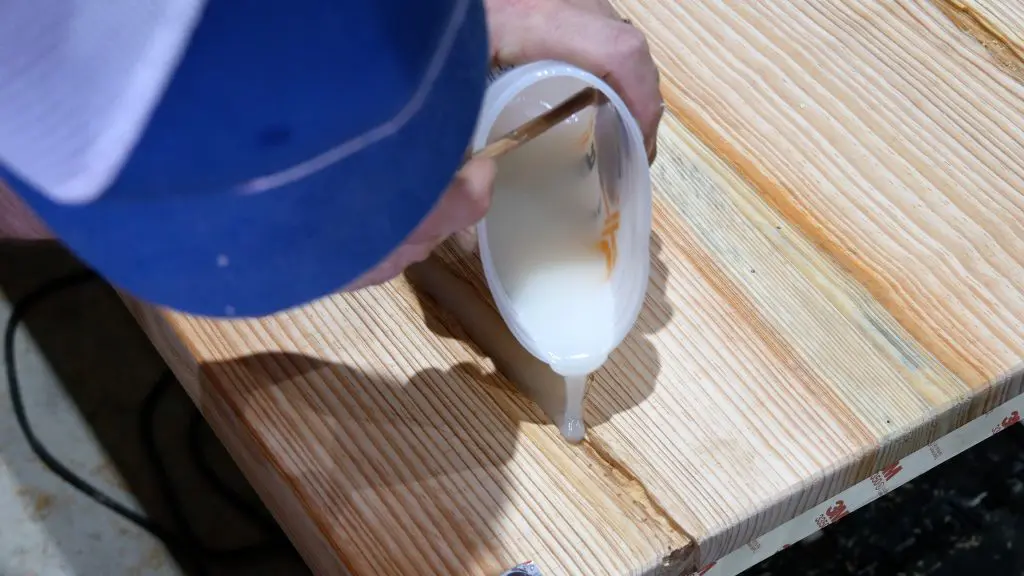
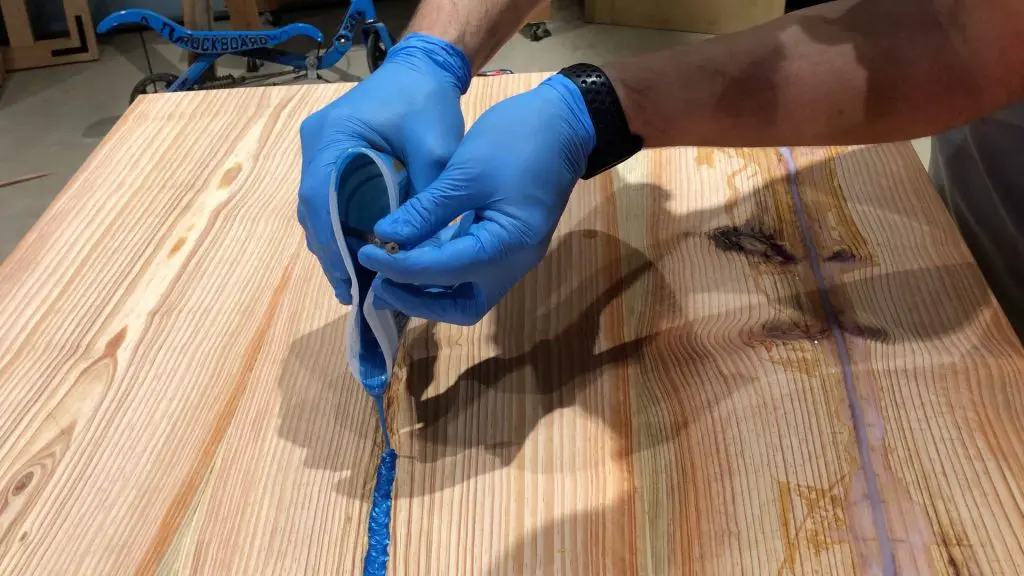
First, I mixed 8 total ounces of epoxy resin to fill the bowtie resin inlays.
Next, I mixed a very small amount (small pinch) of white pigment powder and glow powder.
Then, I stirred until the powder was completely dissolved in the epoxy resin.
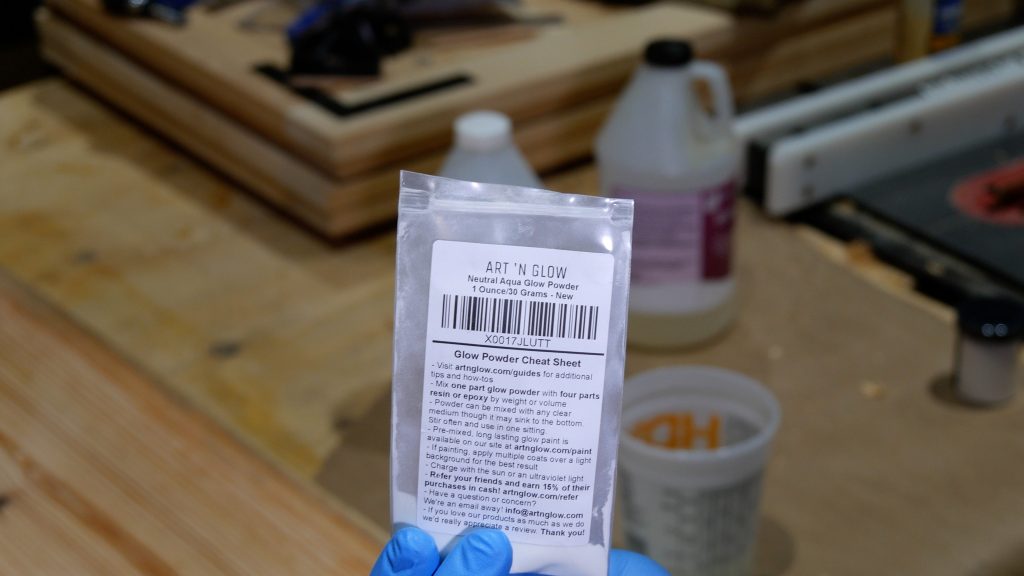
Below is the picture of glow powder I used and the links to each:
Glow Powder for Resin
White Pigment Powder

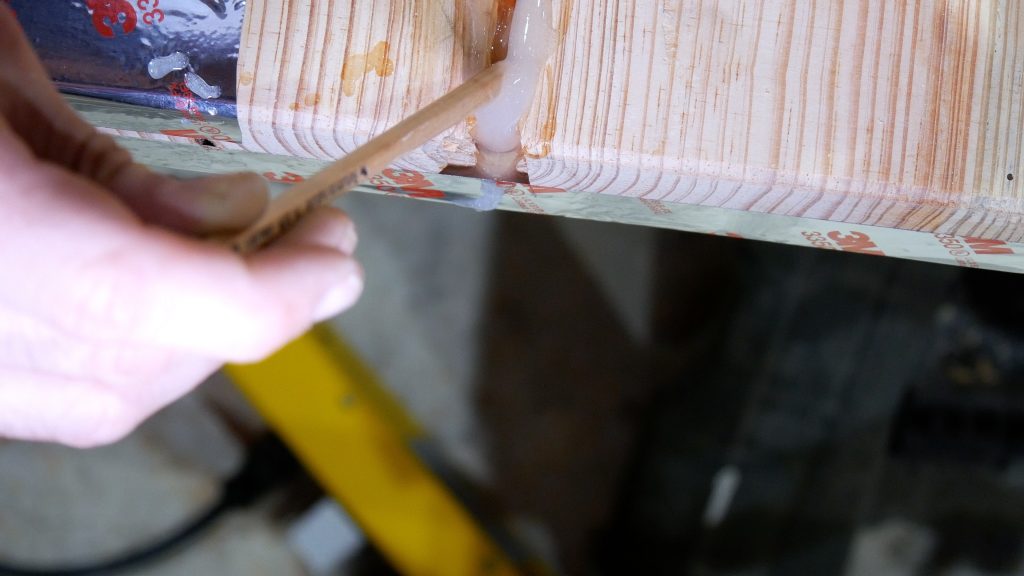
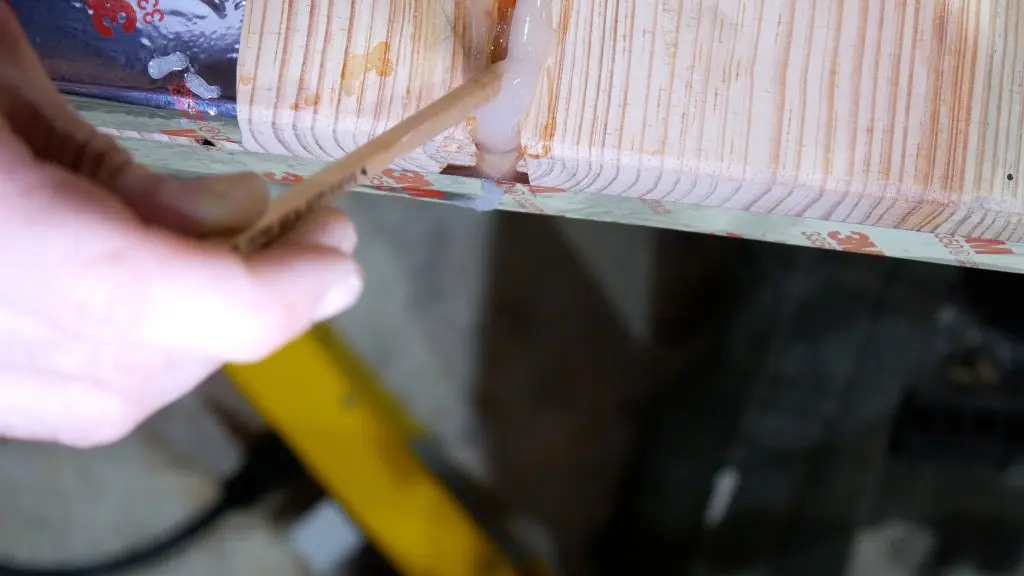
Then, I slowly poured the epoxy resin inlay bowties for the rustic dining table.

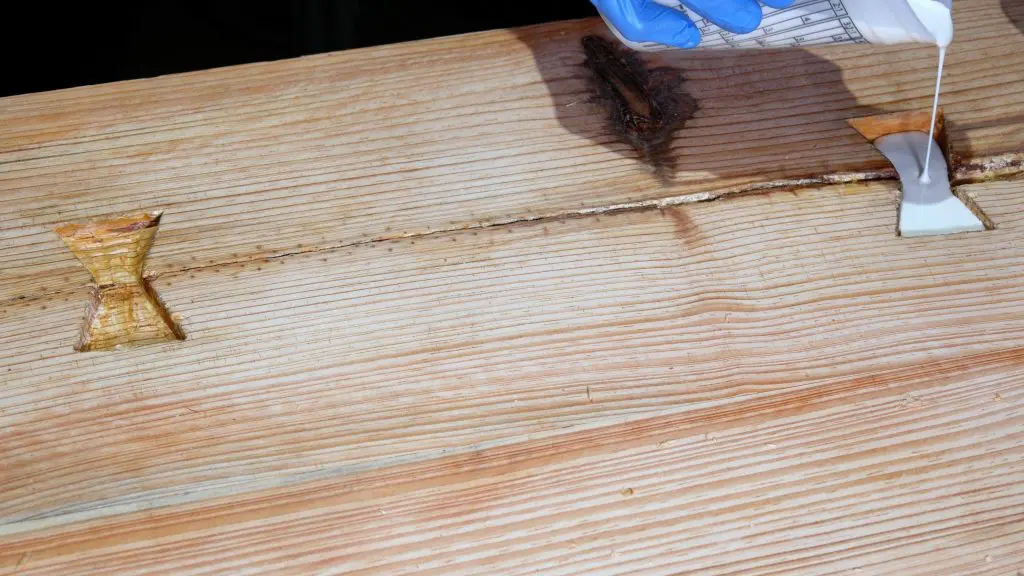
I quickly realized I forgot to tape the underside of the cracks with HVAC tape.
Luckily, I was able to tape the underside of the table in time because no resin seeped through the underside.
Also, I taped the underside of the cross and other voids during this step.
Then, I proceeded with the resin pour.
Slowly, I filled the inlays and the crack until it was just above the edge.
I used my mini torch to pop bubbles and waited for a few minutes to see if the resin would sink.
The resin sunk a tiny bit, so I added more resin to the same level as before and popped the bubbles.
I continued to pop bubbles every 2 minutes for 10 minutes.

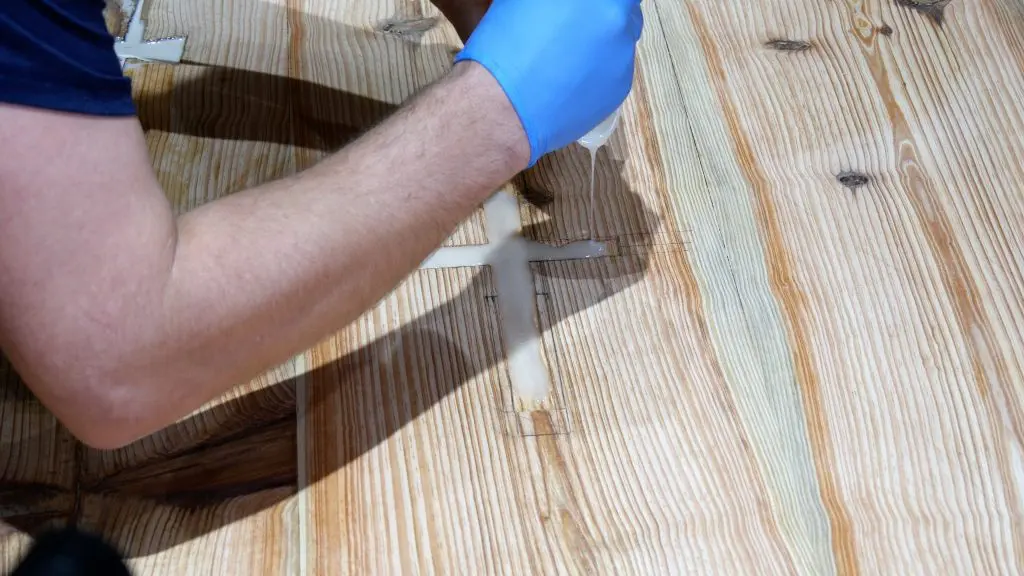
Resin for Cross
First, I mixed another 8 ounces of epoxy resin with 1 ounce of glow powder. I decided to not use white pigment for the cross because I didn’t like how it looked on the bowties.

Epoxy Resin River
The following day after the resin for the bowtie and the cross cured, I just felt it needed more.
Then, I stared at the table for a moment and couldn’t help but picture a river flowing from the top and bottom of the cross to the end of the table.
I thought to myself, “Maybe, I can name the table ‘River of Life’ or ‘All Rivers flow through him’.
People would probably think I did that on purpose.
For further justification, as if I needed any, a very small fracture ran the length of the middle board.
Also, there was a small fracture from the bottom of the bowtie to the end of that board.
Needless to say, both of these were minor and didn’t need to be secured.
However, I certainly used it as justification to do what I wanted to do.
Use Router to Create River
Next, I grabbed my trim router with my spiral bit and started routing.
I started with the river for the cross.
Also, I found the crack at each end of the table and routed a river from the end of the table to the tip of the cross.
Furthermore, I intentionally made the river crooked – narrow in some places and wide in other places.
The depth is ¼” deep.

A traditional river table normally has 2 separate boards not joined together with epoxy resin in the middle.
In order to create the illusion of a river table, I routed down each end of the table as depicted in the picture below.
Determine Width of River
I chose to make the river wider at the end, but this is optional.
Be creative with this step because there is no right or wrong way to do this.

Next, I used my chisel to slope the sides of the river a bit instead of having the steep edge from the router bit.
This just seemed like a logical thing to do, but probably didn’t provide any real value.
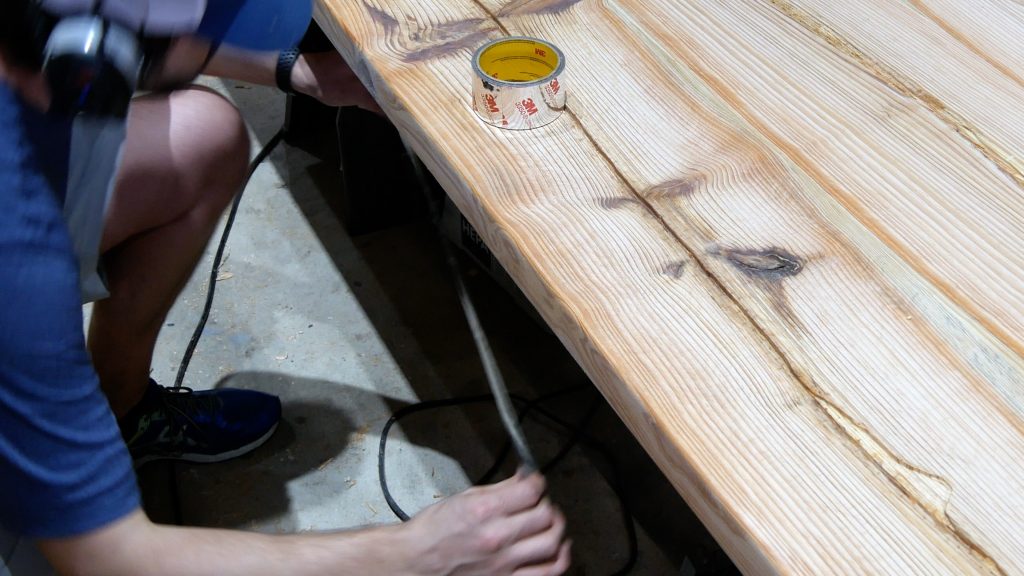
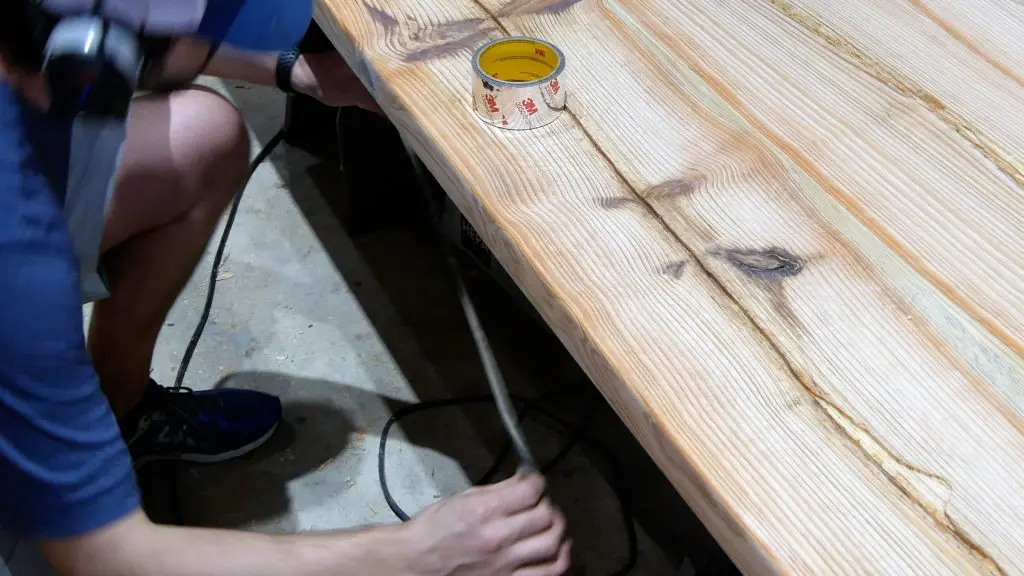
Preparation for Resin River Pour
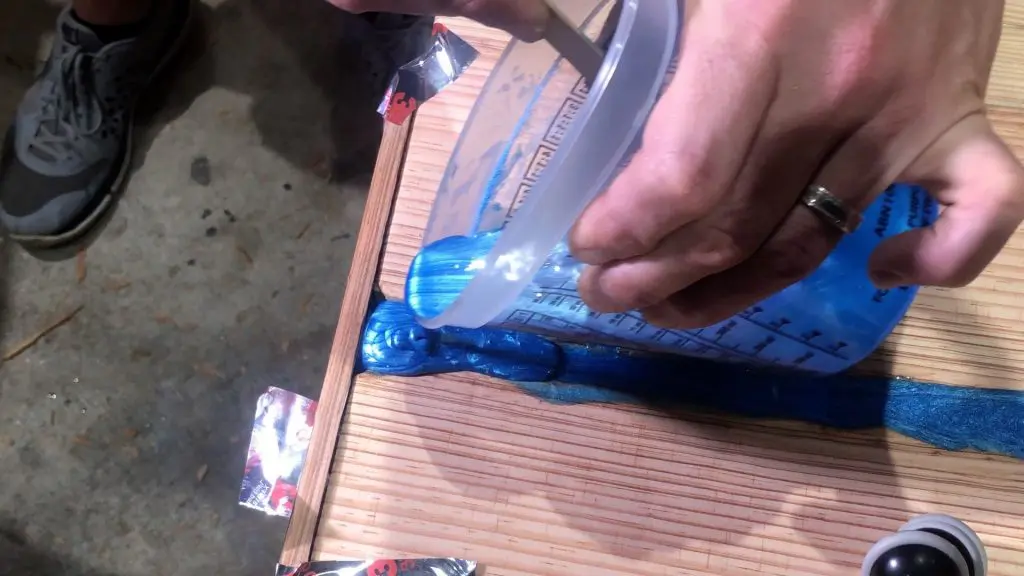
First, I taped the underside of the table in preparation for the resin pour just in case it made it’s way through the table.
Next, I made a ‘river dam’ to stop the resin from falling off the end of the table at each side.
I simply used CA glue with activator to glue to small boards at a 90 degree angle.
Then, I covered it with HVAC tape and attached it each end of the table with 2 brad nails.
I used brad nails because I ran out of hot glue (i.e. lack of proper planning).
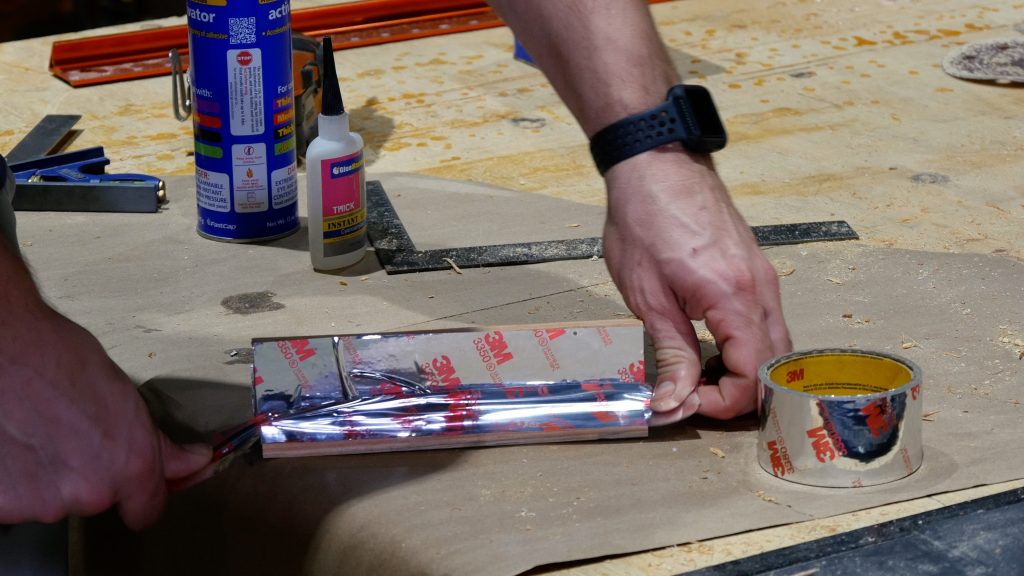

After I attached the 90 degree board to the table, I sealed each side and the bottom with a few pieces of HVAC tape.
Also, I taped the top and bottom of the cross with HVAC tape.
Fill Middle Resin Inlay
It is time to pour epoxy resin into the river extending from each end of the cross and from the end of the bowties.
Resin Problem
The next day after the resin completely cured, I realized I completely forgot to mix glow powder into the epoxy resin for the bowties.
Since I didn’t care for the opaque white color anyway, I decided to remove the resin from the bowties and re-apply.
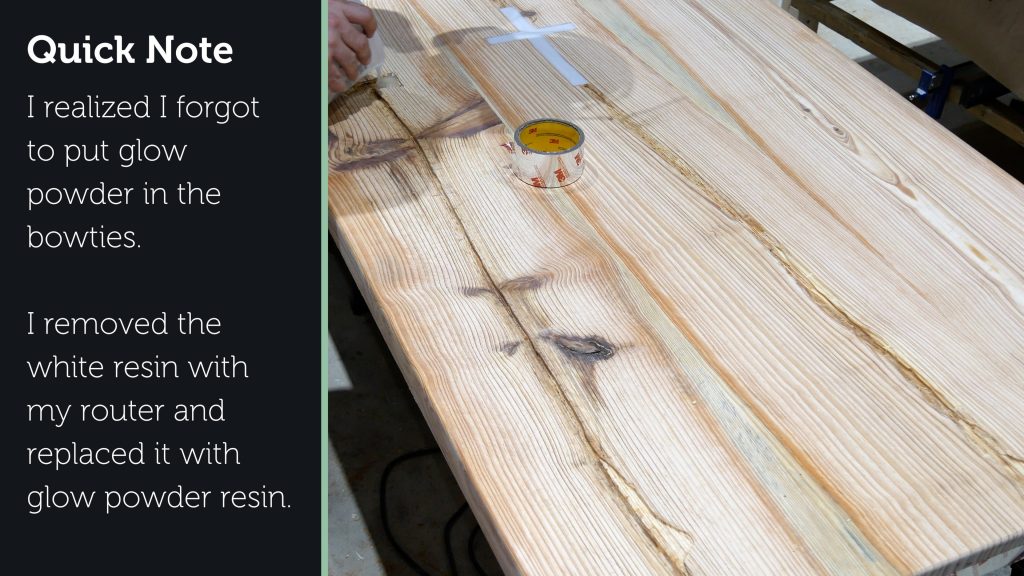

So, I used my trim router with a spiral bit to remove the resin very carefully.
Next, I mixed 8 ounces of epoxy resin with glow powder as I did for the cross and filled the bowties.
Extend Resin Inlay
For the river extending from each bowtie, I mixed 8 ounces of epoxy resin with 1 ounce of glow powder and mixed as I did before.
Before I poured the resin, I secured the end of the river with a piece of tape.
This was smaller than the river extending from the cross, so I didn’t need to build a river dam.
I slowly poured the resin in the epoxy river glow in the dark table and watched it closely as the resin dropped over the side into the tape.
The tape held the resin without leaking perfectly fine.

Resin River Cross
Next, I decided to make the river from each end of the cross a special color.
I mixed 10 ounces of epoxy resin with blue metallic pigment powder.
The blue metallic pigment powder is very strong and you should need much.
Simply pour in a tiny pinch, mix, and add more if needed.
Remember, you can always add more but you can’t remove any if you add too much.
The metallic pigment powder really made the river look awesome.


Ultimately, the river dam I made worked perfectly with no leaks.
Remove Resin Mold
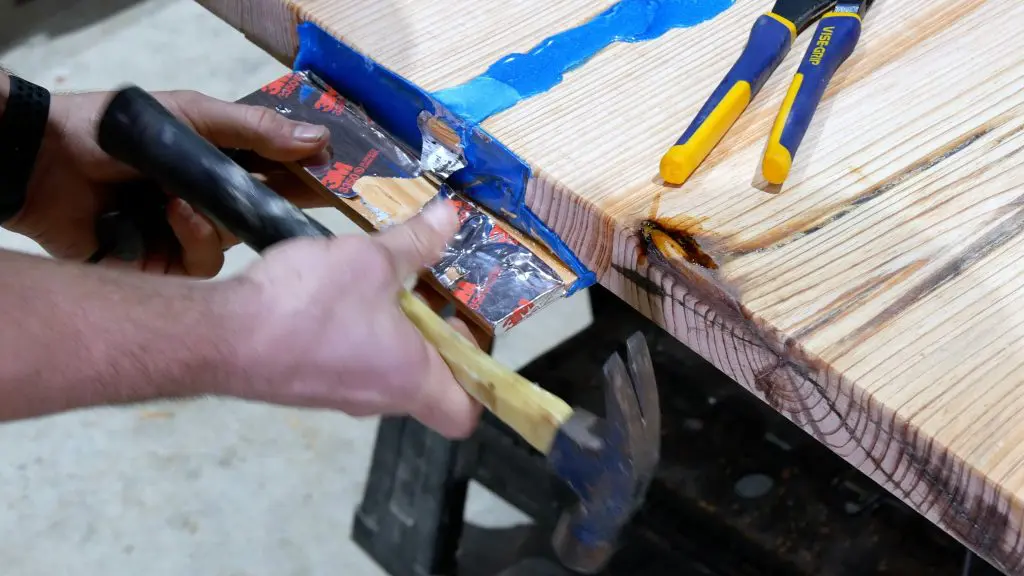
After the epoxy resin cured for 24 hours, I removed the river molds and tape above and below the cross.
Thankfully, it came off with relative ease.
Next, I gently tapped a pry bar with my hammer to get it started and it peeled off with ease.
Then, I used a pair of pliers to remove the 2 brad nails.

Trim Table to Final Dimension
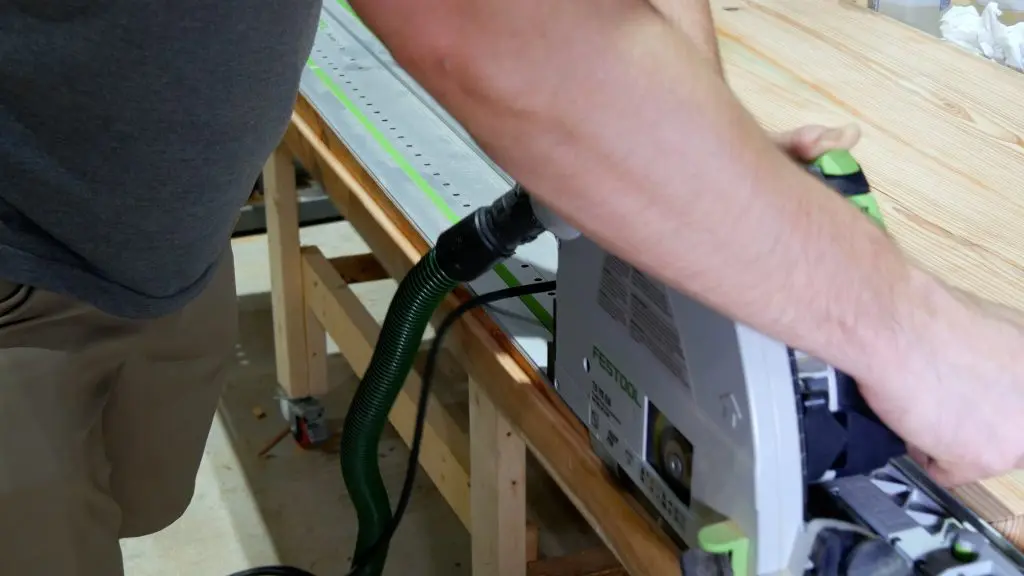
First, I used my festool track saw to trim both ends and both sides of the epoxy river glow in the dark table to the final dimensions.

Next, I used my trim router with a ½” roundover bit to round the edges of the rustic table.
An orbital sander and circular saw are alternate tools that can be used to complete this step.

Sanding Table Top
I sanded the table with 60 grit, 80 grit, 100 grit, 120 grit, 150 grit, 180 grit, 220 grit, and 320 grit sandpaper.

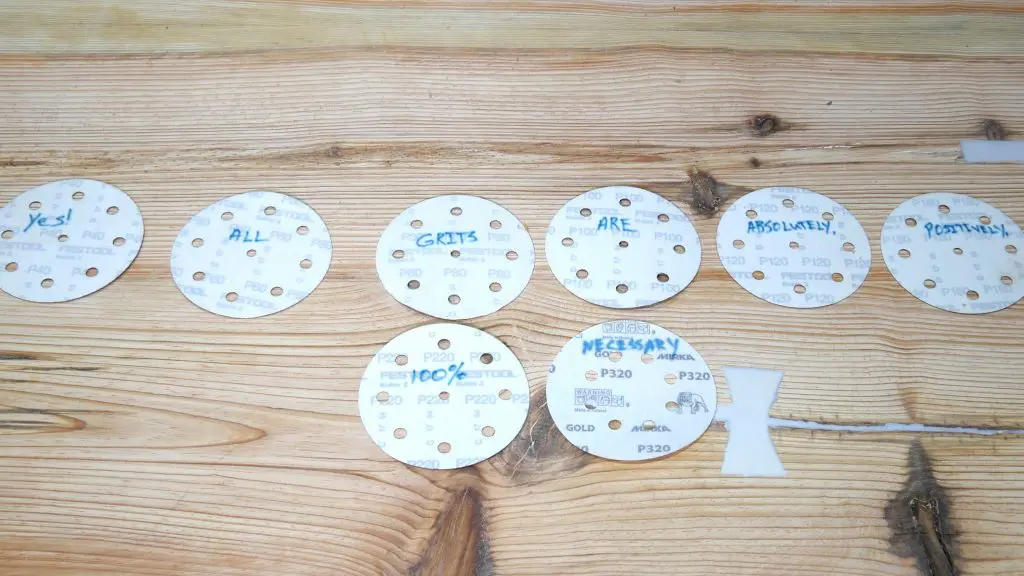
Often times, people tell me each grit is unnecessary; however, I learned this isn’t entirely true.
If I want a smooth, nice surface each grit is necessary. On the other hand, I skip every other grit if I don’t care that much about a perfect finish.

Finish Underside of Table
I decided to finish the underside of this table as if it were going to be the table top.
I wanted to finish the underside of the table to give my sister the option to flip the table over if she chooses to do so.
This certainly added extra work to this project as I normally don’t finish the underside of the tables I build.
I flipped the table over and removed the tape from a previous step.
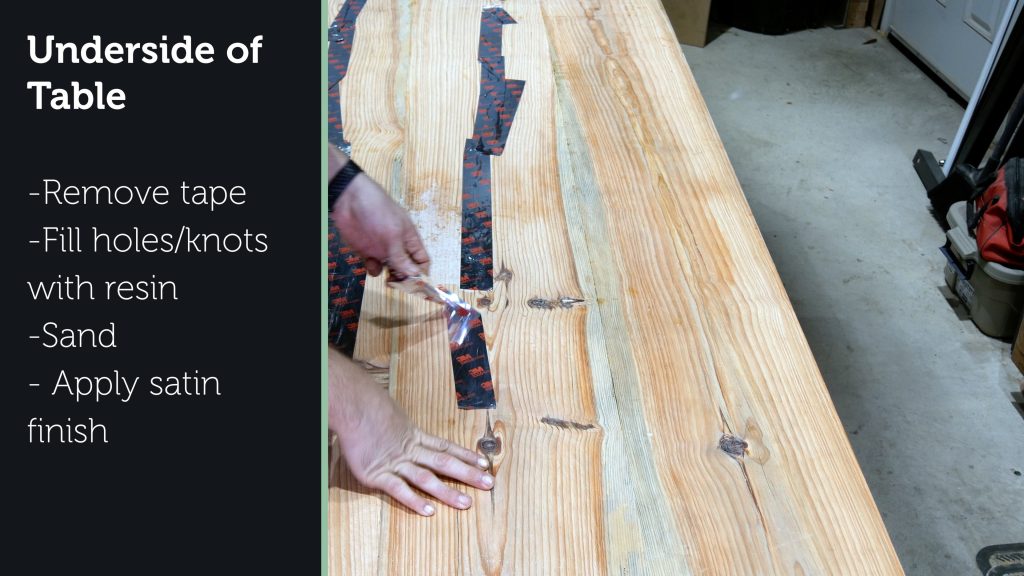
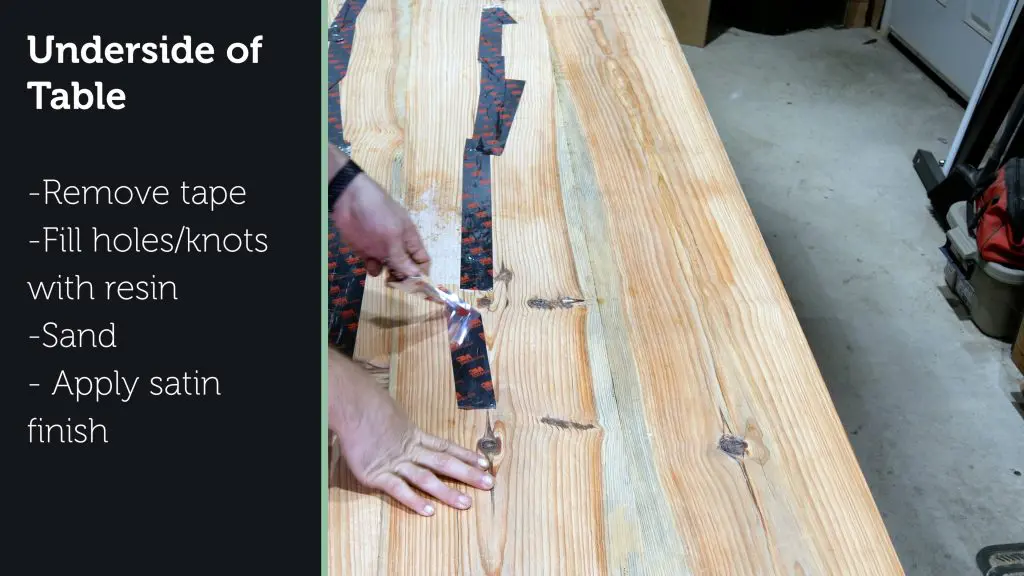
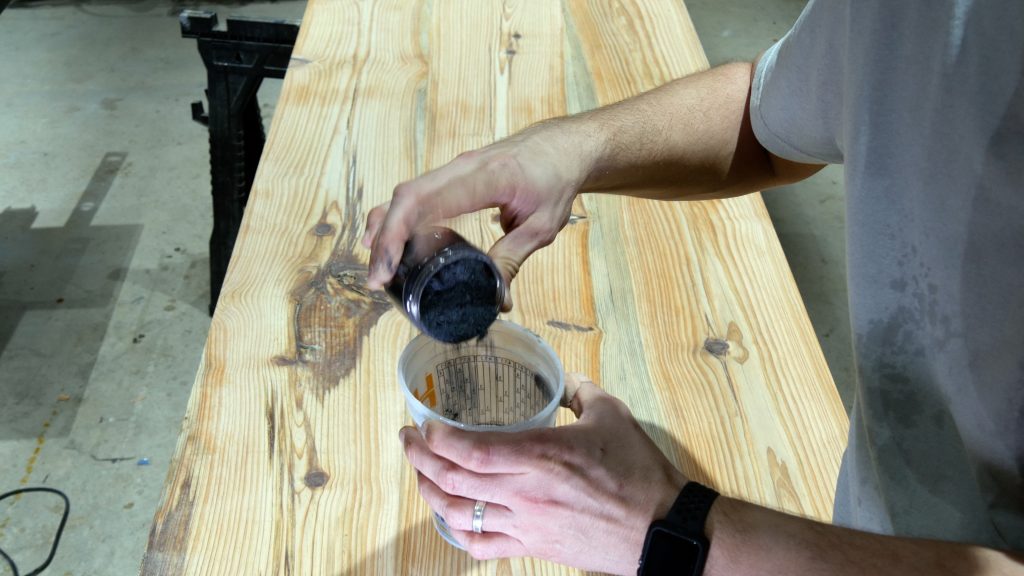
Fill Knots on Underside
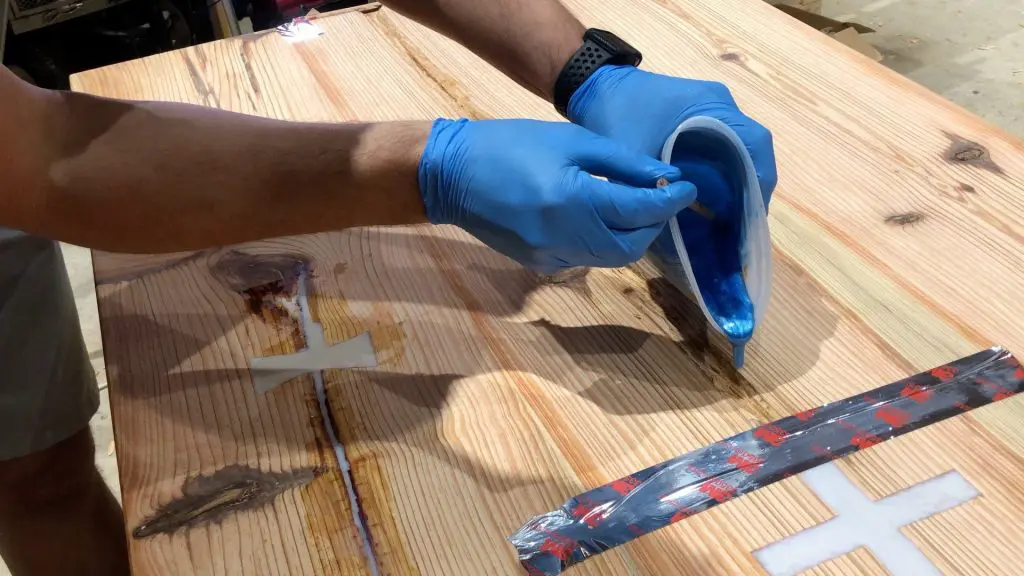
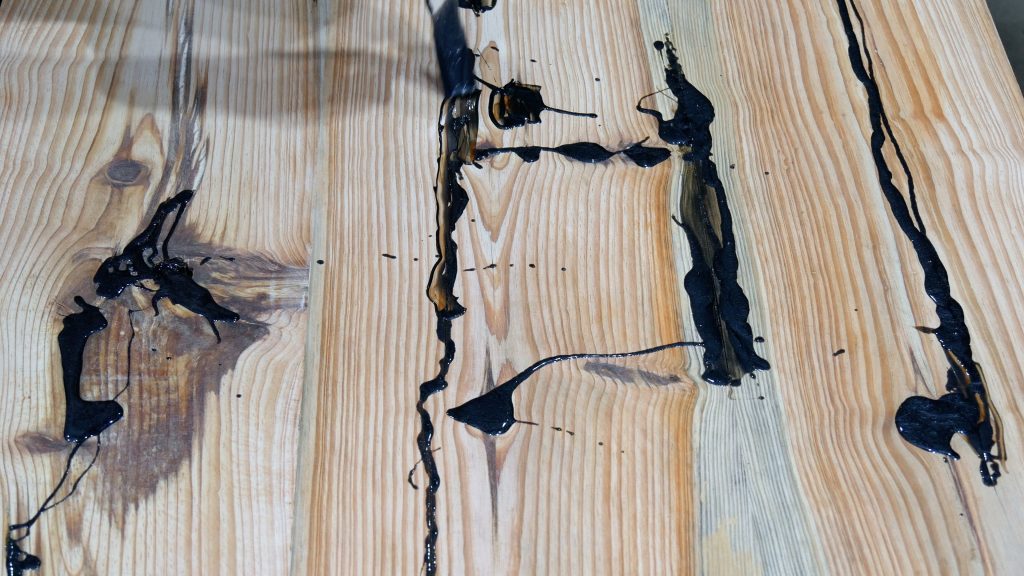
Next, I mixed 8 ounces of epoxy resin with black pigment powder to fill all cracks, knots, and imperfections.
Since the wood for this rustic table was reclaimed and old, I knew it could potentially leak resin through the top when it came time for me to apply a finish to the bottom of the table.


This process was relatively easy.
I used a stirring stick and dripped resin into each knot and imperfection in the wood.
Instead of using my mini torch to pop the bubbles, I used my heat gun to move the material.
If the material sank into the wood, I would put a little more. I did this for roughly 15 minutes.
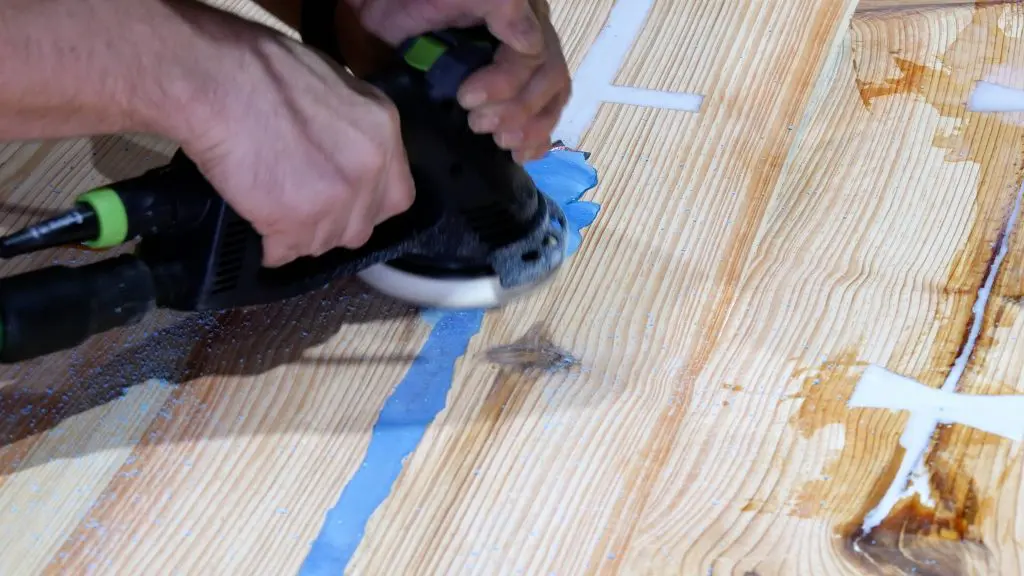
Then, I sanded the underside of the table with all grits I mentioned above using my festool RO125 sander.
The excess black resin was easy to remove with the lower grit sandpaper and the higher grit sandpaper made for a smooth surface.
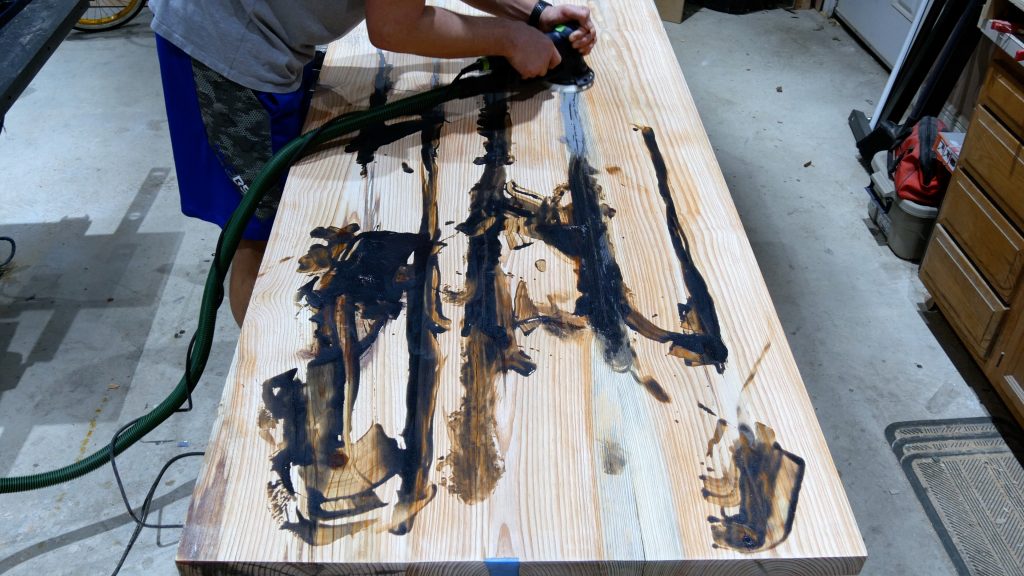

Next, I used a tack cloth to remove the debris from the table.

Then, I applied a satin finish to the underside of the table with a foam brush.
I used General Finishes Water-Based Topcoat, which is a great finish to use.

After the first coat dried, I hand sanded using 1000 grit sandpaper.
I applied the second coat of finish and let it sit overnight.
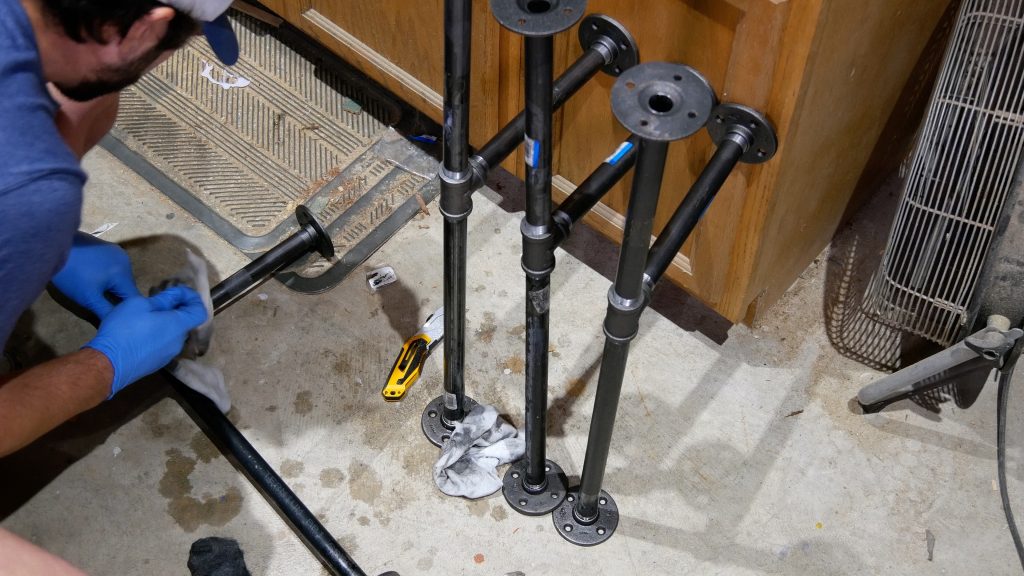
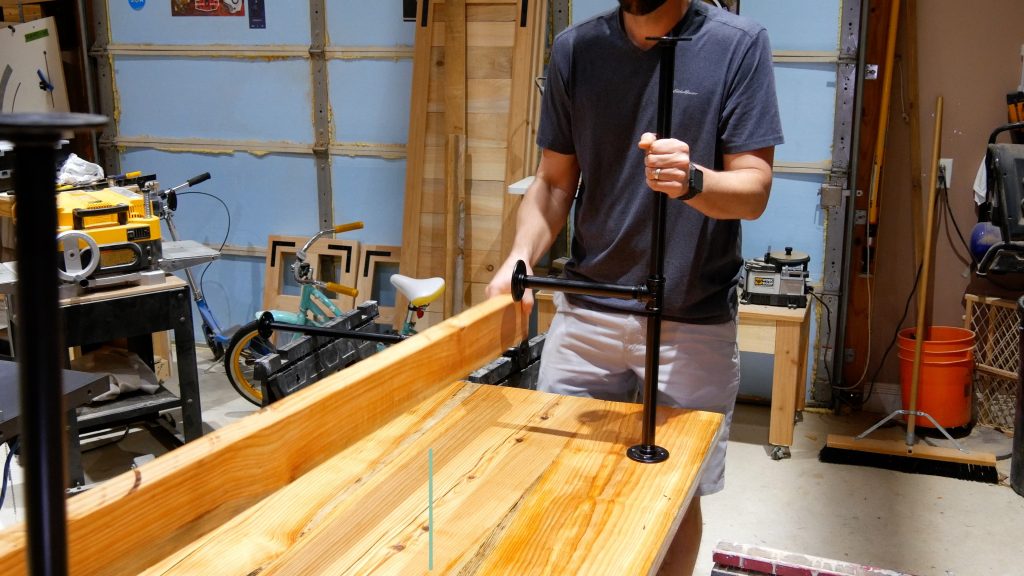
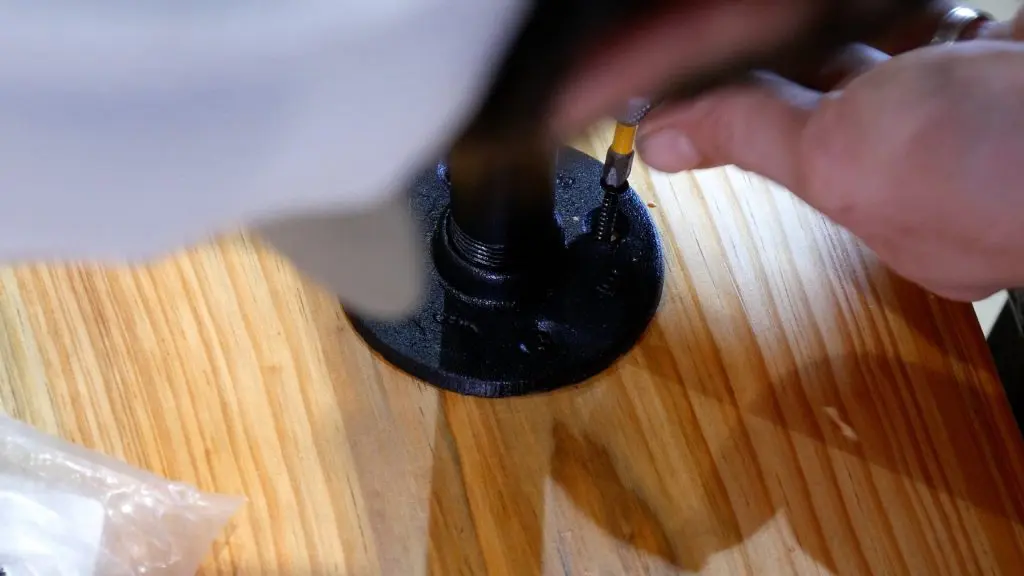
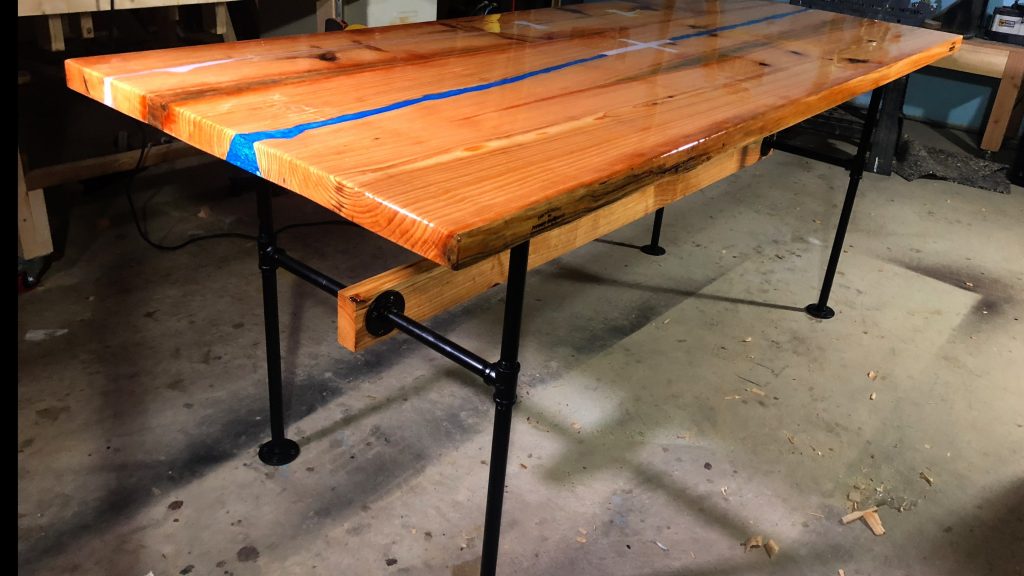
Assemble Black Pipe Table Base
While the last coat of finish was drying on the underside of the table, it was time to assemble the table base.
For the table base, I used black pipe legs to add an industrial look to the table.
The stickers and tape on these legs are a PAIN to remove.
So, the formula that worked best for me to remove the stickers/tape was acetone and a razor blade.
After the stickers were removed, I used acetone to clean the grime/grease from the table legs.
Below is a copy of my receipt from The Home Depot with the exact part numbers and size.
In summary, there are 3 flanges, 3 bars (10”, 12”, 18”), and 1 3-way adapter per leg.
The 18” bar connects to the floor flange and 3-way adapter.
The 10” bar connects to the table runner and 3-way adapter. As you can see, the 12” bar connects to the table and 3-way adapter.
I firmly tightened each leg together by hand.
Obviously, I like using the floor flange at each end of pipe tables because it provides flexibility for table leveling if needed.
Loosen the floor flange to raise the table on that end. Tighten the floor flange to lower the table on that end.
Paint Black Pipe Table Legs
First, I painted the pipe legs outside with black satin Rustoleum spray paint.
Note, it is easier to paint the pipe legs after assembly.
I laid them down on a piece of plywood and lightly painted them with sweeping motions.
Then, I put 3 thin coats of paint on them.
Remember, 3 light coats is better than 1 or 2 thick coats.
Attach Table Base Runner
I built the black pipe table base to incorporate a piece of heart pine I cut from an extra wide piece I used for the table top.
The size of this piece was roughly the size of a dimensional 2×4 (2 full inches x 4 full inches, not 1.5”x3.5”) and 60” long.

In order to attach the flange to the table runner, I measured 1” from the end of the runner, 1” from the top, and 1” from the bottom of the runner.
Next, I used an F-clamp to hold the runner in place.
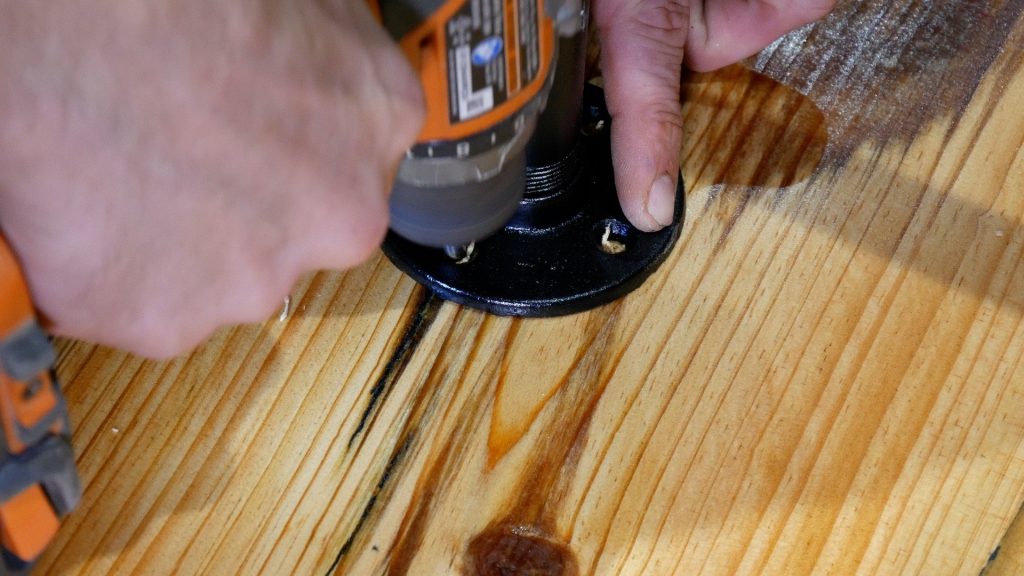
I drilled a pilot hole and used 1” black screws to secure it.
Then, I repeated this process for all 4 flanges that connected to the runner.

Attach Table Base to Table
Once the runner was secured to the pipe legs, I found the center of the epoxy river glow in the dark table and the center of the runner.
First, I lined them up using a right angle.
This verified this was center by verifying the distance from each flange to the side and end of the table.
Next, I drilled pilot holes in the table and used 1” black screws to secure it.


Then, I carefully flipped the table over.
I forgot to mention earlier place a soft towel or mat down to protect the table top from scratches.
It wouldn’t be fun to sand the table again.

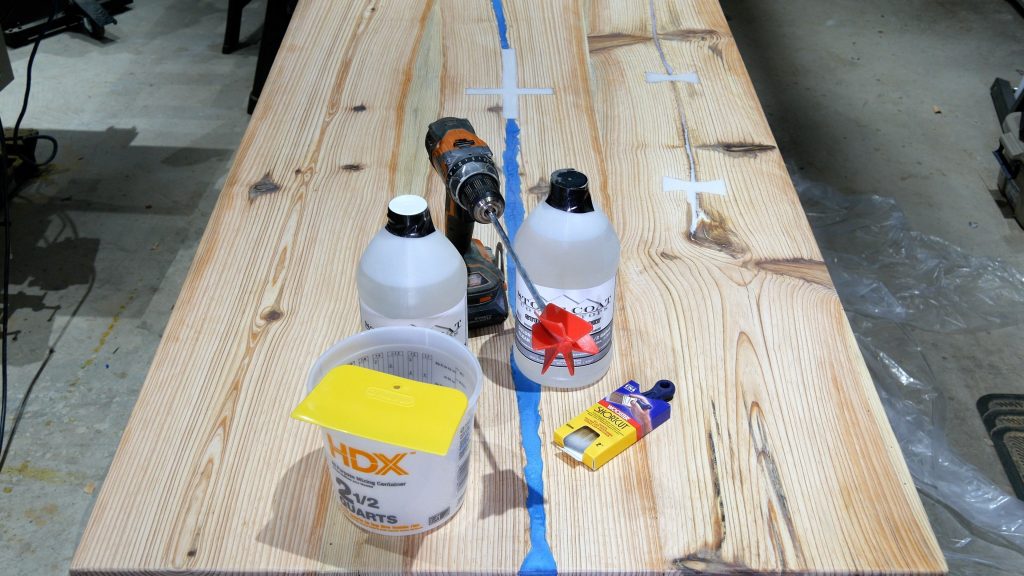
Epoxy Resin Top Coat
First, I used a countertop epoxy for the seal and flood coats made by stonecoat countertop, which I will cover in great detail in later steps.
Stonecoat countertop epoxy is made to coat countertops and make it look like granite or stone. It is heat resistant and very strong.
Even though I prefer other top coats for wood tables, my sister requested an epoxy top coat.
So, I decided to use stonecoat to give it extra protection.
In addition, I wrote a detailed article on the best epoxy wood finishes, so be sure to check this out before deciding on a final top coat.
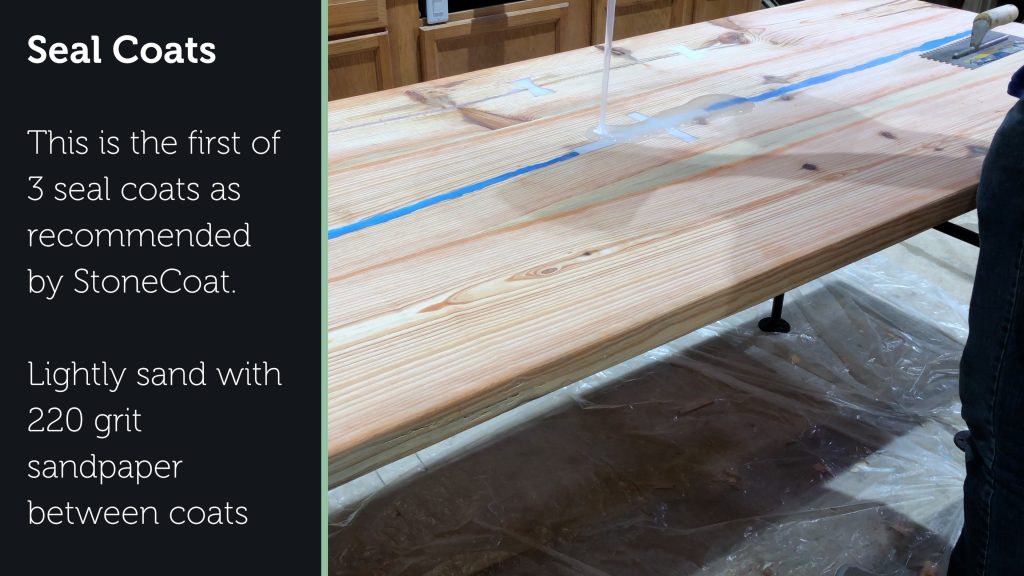
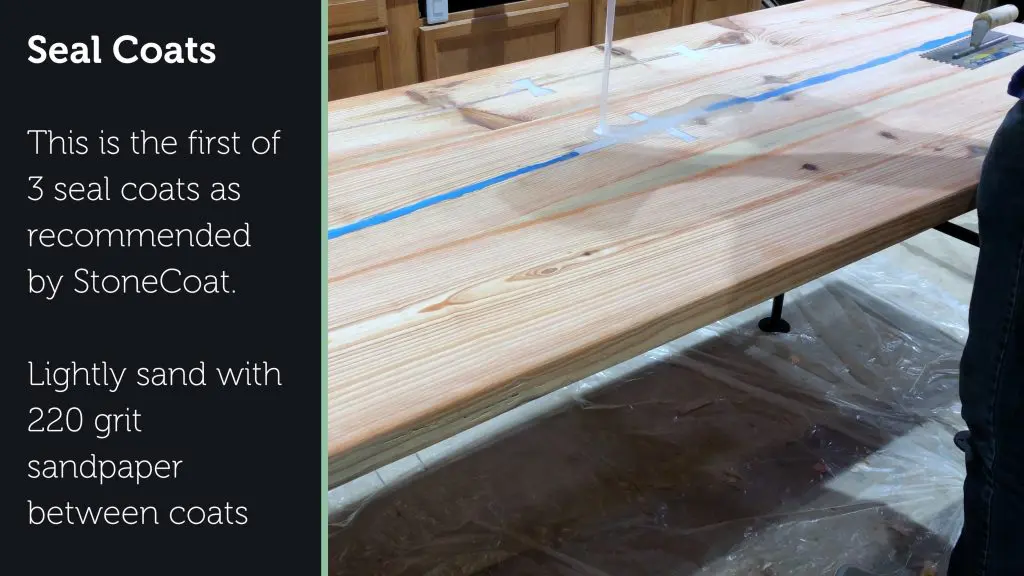
Apply Seal Coats
On raw wood, Stonecoat recommends 3 seal coats and 1 flood coat (possibly 2 flood coats).
This material is not like regular epoxy resin, so please pay attention to the instructions from the manufacturer if you plan to use this product.
I’ll do my best to explain the process below, but be sure to have the instructions handy along with this tutorial.

First Seal Coat
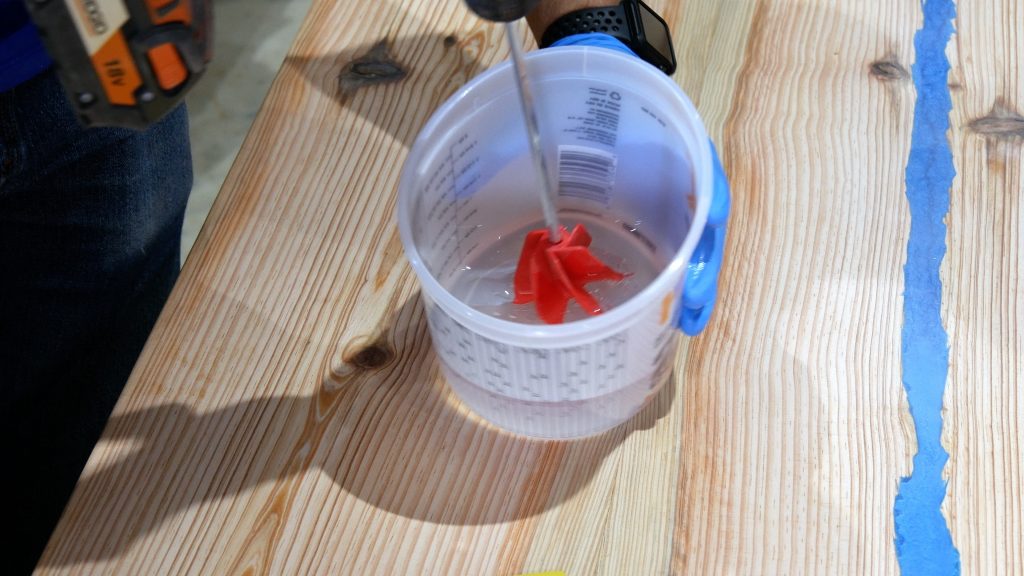
Stonecoat countertop requires a 1:1 mixing ratio.
In other words, 1 part A to 1 part B. I mixed 21 ounces of material for my first seal coat.
First, I made sure to only mix what I needed to avoid excess waste – this stuff ain’t cheap.
Also, this product has 45 minutes of working time, so I had plenty of time to complete this step.
This is another reason I used this product on this table.
Next, I mixed the Stonecoat countertop epoxy with my drill and rubber mixing paddle for 2 minutes as recommended by stonecoat.
Mixing this material with a rubber paddle saves a ton of time.
The bubbles are removed when the material gets dumped out on the table and spread around.

After I mixed the material, I dumped it out on the table surface.
Next, I worked the material around the table with the rubber squeegee.
Note: I used a different rubber squeegee for seal coat 2 and 3 because I needed a handle.
Afterwards, I worked my way to the ends.
In order to cover the sides and ends, I allowed a bead of material seep over the edges as shown in the picture below.


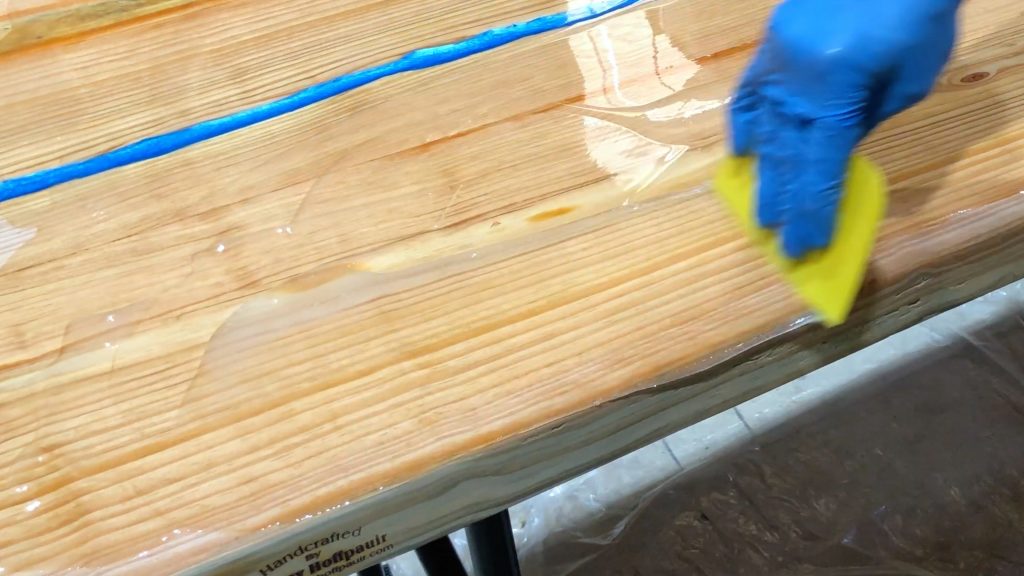


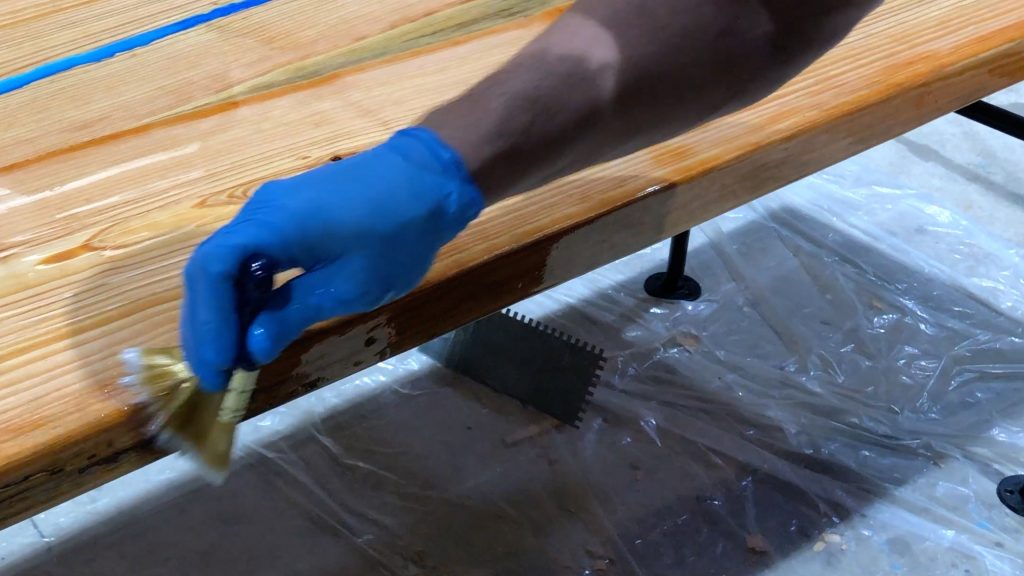
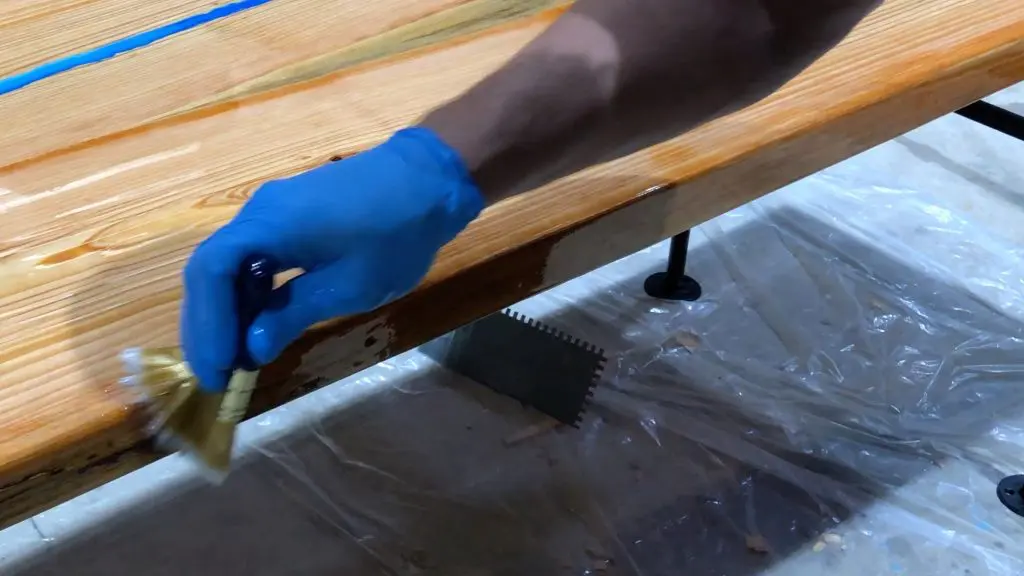
Then, I ran a brush along the side of the table to make sure the table was covered.
I later realized using my hand with a rubber glove worked best for this step.
It also allowed me to save my brushes for the flood coats.
Lastly, I used my large blow torch to remove the bubbles every 2 minutes for 10 minutes.
My smaller mini torch has a smaller flame, so it doesn’t cover as much surface.

Other Seal Coats
After 6 hours, I applied the second seal coat.
Ultimately, I repeated the same process for seal coat #2 and seal coat #3 that I did in the previous step.
First, I used a shower squeegee that I bought off of amazon and this worked much better than the yellow one I used in seal coat #1.


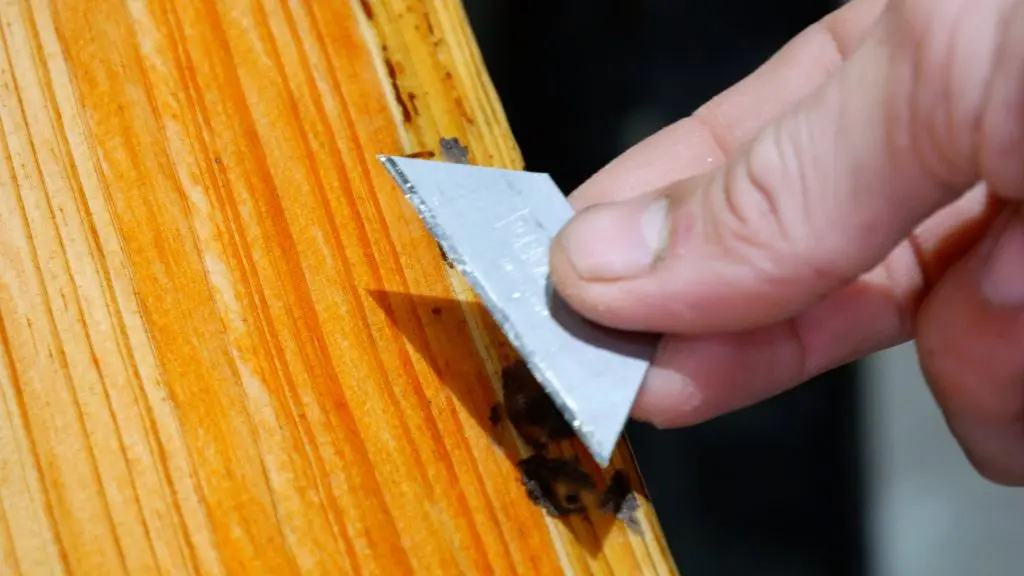
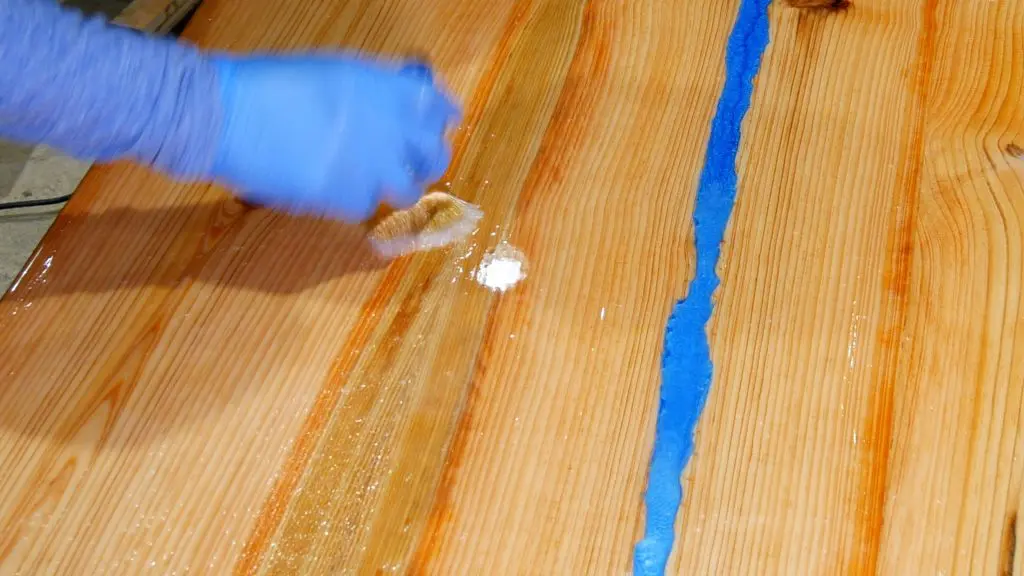
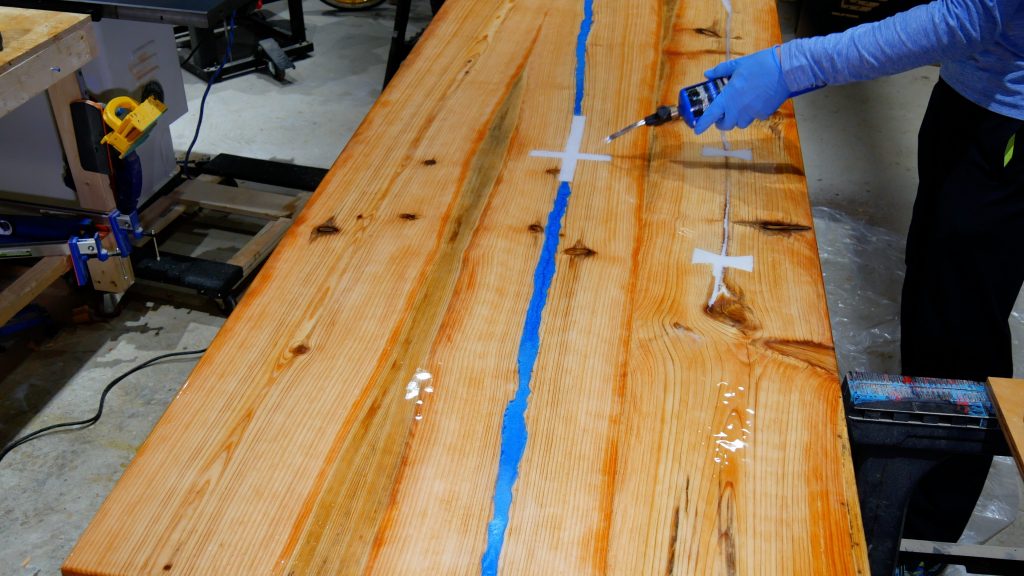
Fill Voids with Burn In Stick
Heart Pine wood is beautiful, but it can be challenging to use with epoxy resin.
However, it often has stubborn pin holes that are very thirsty.
Before I applied the flood coat, I used a burn in stick to seal the stubborn holes.
I used a mini torch to heat the burn-in stick.
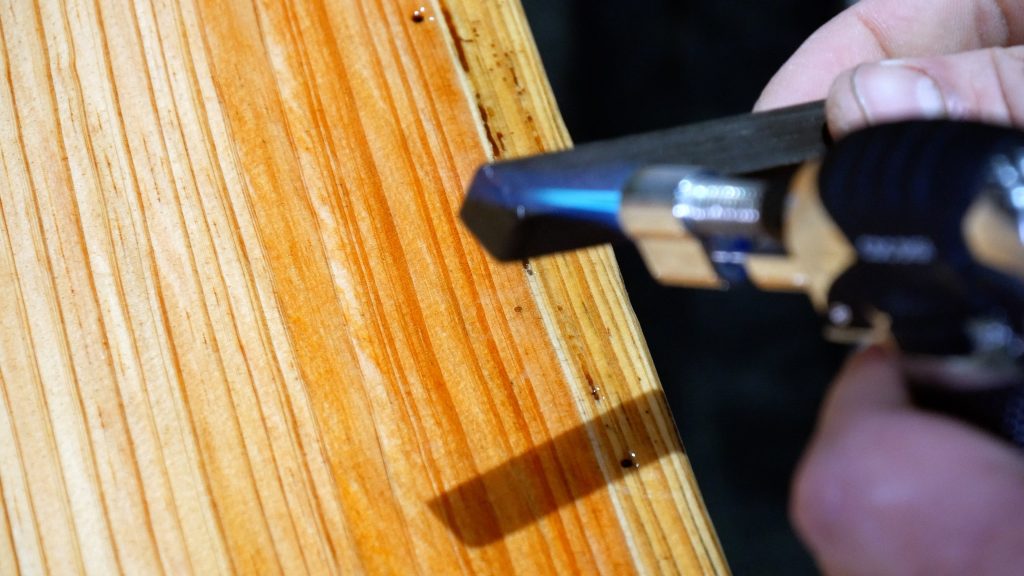

Next, I filled the pin hole while the burn in stick was hot.

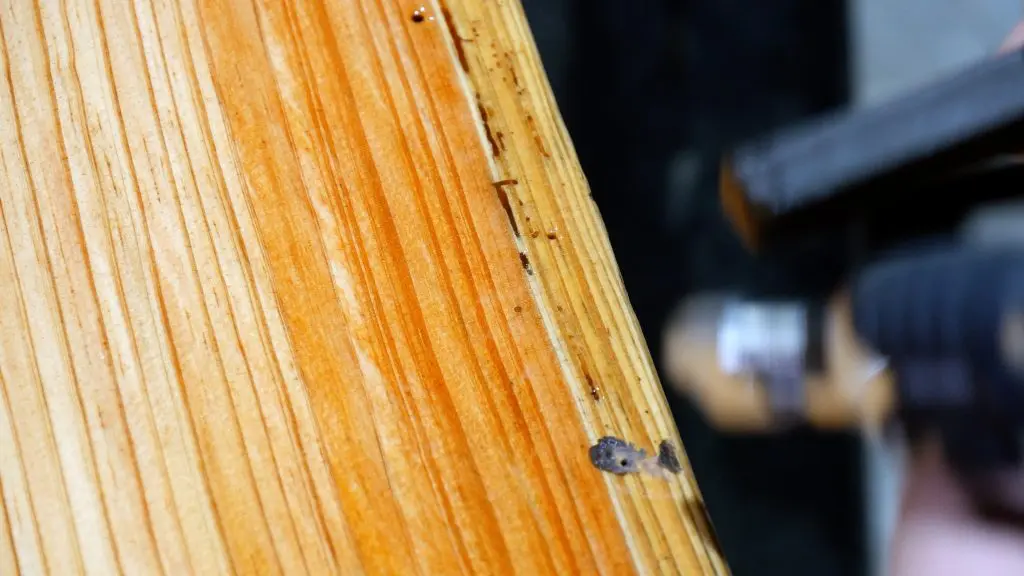
Then, I used a razor blade to remove the excess.
This stuff dries really fast, so I removed the excess about 5 minutes afterwards which is the total time it took me to complete the table.

Lastly, I used 220 grit sandpaper to lightly hand sand the table to remove any high spots.
I cleaned the table with a roll of paper towels after sanding to prepare it for the flood coat.

Quick Tip: Use a rag with acetone to clean the rubber squeegee and any other location you don’t want epoxy to dry on.
Cleaning the tools enables you to use them more than once.
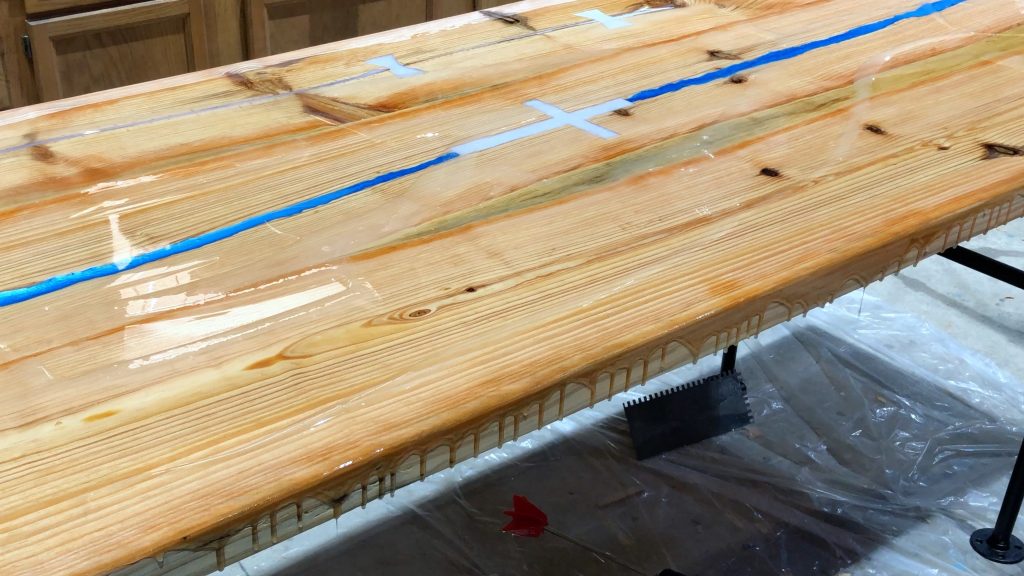
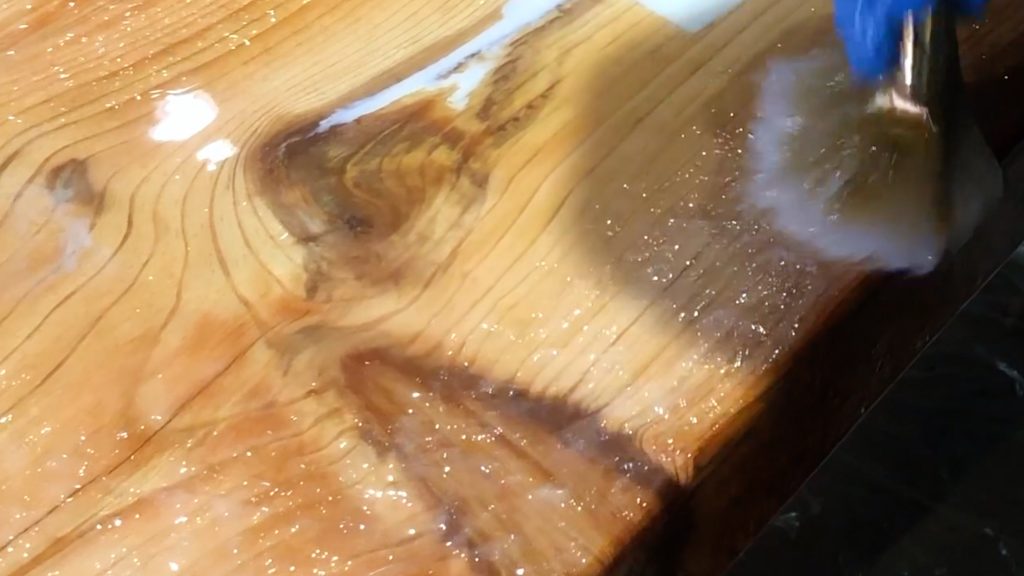
Resin Flood Coat
Now for the most important step of the project.
I tend to get excited and rush through the most important step because I am so excited to see the final product.
However, rushing during this step has ruined a few of my previous projects, so take my advice and work slowly.
First, I applied the flood coat and made sure I followed Stonecoat’s instructions.
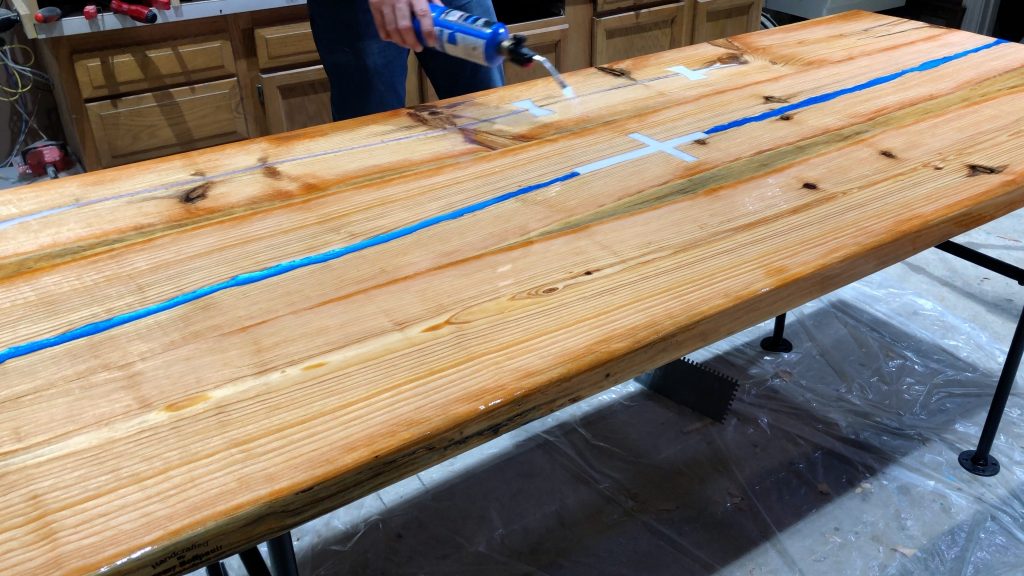
After mixing, I poured the flood coat on the middle of the rustic dining table.
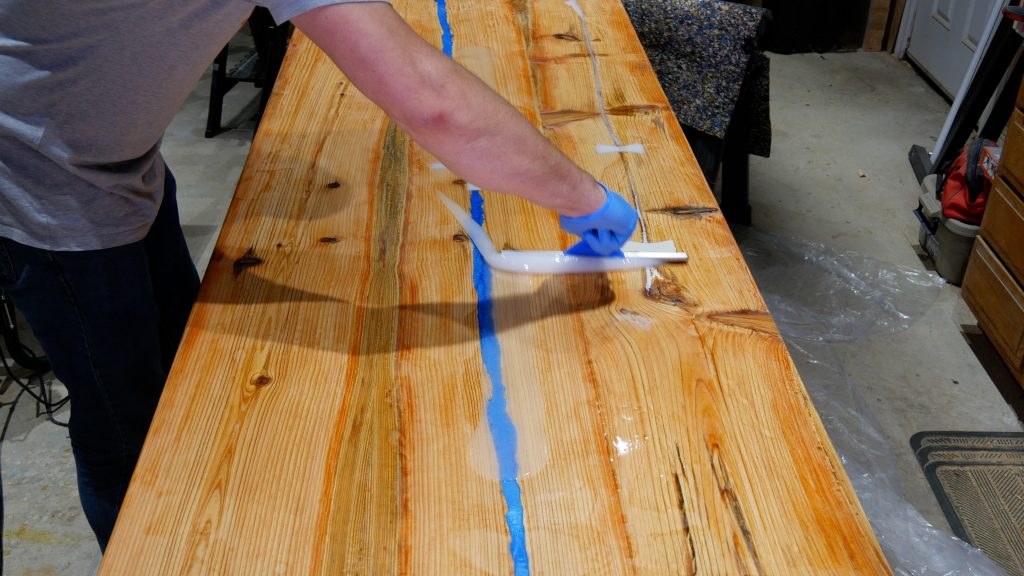
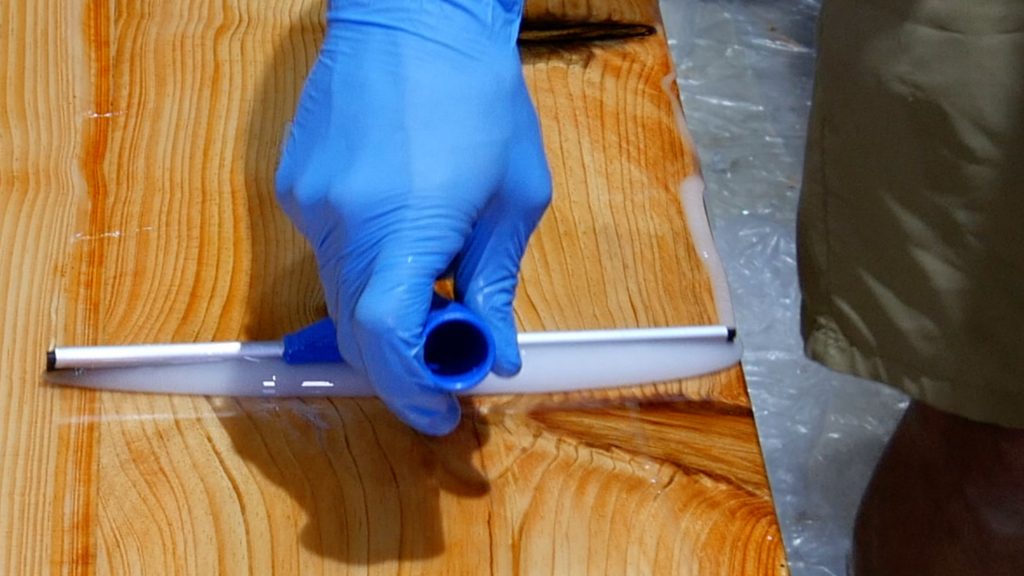
Then, I used a 1/8” trowel to spread the material across the table.
The ⅛” trowel is a fantastic idea because it really helps create a uniform thickness across the table.

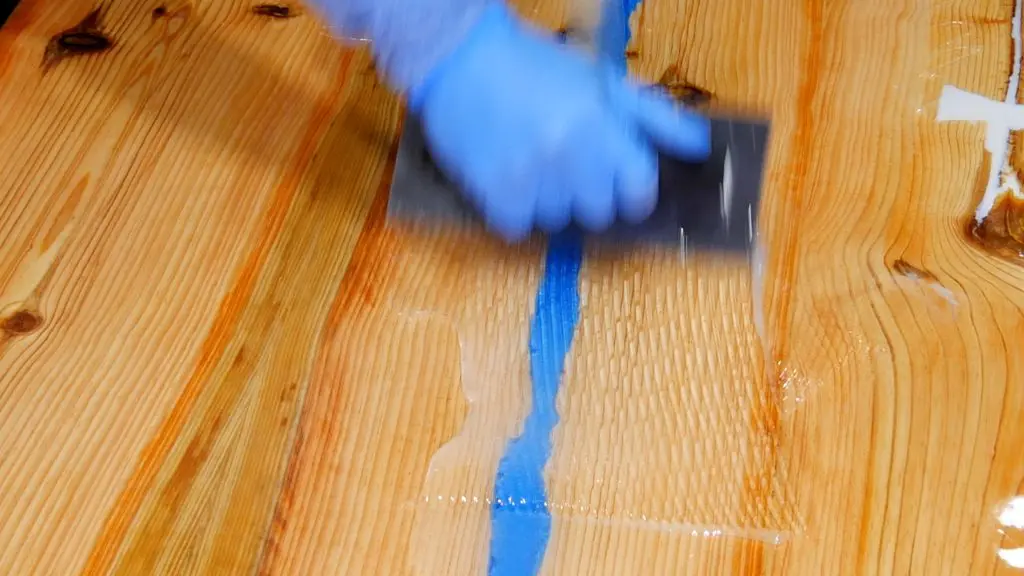
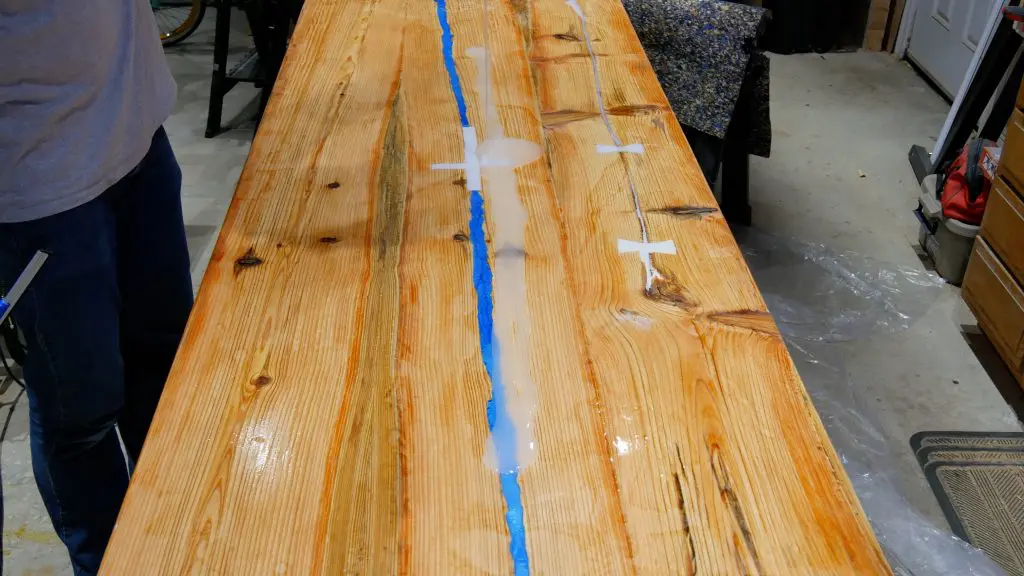
Afterwards, I worked the material across the length of the epoxy resin table in the middle and worked my way to each side.

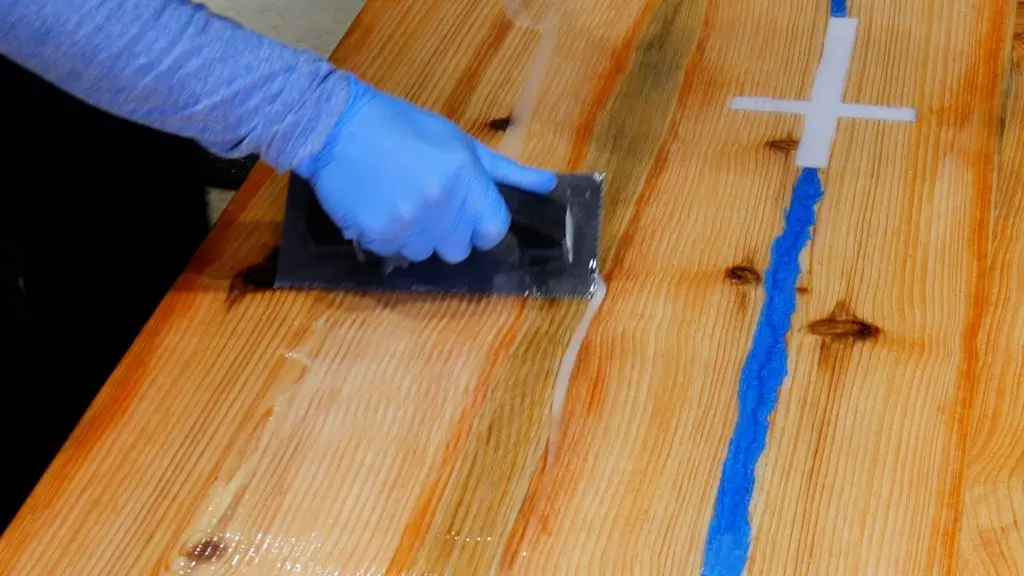
Next, I used a chop brush on the entire reclaimed epoxy river glow in the dark table to pat the material down in order for the epoxy to blend together and remove the trowel marks.
Also, make sure you use a good brush (the one I listed in this article is perfect) for this step and prep it well.
I prep the brush by pulling on the bristles to remove the loose ones.


Then, I used my hand with a rubber glove and ran it across the sides to remove the excess.

Furthermore, I used my blow torch to remove the bubbles.
Keep in mind, the heat from the blow torch also helps the material gel together and flatten out.

Prevent Epoxy Drips
Obviously, it is important to allocate enough time to babysit the flood coat for about an hour or until the epoxy begins to cure on the reclaimed table.
First, use a brush and remove the drips from the side of the epoxy resin table about every 15 minutes as this will save you work later on.
If you don’t have 1 hour to spare, the drips can be easily removed from the bottom of the table after they cure.
Furthermore, simply heat a metal putty knife and scrape them off.
Also, be careful to not allow the hot putty knife to hit the side of the table.
Conclusion
In conclusion, this DIY rustic dining table with resin inlays turned out great.


I hope this article and video tutorial provided you with some value.